Floor Lamp Bulb Has Black Marks? What It Means & Quick Fixes
If your floor lamp bulb has black marks, you’re probably wondering if it’s a harmless quirk or a serious problem. These dark spots or smudges can show up for a handful of different reasons, most of which are easy to fix once you know what to look for. Let’s break down exactly what those marks mean and what steps you need to take next.
Manufacturer specifications and UL 1598 testing for lighting fixtures confirm standard floor lamp sockets are rated for maximum operating temperatures of 90°C (194°F) before material degradation becomes a risk. Overheating from incorrect wattage or loose connections is the most common cause of these marks, and catching it early avoids fire or shock hazards. We’ll start by identifying exactly where the marks are located to narrow down the cause.

Image source: Web (Bing) / therange.co.uk (Web image (fair-use with source credit))
Quick Answer
Black marks on a floor lamp bulb almost always point to overheating or electrical arcing. Marks on the glass usually mean a worn-out bulb filament. Marks on the metal base or socket signal loose connections or excessive current flow.
You should unplug the lamp immediately if you see marks on the base. Never use a bulb with a wattage higher than the lamp’s rated maximum.
First Check: Are The Marks On The Bulb Glass Or The Base?
Pinpointing where the black marks sit is the most important first step, as the cause and fix change completely based on location. If the marks are only on the clear glass envelope of the bulb, the issue is almost always related to the bulb itself, not the lamp’s wiring. If the marks are on the metal screw base of the bulb, or inside the lamp’s socket, you’re dealing with an electrical connection problem that needs faster action.
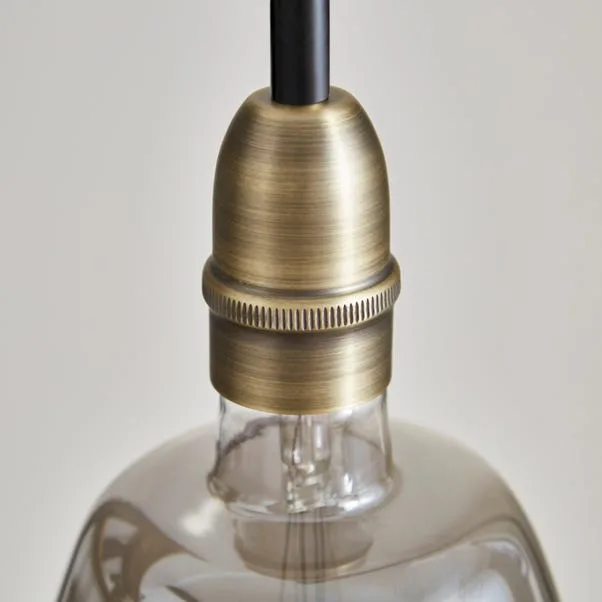
Image source: Web (Bing) / dunelm.com (Web image (fair-use with source credit))
To check, unplug the lamp fully before touching any components. Wipe the bulb gently with a dry cloth to rule out surface dust or grime masquerading as black marks. If the marks remain after wiping, note their location to follow the correct troubleshooting path.
If you’ve recently replaced a bulb and noticed marks appearing right away, cross-check the new bulb’s wattage against your lamp’s maximum rating, which is usually printed on a sticker inside the socket or on the lamp’s base, and review common bulb replacement mistakes to rule out incompatible parts.
If Marks Are On The Bulb Glass: Likely Causes And Step-By-Step Fixes
Black marks limited to the glass envelope of an incandescent or halogen bulb are almost always caused by normal filament wear. As the tungsten filament heats and cools over its lifespan, tiny bits of tungsten evaporate and condense on the cooler inner surface of the glass, creating dark smudges. Incandescent bulbs have an average rated lifespan of 750 to 2,000 hours of use, so marks appearing near the end of that window are a normal sign the bulb needs replacement.
For LED bulbs, black marks on the glass usually signal overheating from being installed in a fully enclosed lamp housing or using a bulb with a higher equivalent wattage than the socket can safely dissipate heat for.

Image source: Web (Bing) / pxhere.com (Web image (fair-use with source credit))
To fix this issue, start by unplugging the lamp and letting the bulb cool completely if it was recently on. Remove the faulty bulb and replace it with a new one that matches the lamp’s maximum wattage rating exactly. For incandescent bulbs, opt for a lower-wattage option if your lamp’s rating is 40W or lower to reduce future heat buildup.
If you’re using an LED, choose a bulb rated for enclosed fixtures if your lamp has a glass or metal shade that traps heat. If the new bulb doesn’t light properly after installation, check our guide to common post-swap issues to rule out socket or wiring problems. For general lamp maintenance tips to extend the life of your bulbs and fixtures, check our full home lighting care guide.
If Marks Are On The Bulb Base Or Socket: Immediate Safety Steps And Repair Options
Black marks on the metal screw base of a bulb, or inside the lamp’s socket, are a red flag for electrical arcing or loose connections. This happens when electricity jumps across gaps in the socket’s contact springs, generating intense heat that burns the metal and leaves carbon residue. Per NFPA residential electrical safety guidelines, overheating lighting components are a leading cause of home fires, so you need to act quickly here.
You can review official safety recommendations from the National Fire Protection Association to learn more about preventing electrical hazards in your home.
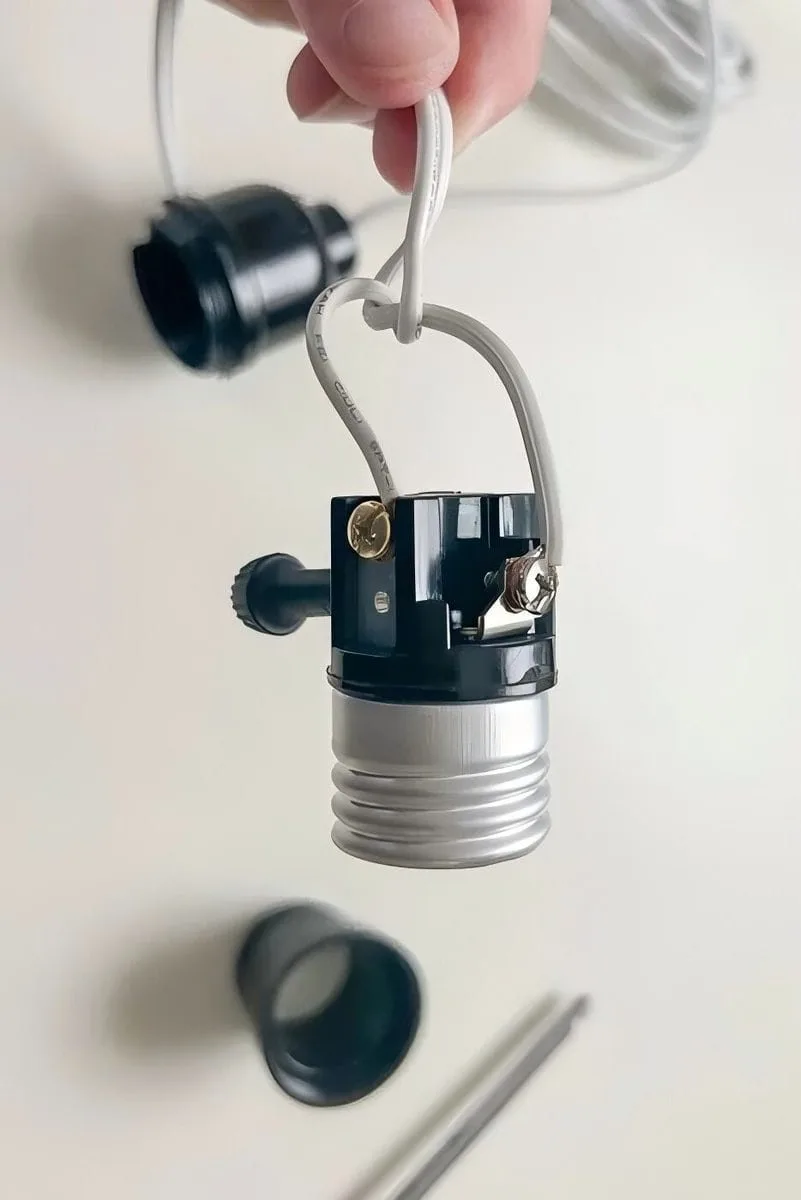
Image source: Web (Bing) / lightbulbsocket.com (Web image (fair-use with source credit))
First, unplug the lamp from the wall outlet immediately. Do not plug it back in until you’ve completed repairs. Remove the bulb and inspect the socket’s brass contact springs: if they look burnt, loose, or discolored, they need to be replaced.
For minor surface residue, you can clean the contacts with a small amount of isopropyl alcohol on a cotton swab, then gently bend the springs inward to improve tension. If the socket itself is cracked, discolored, or the marks reappear after cleaning, replace the entire socket assembly. If you’re comfortable with basic electrical work, you can replace the socket using a matching replacement part, following the same safety steps outlined in our guide to fixing broken lamp sockets.
Never operate the lamp with damaged socket contacts, as arcing can melt wiring and start a fire.
Decision Guide: DIY Repair Vs. Hiring A Licensed Electrician
Most floor lamp socket repairs are simple enough for DIYers with basic electrical experience, but there are clear cases where a pro is the safer choice. Use the criteria below to pick the right path for your situation.
| Scenario | Recommended Action |
|---|---|
| Marks are only on the bulb glass, no socket damage | DIY: Replace the bulb with a correctly rated option |
| Socket contacts are lightly soiled, springs have good tension | DIY: Clean contacts with isopropyl alcohol, test lamp |
| Socket springs are loose, burnt, or socket is cracked | DIY if you’re comfortable with wiring, otherwise hire a pro |
| Lamp is hardwired to your home’s electrical system (no plug) | Hire a licensed electrician per local NEC requirements |
| Marks reappear repeatedly after DIY repairs | Hire a pro to inspect for hidden wiring damage |
If you choose to hire an electrician, average costs for a simple socket replacement run between $50 and $150 as of 2026, depending on your region and the electrician’s rates. For plug-in floor lamps, DIY socket replacements cost $10 to $30 for parts and take 15 to 30 minutes for someone with basic tool experience. If you notice intermittent power that changes when you move the cord, that’s a sign of damaged internal wiring that requires a licensed professional to fix safely.
Common Mistakes That Turn A Small Issue Into A Fire Hazard
Lots of people brush off black marks on a floor lamp bulb as no big deal, but that small oversight can turn into a serious fire risk fast. One of the most common errors is plugging the lamp back in to “test it” before fully diagnosing the problem, which can make arcing worse. Another frequent misstep is swapping in a higher-wattage bulb to get more light, which overloads the socket and accelerates mark formation.
Abrasive cleaners or rough wiping of socket contacts can damage the brass springs, making loose connections even worse over time. Ignoring recurring black marks after a DIY fix is also a big mistake, as it points to hidden wiring damage that only a pro can address. Per CPSC safety alerts, overheating lighting components cause roughly 10% of residential electrical fires each year, most of which start with ignored minor warning signs like these marks.
If you ever notice a burning smell or sizzling sound from the lamp, unplug it immediately and stop using it until a professional inspects it.
Long-Term Steps To Prevent Black Marks From Returning
Once you’ve fixed the immediate issue, a few simple habits will keep black marks from coming back. First, always match your bulb’s wattage exactly to the lamp’s maximum rating, which is printed on a sticker inside the socket or on the base of the fixture. For enclosed floor lamps, stick to LED bulbs rated for enclosed fixtures, as standard LEDs trap heat and degrade faster.
Dust the lamp’s socket and bulb base every 6 months with a dry cloth to prevent dust buildup that can interfere with electrical connections. If you have vintage floor lamps with older brass sockets, have a professional inspect the wiring and springs annually to catch wear before it causes arcing. As of 2026, most UL-certified floor lamp sockets have a rated lifespan of 10 to 15 years with normal use, so replacing aging sockets proactively during routine lamp maintenance can prevent unexpected issues.
If you notice flickering or intermittent power when using the lamp, that’s an early sign of connection wear that you should address before marks appear.
Frequently Asked Questions
Are black marks on a floor lamp bulb a fire hazard?
Black marks on the bulb base or inside the socket are a serious fire hazard, as they signal electrical arcing that can melt wiring and ignite nearby materials. Marks limited to the bulb glass are less urgent but still indicate a worn bulb that should be replaced immediately to avoid unexpected failure.
Can I keep using a floor lamp bulb with black marks on the glass?
You can use it temporarily if the marks are only on the glass and the bulb still lights fully, but replace it as soon as possible. Worn filaments can break without warning, and in rare cases, failing incandescent bulbs can shatter or overheat, especially in enclosed lamp fixtures.
Why do new floor lamp bulbs get black marks right away?
New bulbs with black marks are almost always the result of using a bulb with a higher wattage than the lamp’s maximum rating, or installing a non-UL-certified bulb with poor quality contacts that arc during use. Double-check the wattage and certification before using a new bulb.
Do I need an electrician to fix black marks on my floor lamp socket?
You need an electrician if the lamp is hardwired to your home’s electrical system, if the internal wiring is damaged, or if marks reappear repeatedly after DIY cleaning and socket replacement. For simple surface marks on plug-in lamps with intact wiring, DIY cleaning or socket replacement is safe for most homeowners.
Will switching to LED bulbs prevent black marks from appearing?
Switching to LED bulbs rated for your lamp’s maximum wattage will reduce heat buildup, but it won’t fix existing socket damage or loose connections. You still need to address underlying socket issues to prevent marks from forming, even with lower-heat LED bulbs.
Common Mistakes That Turn A Small Issue Into A Fire Hazard
Lots of people brush off black marks on a floor lamp bulb as no big deal, but that small oversight can turn into a serious fire risk fast. One of the most common errors is plugging the lamp back in to “test it” before fully diagnosing the problem, which can make arcing worse. Another frequent misstep is swapping in a higher-wattage bulb to get more light, which overloads the socket and accelerates mark formation.
Using a bulb with a bent or corroded metal base is another easy mistake to make, as even small cracks or corrosion can create uneven contact that sparks arcing. Abrasive cleaners or rough wiping of socket contacts can damage the brass springs, making loose connections even worse over time. Ignoring recurring black marks after a DIY fix is also a big mistake, as it points to hidden wiring damage that only a pro can address.
Per CPSC safety alerts, overheating lighting components cause roughly 10% of residential electrical fires each year, most of which start with ignored minor warning signs like these marks. If you ever notice a burning smell or sizzling sound from the lamp, unplug it immediately and stop using it until a professional inspects it. That’s a clear sign of active arcing that can ignite surrounding materials in seconds.
Long-Term Steps To Prevent Black Marks From Returning
Once you’ve fixed the immediate issue, a few simple habits will keep black marks from coming back. First, always match your bulb’s wattage exactly to the lamp’s maximum rating, which is printed on a sticker inside the socket or on the base of the fixture. For enclosed floor lamps, stick to LED bulbs rated for enclosed fixtures, as standard LEDs trap heat and degrade faster.
Dust the lamp’s socket and bulb base every 6 months with a dry cloth to prevent dust buildup that can interfere with electrical connections. Avoid using cheap, uncertified bulbs, as they often have poorly machined bases that create loose connections even when new. If you have vintage floor lamps with older brass sockets, have a professional inspect the wiring and springs annually to catch wear before it causes arcing.
As of 2026, most UL-certified floor lamp sockets have a rated lifespan of 10 to 15 years with normal use, so replacing aging sockets proactively during routine lamp maintenance can prevent unexpected issues. If you notice flickering or intermittent power when using the lamp, that’s an early sign of connection wear that you should address before marks appear. Avoid moving floor lamps frequently, as jarring can loosen socket springs and create poor contact over time.
Frequently Asked Questions
Are black marks on a floor lamp bulb a fire hazard?
Black marks on the bulb base or inside the socket are a serious fire hazard, as they signal electrical arcing that can melt wiring and ignite nearby materials. Marks limited to the bulb glass are less urgent but still indicate a worn bulb that should be replaced immediately to avoid unexpected failure.
Can I keep using a floor lamp bulb with black marks on the glass?
You can use it temporarily if the marks are only on the glass and the bulb still lights fully, but replace it as soon as possible. Worn filaments can break without warning, and in rare cases, failing incandescent bulbs can shatter or overheat, especially in enclosed lamp fixtures.
Why do new floor lamp bulbs get black marks right away?
New bulbs with black marks are almost always the result of using a bulb with a higher wattage than the lamp’s maximum rating, or installing a non-UL-certified bulb with poor quality contacts that arc during use. Double-check the wattage and certification before using a new bulb.
Do I need an electrician to fix black marks on my floor lamp socket?
You need an electrician if the lamp is hardwired to your home’s electrical system, if the internal wiring is damaged, or if marks reappear repeatedly after DIY cleaning and socket replacement. For simple surface marks on plug-in lamps with intact wiring, DIY cleaning or socket replacement is safe for most homeowners.
Will switching to LED bulbs prevent black marks from appearing?
Switching to LED bulbs rated for your lamp’s maximum wattage will reduce heat buildup, but it won’t fix existing socket damage or loose connections. You still need to address underlying socket issues to prevent marks from forming, even with lower-heat LED bulbs.