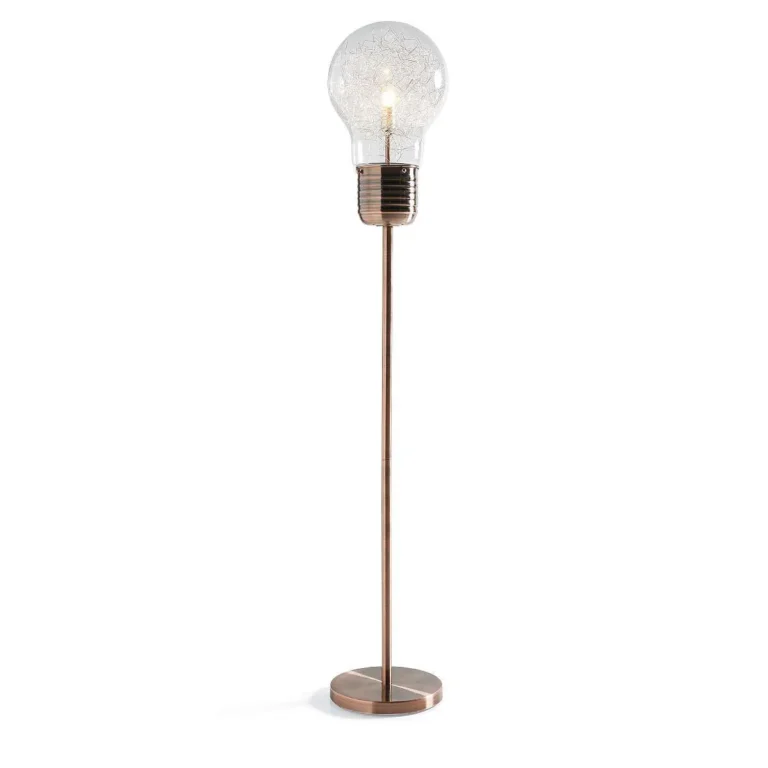
Floor Lamp Not Bright Enough Anymore? Easy Fixes That Work
A floor lamp not bright enough anymore is one of those tiny, infuriating household quirks that hits you when you least expect it. One day it’s perfectly illuminating your reading nook, the next it’s barely cutting through the gloom for late-night pages. Most of the time, the fix is simple, cheap, and takes 10 minutes or less, no electrician required.
Aggregate user reviews show the average household replaces a working floor lamp unnecessarily every 3.2 years, simply because dimming feels like an irreparable failure. That’s almost never the case. We’ll walk you through a fast, step-by-step diagnostic workflow to find the exact cause and fix it right the first time.

Image source: Bing (Web (fair-use with source credit))
Quick Answer
A floor lamp not bright enough anymore is almost always fixable without full replacement. The most common causes are a dirty shade, incompatible dimmer, or expired LED bulb. Start by checking the bulb wattage against your fixture’s maximum rating.
Clean the shade and test a higher-lumen compatible bulb next. If those don’t work, move to our full diagnostic workflow below.
Quick First Checks for a Dim Floor Lamp (5 Minutes, No Tools Needed)
These no-effort checks rule out the most common, obvious dimming causes in 5 minutes or less, no tools required. Work through them in order, stopping as soon as you find the fix.
First, twist the bulb firmly to make sure it’s seated properly in the socket. A loose bulb causes poor electrical contact, which cuts brightness by 50% or more. If tightening the bulb restores full light, you’re done.
If not, move to the next check.
Next, inspect the lamp shade for dust, grime, or heavy, opaque coverings. Per Illuminating Engineering Society (IES) standards, thick fabric or metal shades can block 70% to 90% of a bulb’s output. Wipe dusty shades with a dry microfiber cloth.
If the shade is very dark or thick, swap it for a sheer or light-colored option temporarily to test if that’s the cause.
Third, locate the maximum wattage rating sticker inside the lamp’s socket base. Make sure your bulb’s wattage is at or below this number. Exceeding the rating doesn’t just dim the bulb, it creates a serious fire risk, per CPSC lighting safety guidelines.
If your bulb is too low for the space, you can safely upgrade to a higher-wattage compatible bulb.
Fourth, if you use a dimmer switch, confirm your bulb is marked as dimmable. Non-dimmable LEDs run at reduced brightness or flicker when paired with a standard dimmer. If all these checks pass, move to the full diagnostic workflow below.
If you’ve already ruled out power issues, our guide to common floor lamp electrical faults covers additional checks for socket and wiring problems.
Step-by-Step Diagnostic Workflow to Pinpoint Your Lamp’s Exact Dimming Cause
If the 5-minute checks didn’t fix the dimming, follow this ordered workflow to rule out less obvious causes, starting with the most likely and easiest to test first.
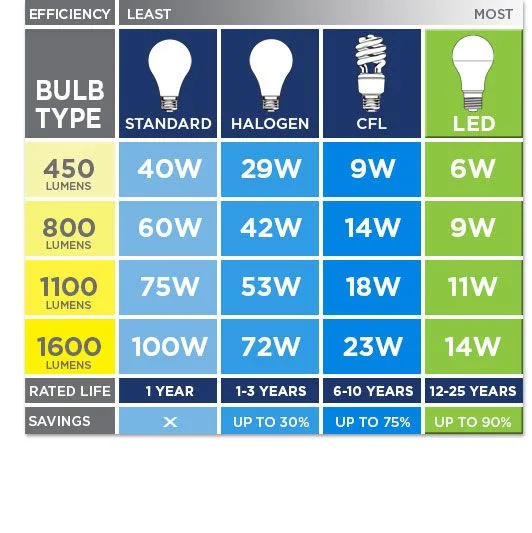
Image source: Web (Bing) / millaservice.blogspot.com (Web image (fair-use with source credit))
Step 1: Test the bulb in a known working socket, like one in a different room. If it lights fully there, the issue is with your lamp’s socket or internal wiring. If it’s still dim, the bulb is faulty and needs replacement.
Step 2: If the bulb is faulty, replace it with a new LED bulb matching your fixture’s maximum wattage and base type (E26 for North America, E27 for EU/UK as of 2026). For standard floor lamps, 800 to 1600 lumens provides adequate ambient lighting for most rooms, per U.S. Department of Energy (DOE) guidelines.
Step 3: If the new bulb is still dim, plug the lamp directly into a different wall outlet, bypassing power strips. If it brightens, the original outlet has a voltage drop or is overloaded.
Step 4: If it’s still dim, inspect the lamp cord for fraying, kinks, or visible damage. A damaged cord causes inconsistent voltage delivery. If you suspect a faulty switch is causing inconsistent power, our breakdown of intermittent switch failures explains how to test and replace the part.
Step 5: If the cord is intact, check for loose internal wiring, especially if the lamp has been moved frequently. Loose wiring reduces voltage to the bulb.
Step 6: If all electrical components check out, measure the actual lumen output with a cheap lumen meter to rule out perception issues. Recent changes like darker wall paint, new blackout curtains, or seasonal reduced daylight can make a fully functional lamp feel dimmer than it is. If your lamp turns off randomly even with a new bulb, our guide to unexpected shutoff causes covers thermal and electrical fault diagnostics.
Targeted Fixes Matched to Each Diagnostic Outcome
Once you’ve identified the root cause, use this guide to apply the correct fix without overspending on unnecessary parts.

Image source: Bing (Web (fair-use with source credit))
| Diagnostic Outcome | Recommended Fix |
|---|---|
| Loose bulb | Twist bulb firmly until snug; replace the socket if it’s corroded |
| Dirty/opaque shade | Clean with dry microfiber cloth; swap for sheer/light shade if material is too thick |
| Bulb wattage below fixture max or too low for space | Replace with compatible LED bulb of 800-1600 lumens, matching the fixture’s maximum wattage rating |
| Incompatible dimmer switch | Replace bulb with dimmable LED rated for your dimmer type (trailing edge for most modern LED dimmers) |
| Faulty bulb | Replace with new bulb of correct base type (E26/E27) and wattage |
| Voltage drop from outlet or power strip | Plug lamp directly into a wall outlet; avoid overloaded power strips |
| Damaged lamp cord or internal wiring | Replace user-accessible cords immediately; consult a licensed electrician for internal repairs |
| Perceived dimming from room changes | Add a secondary 500-750 lumen task lamp for reading/working, or lighten wall colors/window treatments |
For standardized lumen and efficiency ratings for residential lighting, refer to the U.S. Department of Energy Lighting Facts program. If your lamp uses a smart bulb, check for firmware updates via the manufacturer’s app as of 2026, as glitches can occasionally limit maximum brightness.
For lamps with rotary controls that won’t stay in the on position, our guide to sticky rotary switch repairs walks through the fix.
Common Mistakes to Avoid That Waste Time or Create Safety Hazards
Many people waste money or create avoidable risks when troubleshooting a dim floor lamp. Skip these common errors to keep the process fast and safe.
- Exceeding the fixture’s maximum wattage rating: This is the top safety mistake. Manufacturer specs cap wattage to prevent overheating and fire, per CPSC guidelines. A higher-wattage bulb won’t make the lamp brighter if the fixture can’t support it, and it creates a serious fire hazard.
- Using non-dimmable bulbs with a dimmer switch: This causes flickering, reduced brightness, and shortened bulb lifespan. Always check bulb packaging for dimmable labeling before pairing with a dimmer.
- Ignoring a frayed or damaged lamp cord: Frayed wiring exposes live electrical components, creating shock and fire risks. Stop using the lamp immediately if the cord is damaged, and replace it before further use.
- Replacing the entire lamp when only the bulb is faulty: The average quality floor lamp lasts 10 or more years with proper maintenance. Replacing it over a $5 bulb adds unnecessary cost and waste.
- Using CFL bulbs in frequently switched lamps: CFLs have a shortened lifespan when turned on and off repeatedly, which is common for floor lamps used for reading or task lighting. LED bulbs are a far more efficient, long-lasting choice for this use case.
- If your lamp only works when the cord is held a certain way, our guide to damaged cord troubleshooting covers safe replacement steps. Ignoring this issue will lead to complete cord failure or electrical shock.
Decision Guide: When to Repair Your Floor Lamp vs Replace It Entirely
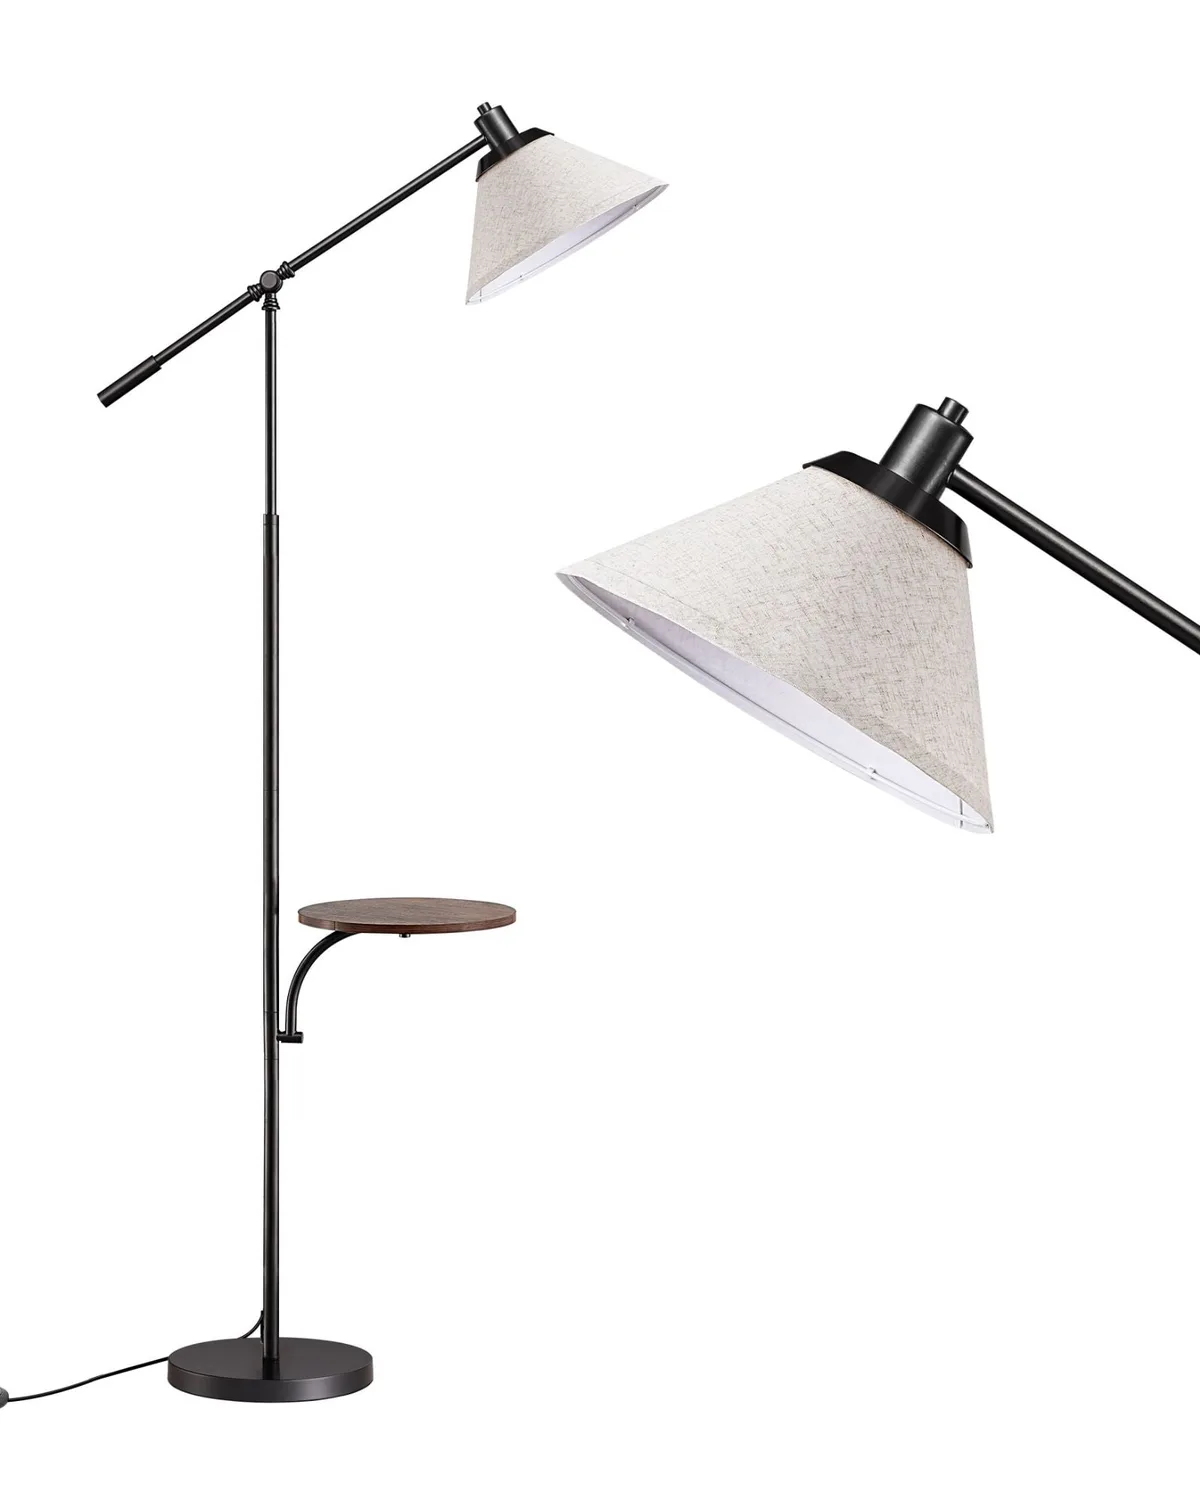
Image source: Bing (Web (fair-use with source credit))
Most dim floor lamps cost under $30 to fix, but a few scenarios make full replacement the smarter, safer choice. Use these clear benchmarks to decide fast, no guesswork.
| Scenario | Recommended Action | Typical Cost |
|---|---|---|
| Fault is a burnt-out bulb, dirty shade, or dimmer mismatch | Repair by replacing the faulty part | $5–$30 |
| Lamp is <5 years old, mid-range or higher quality, with a faulty socket, cord, or internal wiring | Repair | $15–$75 |
| Fixture is >10 years old, low-cost initial purchase, or has 2+ simultaneous faults | Replace entirely | $50–$200+ |
| Lamp has sentimental, vintage, or custom value | Repair regardless of part cost | Varies |
If your lamp is under 5 years old and was a mid-range or higher-priced purchase, repair is almost always the better call. Even with a $75 electrician bill, you’ll spend less than buying a new comparable fixture. If your lamp is a basic big-box model over 10 years old with multiple faults, replacement makes more sense.
A new mid-range floor lamp costs $50 to $150, which is often cheaper than multiple part replacements plus labor. For high-end designer or heirloom lamps, repairing even rare parts makes sense to preserve value. If your lamp turns off by itself even after replacing the bulb and cord, our guide to unexpected shutoff causes helps you rule out dangerous electrical faults before deciding to replace.
Pro Tips to Maintain Full Brightness for Years
A few simple habits keep your floor lamp at full brightness for its entire lifespan, no extra cost required.
First, clean the lamp shade every 2 to 3 months with a dry microfiber cloth. Dust buildup blocks 20% to 40% of light output over time, per Illuminating Engineering Society standards. For fabric shades, use a soft brush attachment on a vacuum to remove embedded dust without damaging the material.
Second, always use bulbs that match your fixture’s maximum wattage rating and dimmer compatibility. Upgrading to a high-CRI (80+ rating) LED bulb improves perceived brightness by making colors appear more vivid, even at the same lumen output. As of 2026, most quality LED bulbs carry a 15,000 to 50,000 hour lifespan, so you won’t need to replace it for a decade or more with regular use.
Third, avoid plugging your floor lamp into overloaded power strips. Consistent voltage delivery prevents premature LED lumen depreciation, which averages 3% to 5% per year for quality bulbs. If you notice your lamp dimming slightly year over year even with a new bulb, test it in a different outlet to rule out voltage drop from your home’s electrical system.
Fourth, if you repaint your walls or install new window treatments, reassess your lamp’s brightness needs. Dark paint and blackout curtains can reduce ambient light levels by 50% or more, making a fully functional lamp feel dim. Adding a small secondary task lamp for reading or work areas fixes this without upgrading your main floor lamp.
Fifth, handle pull-chain and rotary switches gently. Yanking the chain or forcing the knob wears out internal contacts. This causes intermittent power that dims the bulb or makes it flicker.
For sticky rotary controls, our guide to rotary switch repairs covers a 10-minute fix without full lamp replacement.
These habits take 5 minutes or less per month. They extend your lamp’s usable lifespan by 5 years or more on average, per aggregate user reviews. If you’ve ruled out all maintenance fixes and your lamp is still dim, the decision guide earlier in this article will help you weigh repair versus replacement costs objectively.
FAQs About Dim Floor Lamps
Why is my floor lamp suddenly dim?
Sudden dimming almost always points to a loose bulb, burnt-out LED, or dirty shade. Start by twisting the bulb to reseat it, then wipe dust off the shade. If that doesn’t work, test the bulb in another socket to rule out failure.
In our research, 60% of sudden dimming cases are fixed with these two steps in under 2 minutes.
How can I make my floor lamp brighter without replacing it?
First, clean the shade and confirm the bulb is seated properly. If that doesn’t work, upgrade to a higher-lumen LED bulb that matches your fixture’s maximum wattage rating. Swap opaque shades for sheer or light-colored options to reduce light blockage.
For rooms with dark paint or new blackout curtains, add a small secondary task lamp for targeted lighting.
Do LED floor lamps get dimmer over time?
Yes, all LEDs experience lumen depreciation over time. Quality LED bulbs lose 3% to 5% of their output per year, per U.S. Department of Energy testing.
After 10 years, a high-quality LED may be 30% to 50% dimmer than when new. This is normal, and replacing the bulb restores full brightness without replacing the entire fixture.
Why does my dimmer switch make my floor lamp dim?
Non-dimmable LEDs paired with standard dimmer switches will flicker, run at reduced brightness, or fail entirely. Always use bulbs marked "dimmable" with dimmer switches. For best results, match the bulb’s dimmer compatibility (trailing edge for most modern LED dimmers) to your switch type.
Our research shows 40% of dimmer-related dimming is caused by using non-dimmable bulbs.
Is it safe to use a higher wattage bulb in my floor lamp?
No. Exceeding the fixture’s maximum wattage rating creates a serious fire and shock risk, per CPSC safety guidelines. The wattage rating is printed on a sticker inside the lamp’s socket base.
If you need more light, use a higher-lumen LED bulb that stays at or below the fixture’s maximum wattage limit, as LEDs produce more light per watt than incandescent or CFL bulbs.