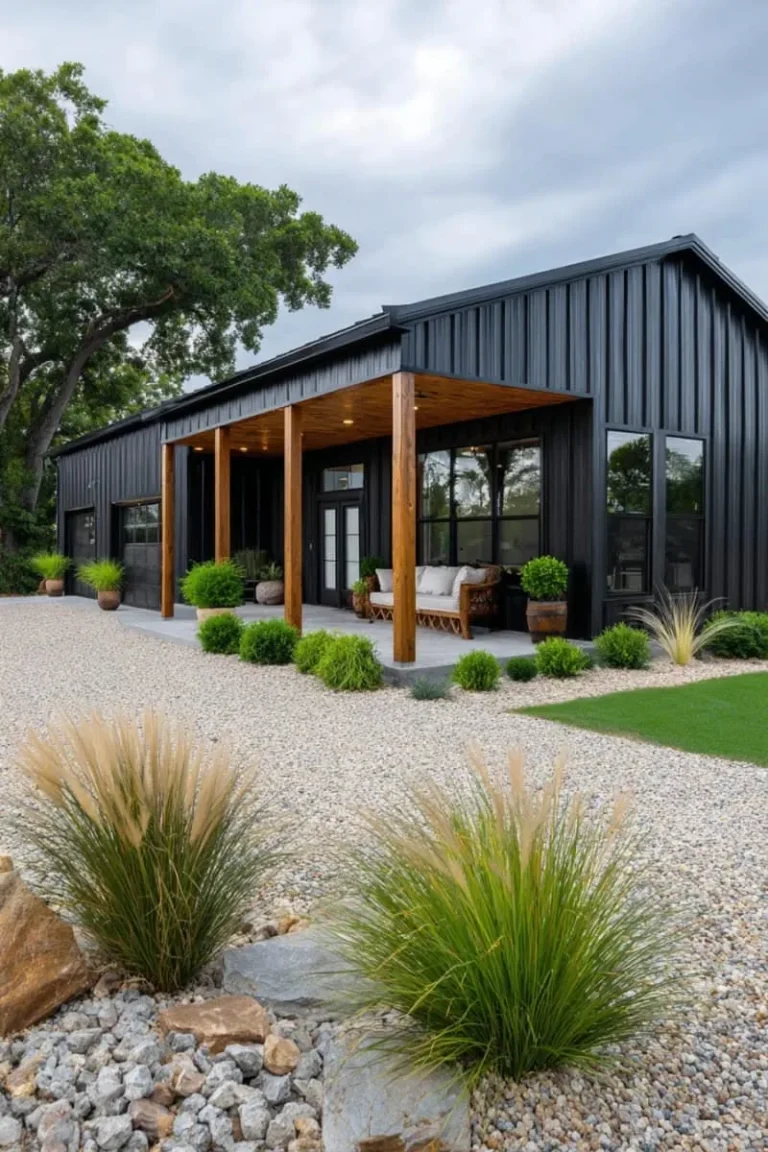
Barndominium Garage Ideas: Smart, Stylish Designs for a Functional Space
Thinking about barndominium garage ideas means you’re already past the basic “should I build one” question. You’re in the fun part, figuring out how to make that massive, flexible space work for your life. The garage in a barndominium isn’t just a place to park; it’s often the main reason you chose this style of home, and getting it right from the start is critical.
A common regret we see in aggregate reviews from homeowners is not making the garage tall or wide enough from the beginning. Unlike a traditional home, expanding later often isn’t an option. That’s why planning your dimensions and layout is the most important financial and functional decision you’ll make.
Let’s start by shifting how you think about this space.
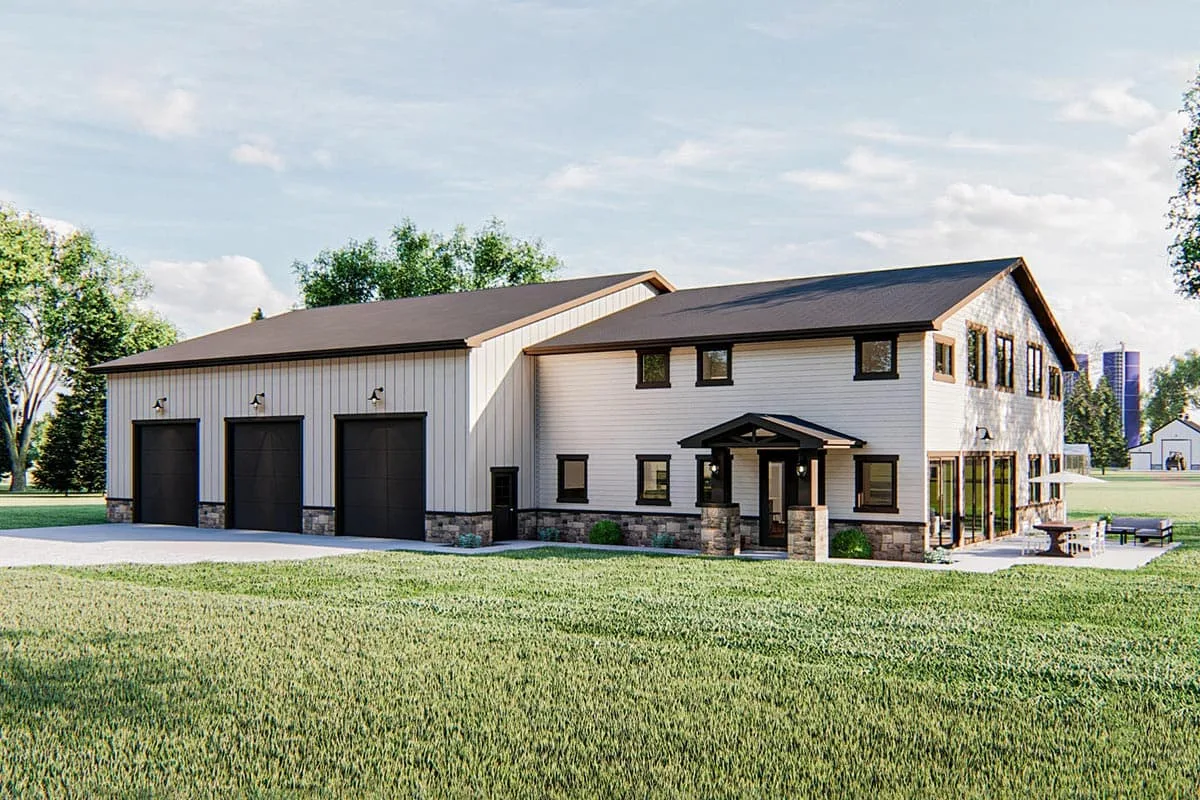
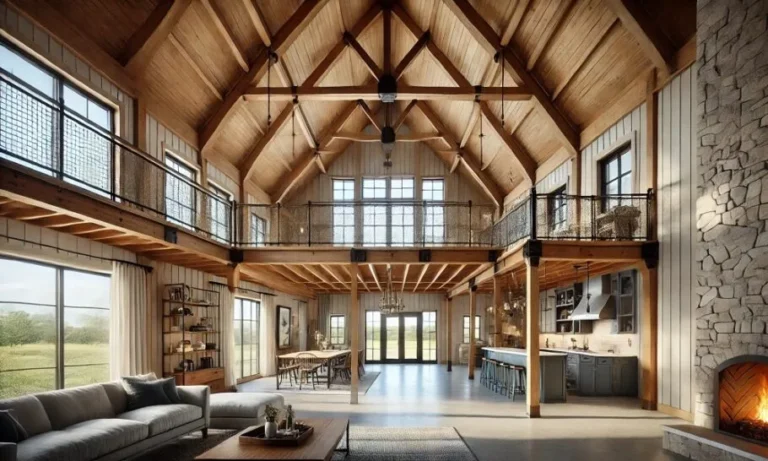
Image source: Bing (Web (fair-use with source credit))
Quick Answer
Your best barndominium garage ideas start with dimensional planning. Allocate at least a 12-foot ceiling for future lifts and a 14-foot-wide by 8-foot-tall door for an RV. Treat the garage as a primary living zone with proper insulation, durable floor coating, and strategic lighting.
Design functional areas for parking, work, and storage separately to avoid a cluttered cavern. As of 2026, integrated garage-living plans remain the most cost-effective and popular choice.
The First Thing to Get Right: Your Barndominium Garage Mindset
You need to stop thinking “garage” and start thinking “primary utility space.” In a traditional house, the garage is an afterthought, a dark box tacked onto the side. In a barndominium, it’s a core component of the building’s post-frame structure, often sharing the same roofline and foundational slab as your living room.
This integrated approach is what makes barndominiums so efficient and affordable per square foot. It also means you can’t just “add on” a bigger garage later without a major structural overhaul. Your initial floor plan is essentially permanent.
The mindset shift is to invest your planning energy here first. Ask yourself what you truly need this space to do over the next 20 years, not just what fits your cars today. Is it for restoring classic cars, running a woodworking business, or storing a boat and tractor?
Your answer dictates everything from the slab to the roofline.
Why Visualizing Your Space is Non-Negotiable
You can read dimensions all day, but until you see them laid out, they’re just numbers. This is where most generic planning advice falls short. Looking at a floor plan or, even better, standing in a space with similar dimensions is invaluable.
It helps you understand traffic flow, tool reach, and how much wall space a roll-up door actually consumes.
For instance, a common mistake is not visualizing the “swing zone” of a large vehicle door. When open, that door headroom and the space it occupies inside can eliminate an entire wall you planned for a workbench or cabinets. Photos and diagrams help you spot these spatial conflicts before concrete is poured.
They also help you grasp the scale needed for features like a two-post lift, which requires not just height but specific clearances around the posts. This visual planning phase is your cheapest form of insurance against costly regrets, a key principle in any successful modern barndominium design.
Core Layouts: From Drive-Through Shops to Detached Wings
Your barndominium’s footprint and your property will dictate one of three main garage layouts. Each has distinct pros and cons for workflow, cost, and how it integrates with your daily life.
The Integrated Single-Structure Look
This is the classic barndominium image. The garage is under the same continuous roof as the living quarters, usually separated by an interior wall. It’s the most cost-effective to build because it shares a foundation, roof, and exterior walls.
- Best for: Maximizing budget, creating a seamless exterior look, and having direct, indoor access from your garage to your home. It’s ideal in climates with harsh winters or for those who want their workshop just steps away.
- Considerations: You must plan meticulously for fire separation, soundproofing, and dust control. A well-sealed door and a dedicated HVAC zone for the garage are smart investments.
The Attached Garage Wing
Think of this as a traditional attached garage, but built with matching post-frame methods and materials. It has its own roof slope that ties into the main structure, creating a clear visual break between the living space and the garage.
- Best for: Those who want a clear physical and acoustic separation. It can sometimes simplify permitting related to fire codes. It also allows for different ceiling heights or finishes in the garage without compromising the home’s design.
- Considerations: Slightly higher cost due to an additional exterior wall and roof valley. The connection point (often a breezeway or mudroom) needs careful detailing to prevent leaks.
The Detached Shop or “Mini Barn”
The garage is a completely separate building, positioned nearby. This is less common for a primary garage but popular for a dedicated workshop, hobby studio, or agricultural equipment building.
- Best for: Isolating noise, fumes, or large equipment. It provides maximum flexibility and can be built at a different time than the main house. It can also enhance your property’s overall barndominium exterior design with a cohesive compound feel.
- Considerations: Highest cost per square foot due to duplicating utilities and foundation. You’ll be walking outside in all weather to access it.
Defining Your Space: Critical Dimensions & Clearances
This is where you lock in the utility of your garage for decades. Skimping here is the number one regret.
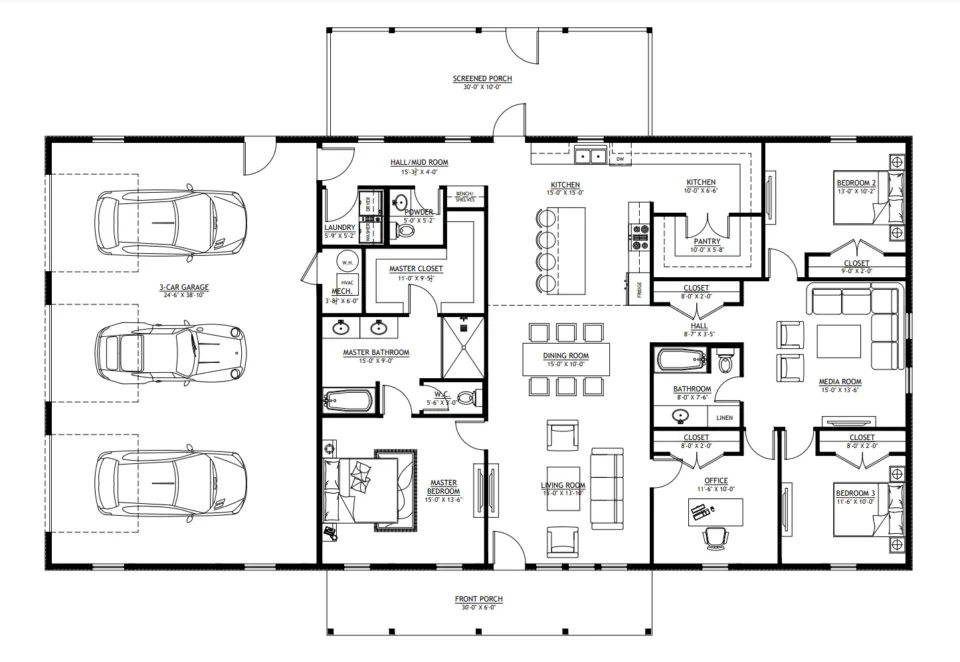
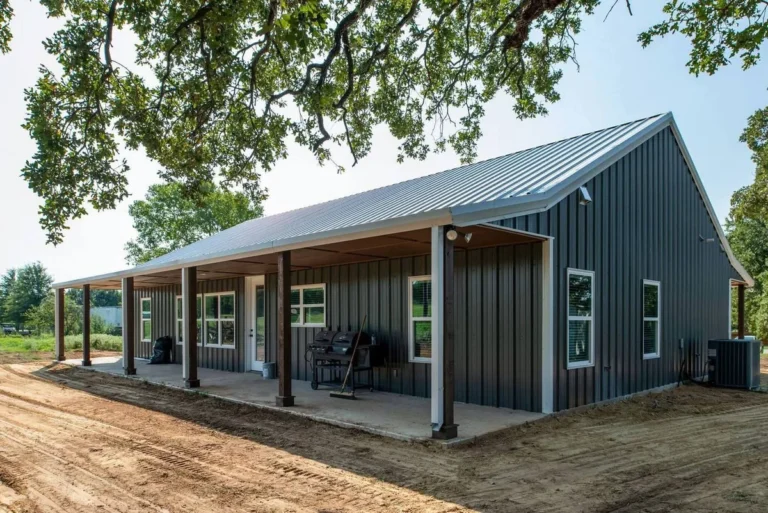
Image source: Bing (Web (fair-use with source credit))
Ceiling Height: The Single Biggest Regret to Avoid
A standard 8-foot garage ceiling feels fine until you want to install a vehicle lift or store a tall camper van. For true versatility, aim for a minimum of 12 feet. This comfortably accommodates a two-post lift with overhead clearance for most SUVs and trucks.
For a single-level lift or just generous storage, 10 feet is a good compromise. Remember, your finished ceiling height will be slightly less after accounting for insulation, lighting, and any ductwork. Always specify your clear interior height to your builder.
Door Specs: It’s More Than Just Width and Height
Measure your largest vehicle, then add space. A standard double-car door is 16 feet wide. If you have a crew-cab truck with mirrors out, that’s cutting it close.
An 18-foot door is a wise upgrade for comfortable daily use.
For RV, boat, or tractor storage, you need both width and height. A 14-foot-wide by 12-foot-tall door is a common specification. Don’t forget the approach!
You need adequate space outside for the vehicle to line up squarely with the opening.
Floor Plan Ratios (Garage vs. Living Space)
There’s no strict rule, but a 60/40 split (garage/living) is very common. A 40×60 barndominium, for example, often dedicates a 40×40 shop area with a 40×20 living space on one end. Think about depth, not just width.
A deeper garage (40 feet deep vs. 30 feet) gives you a comfortable workshop area behind parked vehicles. Our research into cheap barndominium ideas shows that optimizing this ratio is the biggest lever for controlling overall project cost while preserving functionality.
Let’s look at how these dimensions translate into common uses:
| Use Case | Minimum Recommended Dimensions (Width x Depth) | Ideal Ceiling Height | Critical Door Spec |
|---|---|---|---|
| Two-Car Parking + Workshop | 24′ x 30′ | 10′ – 12′ | 16′ wide x 8′ high |
| RV or Boat Storage | 30′ x 40′ (deep) | 12′ – 14′ | 14′ wide x 12′ high |
| Wood/Metal Shop (1 bay) | 20′ x 30′ | 10′ (12′ for lifts) | 10′ wide x 8′ high |
| 4-Car Collector Garage | 36′ x 40′ | 10′ (12′ preferred) | Two 16′ wide doors |
Functional Zones: Planning Your Workbench, Storage, and Vehicle Bays
An open floor plan is a blessing and a curse. Without intentional zoning, your beautiful garage becomes a chaotic dumping ground. The key is to design distinct areas for specific tasks before you move in a single tool.
Start by mentally dividing your slab into three zones: the vehicle bay, the workshop zone, and the storage zone. The vehicle bay should have the clearest, most unobstructed path from the door. The workshop zone needs the best natural light (from windows or skylights) and should be positioned where you have ample wall space for benches and tool storage.
The storage zone is for bulky, less-frequently-used items and is perfect for high, out-of-the-way spaces like loft areas or along the back wall.
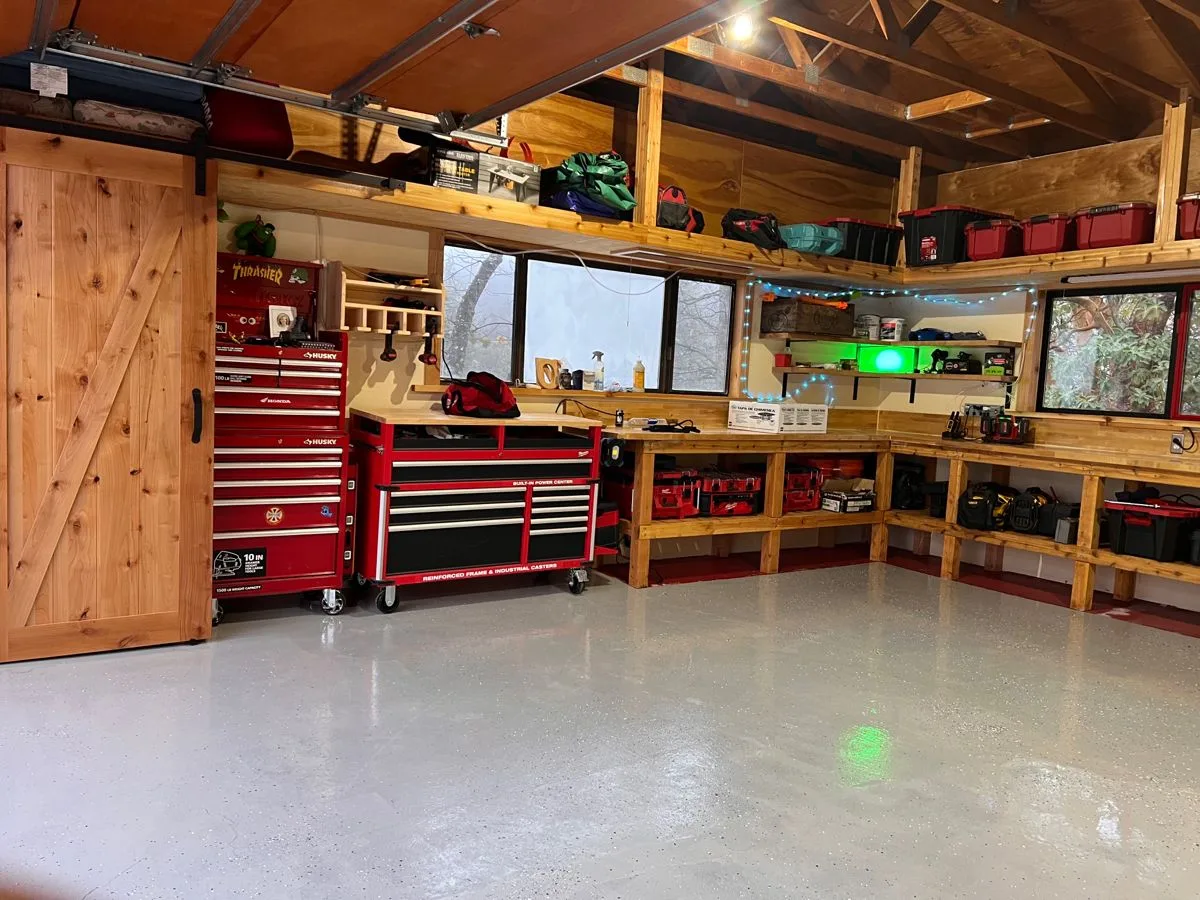
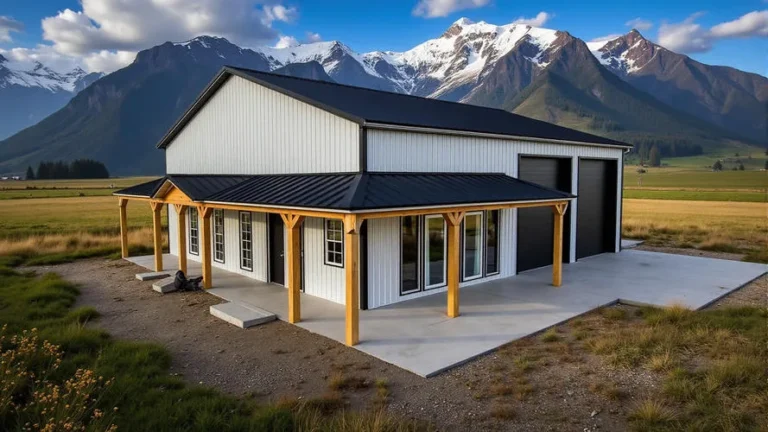
Image source: Bing (Web (fair-use with source credit))
Think about workflow. If you’re restoring a car, you need space to roll a tool cart completely around the vehicle. Place your primary workbench so you can turn from it to your project without tripping over other equipment.
Dedicate a wall for French cleats or slat wall panels, these modular systems let you reconfigure tool storage as your needs change, which is far more flexible than built-in cabinets from day one. For a cohesive look that ties your hardworking garage to the rest of your home, consider how finishes like cabin barndominium decor principles can be adapted with durable, wipeable materials.
Materials & Finishes That Work (and Those That Don’t)
Your garage materials face a tougher life than your living room’s. They need to withstand oil, impacts, temperature swings, and humidity. Choosing the right ones pays off in durability and easier maintenance.
The Floor: Coatings, Heat, and Moisture Control
A bare concrete slab is porous. It will stain, dust, and wick moisture. A high-quality floor coating is not a luxury; it’s a necessity for a usable space.
- Epoxy: The traditional, durable choice. A professionally applied, 100% solids epoxy system is extremely chemical and abrasion-resistant. It can feel cold underfoot.
- Polyaspartic: This is the modern front-runner as of 2026. It cures much faster than epoxy (often in a day), can be applied in a wider temperature range, and has similar durability with better UV resistance, making it good for spaces with lots of natural light.
- Heated Slab: If you’re pouring a new slab, consider installing hydronic (water) or electric in-floor heat. It’s a game-changer for winter projects, prevents condensation, and helps any floor coating last longer by reducing thermal stress on the concrete.
Crucial Step: No coating will stick to a slab that’s wicking moisture from below. A plastic vapor barrier under the concrete is mandatory. After the slab cures, a moisture test should be performed before any coating is applied.
Walls & Insulation: From Bare Metal to Finished Drywall
Your wall choice balances cost, durability, and finish.
- Exposed Metal Liner Panels: The most utilitarian and barndominium-authentic look. They’re tough, easy to clean, and install directly over girts. The downside is they offer zero insulation on their own and can make the space feel very industrial.
- Insulated Wall Assembly: This is the standard for a conditioned space. The best performance comes from closed-cell spray foam applied directly to the interior of the exterior metal sheathing. It acts as insulation, an air barrier, and a vapor retarder all in one. You can then frame an interior wall and finish it with drywall or OSB (oriented strand board) for a more finished look that’s still tough.
- Fire-Rated Drywall: Building codes typically require a minimum of 5/8-inch Type X drywall on the wall separating an attached garage from living spaces. This is not a place to cut corners. It’s a critical safety feature your building inspector will check.
Lighting & Electrical: A Well-Lit Shop is a Safer, More Useful Shop
Poor lighting leads to mistakes, headaches, and a space you avoid using. LED shop lights are the unanimous choice for their bright, cool light, long life, and efficiency. Plan for general ambient lighting and task lighting.
- Ambient Lighting: Hang high-output LED strip lights or large panel lights in a grid pattern to eliminate shadows. A good rule of thumb is to aim for at least 100 lumens per square foot in a workshop area.
- Task Lighting: Install dedicated, plug-in or hardwired lights over your primary workbench, above any machinery, and near vehicle service areas.
- Electrical Outlets: You can never have too many. Install outlets every 4 to 6 feet along all walls, and consider a few floor outlets in the center of a large space for convenience. A dedicated 100-amp subpanel in the garage is a wise investment, giving you ample circuits for tools, compressors, welders, and an electric vehicle charger. Run conduits for future-proofing before the walls are closed up.
The Big-Ticket Features: Lifts, Lofts, and In-Law Suites
These are the dream features that transform a garage from storage to a premium functional asset. They require forethought.
Lifts: A two-post or four-post lift instantly doubles your parking or project space. As mentioned, you need the height (12-14 feet clear). You also need to plan for the electrical requirement (usually 220V) and, most importantly, ensure your concrete slab is thick enough and has the proper psi strength to handle the point loads.
This must be engineered into the initial slab design.
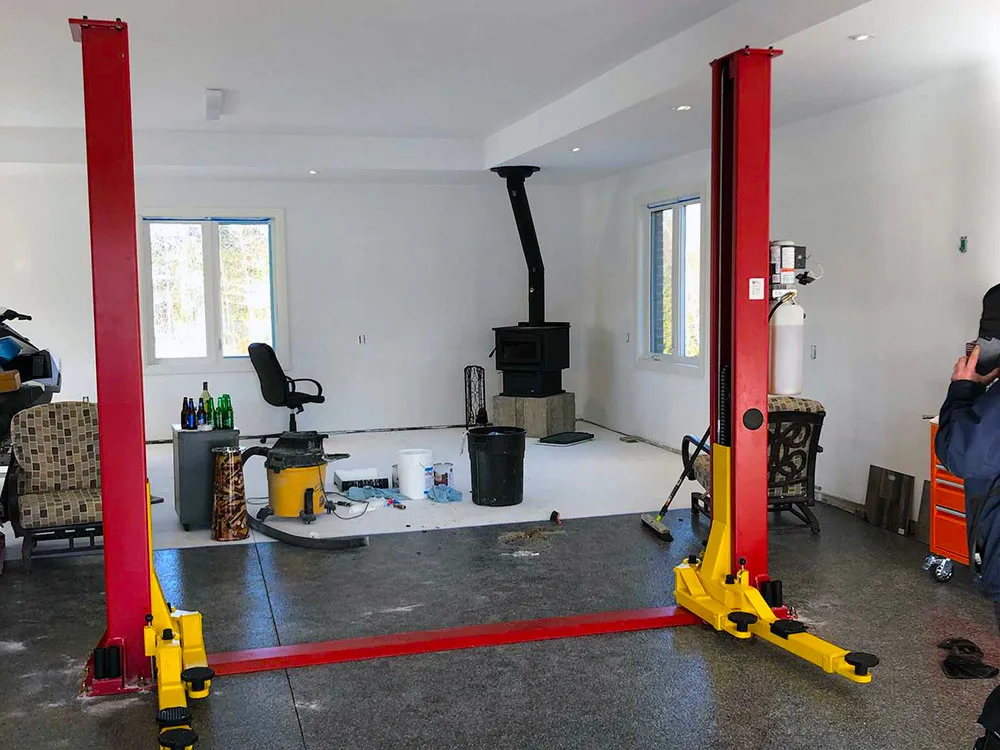
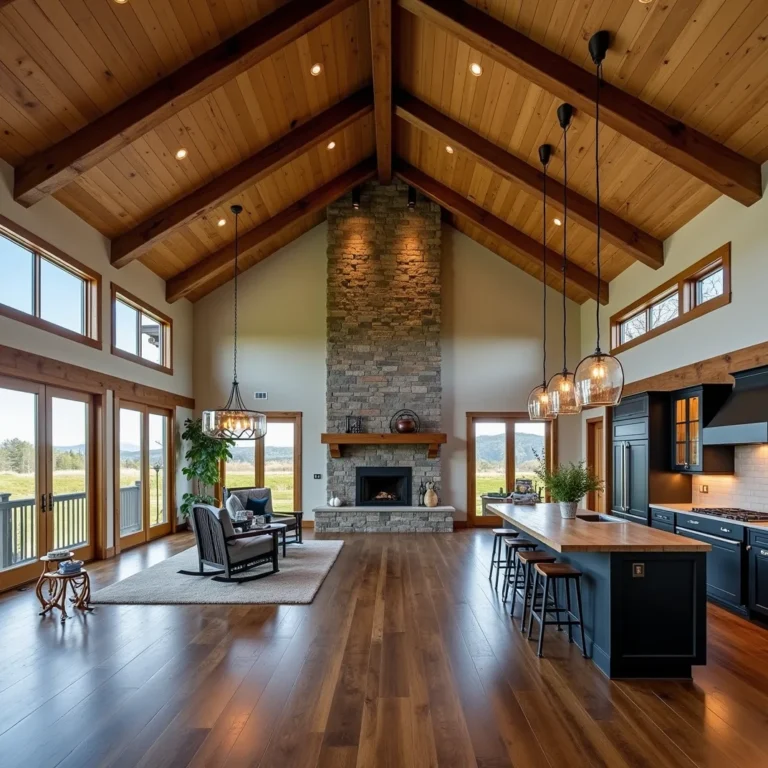
Image source: Bing (Web (fair-use with source credit))
Lofts: The wasted airspace above a garage is prime real estate for a storage loft. It’s perfect for seasonal items, parts, or lumber storage. Ensure your floor trusses are designed to carry the live load (typically 40-50 lbs per square foot for storage).
Safe access via a sturdy staircase or commercial-grade drop-down ladder is a must.
In-Law Suites / Garage Apartments: Building a finished apartment above the garage is a major project that changes the building’s classification and code requirements. It involves full plumbing, HVAC, fire-rated separation, and dedicated egress. The structural requirements are significantly higher.
While it adds tremendous value, it’s a decision that needs to be made at the blueprint stage with a full architectural plan.
Navigating Codes and Comfort: Fire Separation, Climate, and HVAC
Your garage isn’t a lawless zone. Building codes, especially the International Residential Code (IRC), have specific mandates for safety. The most critical is fire separation.
That 5/8-inch fire-rated drywall on the adjoining wall needs to extend from the slab to the roof deck, and any door into the living space must be self-closing and solid-core or fire-rated. This barrier is designed to slow a fire’s spread, giving occupants time to escape.
Climate dictates your insulation strategy. In cold climates, you’re fighting condensation and heat loss. Spray foam insulation that seals the building envelope is highly effective.
In hot, humid climates, vapor drive and cooling are the concerns; again, a properly installed spray foam system that includes a vapor retarder is often recommended by building scientists. Always check the International Code Council’s resources for the specific editions adopted in your locality.
For HVAC, the simplest approach is to install a separate, dedicated mini-split system for the garage zone. It allows you to heat or cool the space independently of your home, prevents fumes or dust from circulating through your home’s ducts, and is highly energy-efficient. Even if you don’t plan to heat it full-time, having the capability for those deep winter or peak summer projects is a huge lifestyle upgrade.
Common Visual & Planning Mistakes (And How to Spot Them in a Floor Plan)
Learning from others’ regrets is free. Here are the top mistakes that become obvious when you scrutinize a plan or photo.
- The Door-Dominated Wall: A floor plan shows a wall with a giant garage door and nothing else. In reality, that door, when open, blocks the entire wall. There’s no space for shelves or a workbench on that side. The fix is to ensure at least one “long wall” is free of large doors.
- The Post in the Middle: Some floor plans, especially for very wide garages, might show a structural support post somewhere in the open space. This can be a major obstacle for parking or workshop flow. Ask your engineer if laminated beams or other clear-span solutions are possible for your width.
- Insufficient Lighting on Paper: A plan with just one or two light fixtures in a 1,000 sq ft garage is a red flag. The lighting plan should be as detailed as the electrical plan.
- No Planned Dust/Dirt Transition: The door from the garage goes directly into a carpeted living room. This is a cleanliness nightmare. The fix is to plan a “mud zone” with durable, cleanable flooring like tile or sealed concrete as a buffer. This transition space can also house your home’s mechanicals, like the water heater or furnace, keeping them accessible but out of the main living area.
- Ignoring the Exterior Look: A massive garage door front and center with tiny living space windows can create an unbalanced, fortress-like facade. Work with your designer to incorporate windows, varying materials, or roof breaks to create a balanced barndominium exterior design that looks like a home, not just a shop.
Cost Drivers: Where the Money Goes in a Barndominium Garage
Understanding what impacts your budget helps you make smart trade-offs. The shell (concrete slab, metal framing, roof, and exterior walls) is surprisingly economical per square foot. The costs escalate when you finish the interior to a living-space standard.
- Site Work & Slab: This is a fixed cost heavily influenced by your soil conditions and the size/thickness of the concrete pour. A heated slab or one engineered for lifts adds 15-30%.
- Insulation: Spray foam insulation is one of the single largest material costs in finishing the space, but it’s also one of the best value-for-money investments for comfort and energy efficiency.
- Floor Coating: A DIY epoxy kit might cost a few hundred dollars. A professional-grade polyaspartic coating on a 1,000 sq ft garage can range from $3,500 to $7,000, but it will last decades.
- Electrical Service: Upgrading your main service to accommodate a garage subpanel and running numerous circuits adds to labor and material costs. EV charger circuits are another line item.
- Doors & Windows: Large, insulated sectional doors or commercial-grade roll-ups are significant purchases. Adding windows for natural light also increases cost but dramatically improves the space.
Barndominium Garage Gallery: Breaking Down Real Examples
Let’s apply what we’ve learned by analyzing common successful layouts.
Example 1: The 40×60 Multi-Purpose Shop-Home
- Layout: A clean 60/40 split. The 40×40 garage area has two 18-foot doors on one long side. The back 20 feet of depth is dedicated to a workshop zone with a workbench along the rear wall and a storage loft above. The living space occupies a 40×20 block on one end.
- Why it Works: The doors are on one side, preserving three full walls for storage and work. The deep design allows for cars to be parked in front with a permanent workshop behind. The loft utilizes vertical space without compromising ceiling height in the main bay.
Example 2: The 30×40 Classic Car Collector’s Setup
- Layout: A 30×30 garage with a 30×10 living space/office mezzanine overlooking it. The garage has a single 12-foot door and soaring 16-foot ceilings with a two-post lift centered in the bay.
- Why it Works: The high ceilings are purely for the lift and ambiance. The mezzanine provides a comfortable, separated space to relax or work while staying connected to the garage hobby. It’s a efficient use of a smaller footprint for a dedicated enthusiast.
Example 3: The Compact, Highly-Finished Hobby Studio Garage
- Layout: Part of a larger barndominium, this is a single 20×20 bay. It features finished drywall walls painted a light color, luxury vinyl plank flooring, and high-output can lights. It’s designed for clean hobbies like crafting, photography, or a home gym.
- Why it Works: It proves a garage space doesn’t have to be greasy. By using home-grade finishes and excellent lighting, it becomes a versatile bonus room that just happens to have a garage door for moving large projects or equipment. The finish choices here could take inspiration from more refined interior themes, like an earthy moody bedroom decor palette, adapted for durability.
Your Action Plan: From Sketch to Slab Pour
- Define Your “Why”: List every vehicle, tool, and activity this space must accommodate now and in 10 years.
- Sketch & Research: Draw bubble diagrams of zones. Spend hours looking at photos and floor plans online. Save every idea you like.
- Set Non-Negotiable Dimensions: Based on your largest item, lock in your minimum ceiling height, door specs, and depth.
- Consult a Designer/Builder: Take your sketches and dimension goals to a professional familiar with post-frame construction. They can turn it into a viable plan that meets code.
- Engineer the Details: This is when you finalize structural details for lifts or lofts, specify insulation R-values, and design the electrical and lighting plan.
- Prioritize the Budget: If costs run high, know where you can phase things. The shell, slab, and doors are Phase 1. Insulation, basic electrical, and a floor sealer can be Phase 2. Fancy coatings, lifts, and finished walls can come later.
Frequently Asked Questions
What’s the ideal garage size for a barndominium?
There’s no single ideal size, but a 30×40 footprint is an excellent starting point for a two-car garage with workshop space. It provides 1,200 sq ft, allowing for a comfortable 24×30 garage bay (720 sq ft) and a 30×16 living area (480 sq ft). Size up or down based on your vehicle and hobby needs.
Can I add a bathroom in my barndominium garage?
Yes, and it’s a highly practical addition. Plumbing for a sink or a full bathroom is much easier to install during initial construction. Even a simple utility sink for cleaning up is a game-changer.
Just remember that any plumbing in an exterior wall or in a slab in a freezing climate requires careful planning to prevent frozen pipes.
How do I keep my garage from getting too hot or cold?
The answer is insulation and a dedicated HVAC zone. High-performance spray foam insulation in the roof and walls is the most effective method. Pair it with a ductless mini-split heat pump to efficiently control the temperature independently of your home.
Proper insulation also drastically reduces condensation on tools and vehicles.
Is it cheaper to build a barndominium with a big garage?
On a cost-per-square-foot basis, yes. The open, post-frame structure of a barndominium is inherently less expensive for creating large, column-free spaces than traditional stick framing. The garage portion, often left as an unfinished shell, brings down the average cost.
The savings are in the structure itself, not necessarily the finishes inside the garage.
Do I need special permits for a garage with a lift or apartment?
Yes. A lift requires engineering approval for the slab design and may require an inspection of the installed unit. A garage apartment (dwelling unit) triggers a whole new level of permitting related to residential occupancy, electrical, plumbing, mechanical, fire egress, and minimum room sizes all come into play.
Always check with your local building department first.
How do I prevent dust from the garage getting into the house?
A multi-pronged approach works best. First, ensure a tight air seal in the fire-rated wall and use a self-closing, weather-stripped door. Second, create an airlock entryway (mudroom) with a second door.
Third, maintain negative air pressure in the garage by having an exhaust fan or ensuring your garage HVAC doesn’t push air towards the house. Using a dust collection system in your workshop is also crucial.
Barndominium Garage Gallery: Breaking Down Real Examples
The 30×40 Classic Car Collector’s Setup is a common and efficient plan. It dedicates the entire volume to the hobby. The single large bay with a lift is the star.
A mezzanine office overlooks the action.
This layout works because it prioritizes vertical space over horizontal. The high ceilings serve a clear purpose for the lift. The living area is compact and elevated, keeping it separate from the shop floor dust and fumes.
It’s a smart use of a smaller property footprint.
Example 1: The 40×60 Multi-Purpose Shop-Home
This is the quintessential family barndominium garage. The 40×40 shop area allows for true multi-use zoning. You can park daily drivers near the door while keeping a dedicated workshop in the back.
The long wall opposite the doors is prime real estate. It often houses a continuous workbench, upper cabinets, and a slat wall system. The depth is key.
It prevents the “parked in” feeling where vehicles block access to tools and storage. Many plans in this category include a small bathroom or utility sink in the rear corner, a highly practical feature.
Example 2: The 30×40 Classic Car Collector’s Setup
We’ve touched on this, but the details matter. The living space is often a loft or mezzanine built over a garage-front office or bedroom. This creates a striking cathedral ceiling in the garage below.
Electrical planning here is intensive. You need outlets at lift post locations, dedicated circuits for air compressors, and excellent task lighting over the lift bay. The floor coating is also critical, as it needs to withstand hydraulic fluid and tire marks while being easy to clean.
This setup is less about parking and more about being a functional showroom.
Example 3: The Compact, Highly-Finished Hobby Studio Garage
This proves a garage doesn’t need to be cavernous. A single 20×20 or 24×24 bay, when finished to residential standards, becomes a premium flex room. Think of it as a studio apartment with a garage door.
Walls are finished with paint-ready paneling or drywall. Flooring might be luxury vinyl plank for warmth and sound dampening. The lighting is soft and ample, more like a living room than a shop.
This space is perfect for artists, musicians, or a high-end home gym. It bridges the gap between a traditional garage and finished living space, offering unique flexibility.
Your Action Plan: From Sketch to Slab Pour
Start with a detailed needs list, not a dream list. Write down every vehicle, tool, and activity. Be brutally honest about must-haves versus nice-to-haves.
This list becomes your functional brief.
Next, create bubble diagrams on graph paper. Use one square for one foot. Sketch where cars, workbenches, and large tools would go.
This simple exercise reveals spatial conflicts immediately. It’s the cheapest and most effective form of planning you can do.
Take your sketches to a professional. A drafter or builder familiar with post-frame construction can translate your bubbles into a buildable plan. This is the step where your ideas meet structural reality and local building codes.
Don’t skip it.
Frequently Asked Questions
What’s the ideal garage size for a barndominium?
A 30×40 footprint is the most versatile starting point. It efficiently provides a 24×30 garage bay and a 30×16 living area. This gives you 720 square feet for vehicles and work, which is ample for two cars and a workshop zone.
You can scale up to 40×60 for more shop space or down for a simpler setup.
Can I add a bathroom in my barndominium garage?
Absolutely. It’s a highly practical upgrade. Running plumbing during initial construction is far easier and cheaper than retrofitting later.
Even a simple half-bath with a toilet and utility sink is a huge convenience. Just ensure drains are properly graded and water lines are protected from freezing if in an exterior wall.
How do I keep my garage from getting too hot or cold?
Superior insulation is the first and most important step. Spray foam provides the best air seal and R-value per inch. Pair it with a dedicated mini-split HVAC unit.
This system heats and cools the space independently from your home. It also controls humidity, which prevents condensation on tools and vehicles.
Is it cheaper to build a barndominium with a big garage?
On a cost-per-square-foot basis, yes. The post-frame structure is inherently economical for large, open spans. The garage portion, often left as an unfinished shell, brings down the average cost significantly.
You’re paying for efficient structure, not interior finishes, in that space.
Do I need special permits for a garage with a lift or apartment?
Yes, both features trigger specific permit requirements. A lift requires engineered approval for the concrete slab’s thickness and strength. The installation itself may need a separate inspection.
A full apartment above a garage is considered a dwelling unit. This involves permits for residential electrical, plumbing, mechanical systems, and fire egress. Always consult your local building department first.
How do I prevent dust from the garage getting into the house?
Use a layered defense strategy. First, ensure a tight air seal in the fire-rated separation wall. Install a self-closing, weather-stripped door.
Second, design an airlock entryway, like a mudroom, with two doors. Third, consider installing a slight negative pressure in the garage with an exhaust fan. Finally, use dust collection systems on your power tools at the source.
There are no remaining H2 sections from the approved TOC to continue. The provided sections in the previous response (Barndominium Garage Gallery, Your Action Plan, and Frequently Asked Questions) completed the final headings from the outline. The article has reached its natural conclusion.