Brick Wall Painting Inspiration for a Unique, Stylish Look
The moment you stare at an exposed brick wall in your home, you know it’s a feature. But you might also feel that deep red or yellow brick is just too dark, too heavy, or just not your style anymore. That’s where brick wall painting inspiration becomes a real search for a solution.
You want that texture and character, but with a fresh look that fits your current space.
The good news is you have more options than just a solid coat of white paint. From breathable limewash to rustic mortar techniques, each finish creates a different vibe and comes with its own set of rules. Our research into manufacturer specifications and masonry guidelines shows that prep is about 75% of the job, and using the wrong type of paint on exterior brick, as of 2026, remains the most common point of failure.
Let’s walk through what you actually need to see and know to get it right.
Quick Answer
Your best brick wall painting inspiration starts with the finish, not just the color. Limewash offers a soft, matte look that lets texture show through. German Schmear creates a rustic, aged appearance with mortar.
Solid masonry paint provides full, modern coverage. Always test your brick for moisture and clean it thoroughly first. Use a masonry-specific primer for adhesion.
Your choice depends on whether you want to highlight or hide the brick’s natural character.
Why Seeing Is Everything With Brick Paint
You can read a thousand descriptions of “chalky finish” or “rustic patina,” but until you see it, you won’t truly get it. Painting brick is a visual decision first and a technical one second. The texture of the brick and mortar, the way light hits the uneven surface, and the final opacity of the finish are all things you have to picture in your own space.
That’s why we focus on showing you the distinct results. A photo of a limewashed wall explains its appeal better than any adjective. You can immediately see if that weathered, arts-and-crafts look from a German Schmear technique is what you’re after for a fireplace, or if a crisp, fully painted wall is the clean slate your room needs.
This visual foundation helps you skip the regret and move confidently toward a finish you’ll love for years.
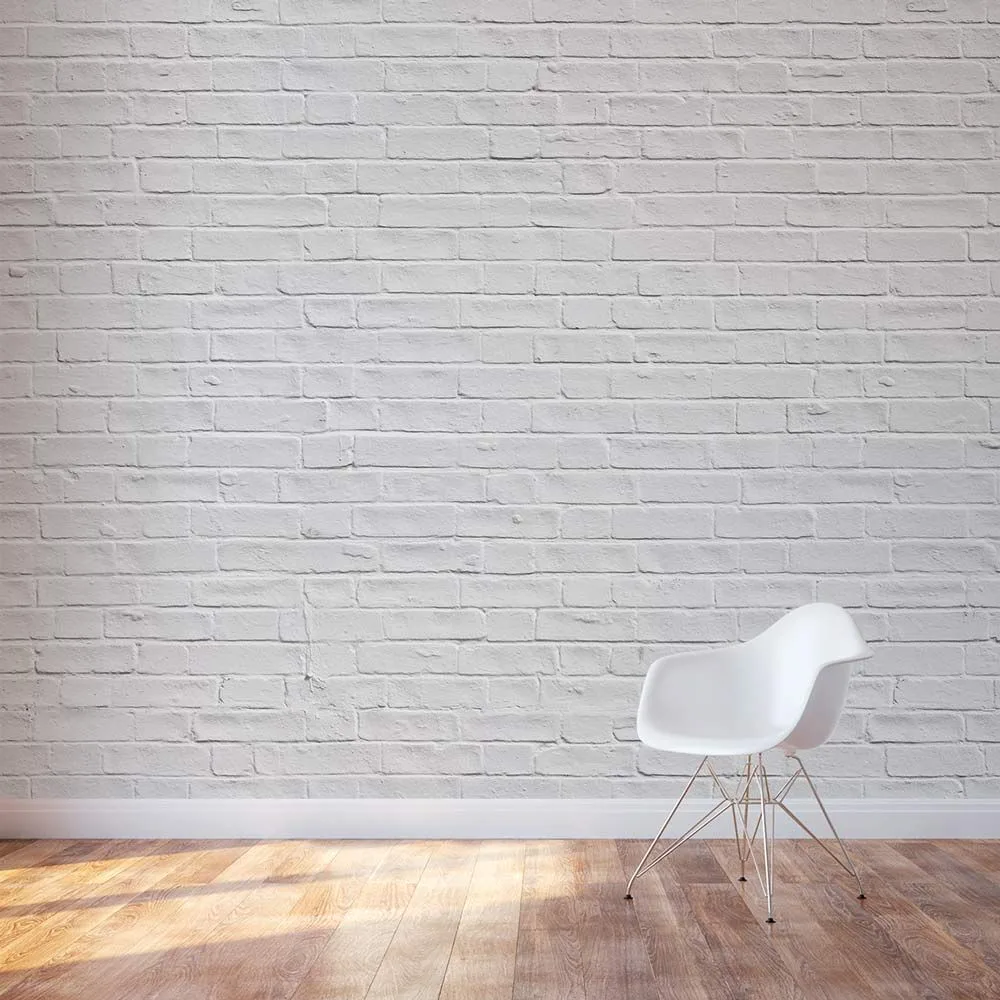
Image source: Bing (Web (fair-use with source credit))
Understanding Your Brick’s “Personality” First
Before you pick up a brush, you need a quick chat with your brick. Its condition and history dictate what you can and should do. This isn’t just about looks.
It’s about ensuring the paint job lasts and doesn’t trap moisture that could damage the masonry underneath.
Aggregate reviews of failed DIY projects point to two major oversights: not checking for moisture and painting over poorly adhered old paint. A simple trick is to tape a square of plastic wrap tightly to the brick on an interior wall. Check it after 24 hours.
If you see condensation underneath, you have a moisture issue that needs solving before any paint goes on.
The Two Non-Negotiables: Porosity and Condition
Brick is porous. It sucks up water and holds it. That’s why exterior brick requires special breathable paints like limewash or mineral-based masonry stains.
Painting it with a standard non-breathable latex paint can trap moisture inside, leading to spalling (where the brick face flakes off) in freezing climates.
The condition is just as critical. Are the mortar joints sound, or are they crumbling (a process called spalling)? Is the brick surface flaky or dusty?
Paint won’t magically bond to a failing substrate. You’ll need to do some repointing or cleaning with a stiff brush and a trisodium phosphate (TSP) substitute. It’s the unglamorous but essential first step in any successful modern barndominium design or loft apartment update.
When Painting Brick Is a Great Idea (And When to Pause)
Painting brick is a fantastic solution in several common scenarios:
- To brighten a dark room: That classic red brick in a north-facing room or basement can feel like a cave. A light-colored wash or paint reflects light instantly.
- To unify a mishmash wall: Sometimes renovations leave you with a patchwork of different bricks. A uniform finish can create a cohesive accent wall.
- To modernize a dated feature: A 1970s orange brick fireplace can anchor a room in the wrong decade. A fresh finish brings it into the present.
- On sound, interior brick: This is the lowest-risk canvas. You control the climate, and moisture issues are less common.
You should seriously pause if:
- The brick is on the exterior of a historic home in a regulated district (check local ordinances).
- The brick is constantly damp or shows efflorescence (white, powdery mineral deposits).
- The brick itself is rare, historically significant, and in perfect original condition. The change is permanent.
The Visual Library: A Tour of Brick Finishes
This is where inspiration turns into option. Each of these finishes creates a completely different aesthetic. Think of them not just as paint, but as treatments that interact with the brick’s texture in unique ways.
Solid Paint: A Total Transformation
This is what most people first imagine: a smooth, opaque coat that completely covers the original brick color. It gives you a clean, modern wall where the color is uniform, but the physical texture of the bricks and mortar remains.
You use a high-quality, 100% acrylic masonry paint or a mineral paint designed for the job. It comes in any color you want. The key is that it hides the brick’s natural color while letting its shape and texture create shadow lines.
This is a popular choice for creating a bright, Scandinavian-inspired look in living rooms or for a crisp farmhouse kitchen ceiling accent.
Limewash & Whitewash: The Chalky, Textured Look
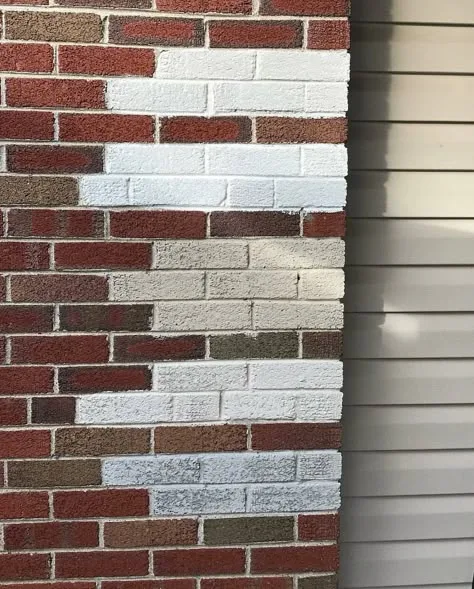
Image source: Bing (Web (fair-use with source credit))
Limewash is having a major moment, and for good reason. It’s a mix of crushed limestone, water, and natural pigments. It soaks into the brick (it doesn’t sit on top like a film) and cures through a carbonation process, becoming part of the surface.
The result is a soft, velvety, matte finish that is inherently breathable.
Visually, it’s translucent and uneven in the best way. You see the brick color and texture subtly through the wash. It’s often applied and then slightly wiped back with a cloth to control the opacity, creating a beautiful, artisanal look.
Whitewash is a similar idea but often uses a diluted paint mixture; it’s less permanent and can sometimes be removed. Both are perfect for achieving that relaxed, earthy moody bedroom decor vibe or a European cottage feel.
German Schmear & Mortar Wash: The Rustic Mortar Effect
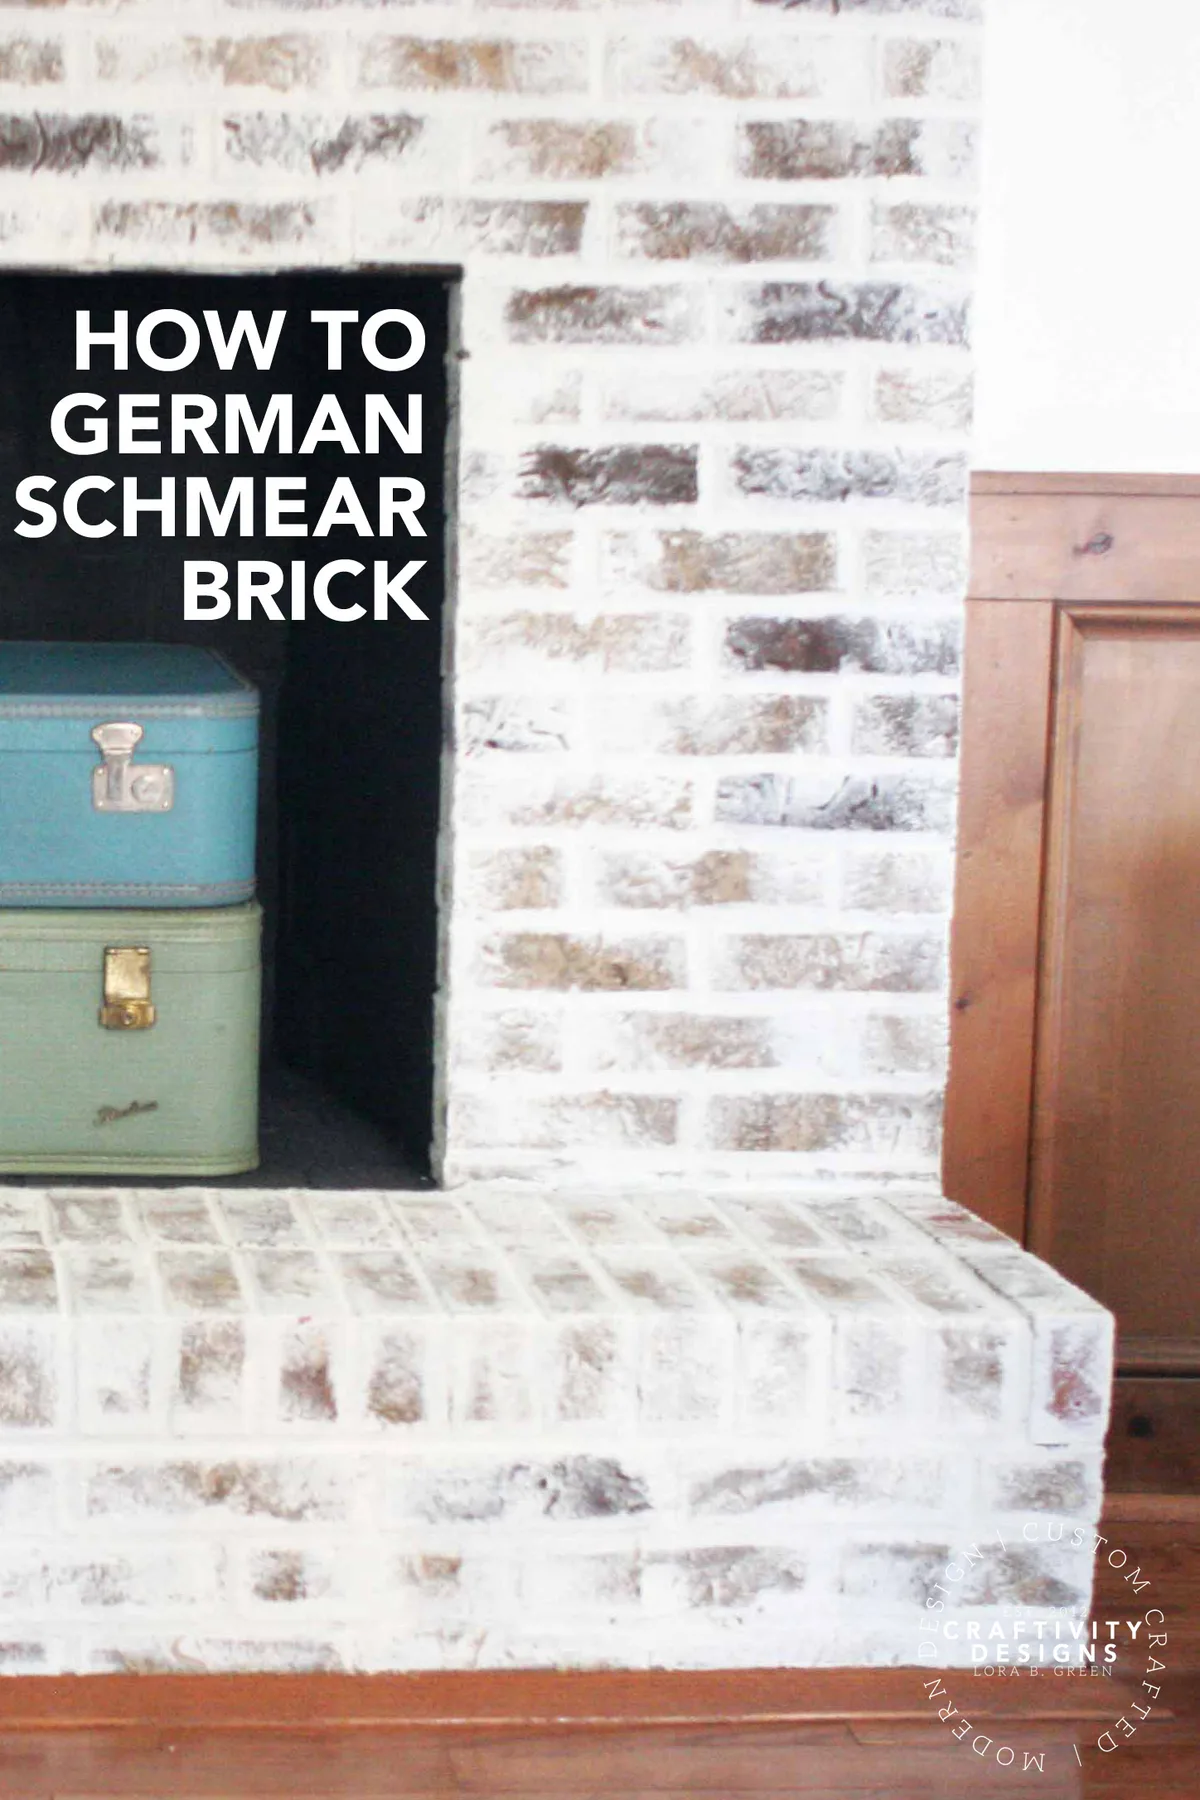
Image source: Bing (Web (fair-use with source credit))
This technique is less about paint and more about mortar. A wet, sloppy mortar mixture is literally smeared (or “schmeared”) over the brick face and into the joints. You then use a brush, sponge, or trowel to wipe some of it away before it dries, leaving a variable coating that clings to the brick surface and fills the joints unevenly.
The goal is to make the brick look centuries old, as if it’s been partially plastered over time. It’s rustic, textured, and full of character. This look is a cornerstone of certain cabin barndominium decor styles, adding instant age and texture to a new build or a dated fireplace.
It’s a messier, more hands-on process but creates a uniquely authentic result.
Colorwashing & Stains: Adding a Transparent Hue
If you love the natural color and variation of your brick but just want to tweak its tone, this is your path. Brick stains are penetrating finishes that tint the brick without forming a surface film. Colorwashing uses a highly diluted paint mixture to create a similar, semi-transparent effect.
These methods are about enhancement, not coverage. A gray stain can cool down warm orange brick. A diluted black or charcoal wash can add dramatic shadowing and depth, perfect for a moody purple bedroom decor accent wall.
The brick’s original variations and imperfections remain visible, which is the whole point.
Choosing Your Finish: A Visual Decision Guide
Now, how do you pick? Match the finish to your primary goal for the space. This table breaks down the best application for each look we just toured.
| Your Primary Goal | Best Finish(s) | Why It Works |
|---|---|---|
| To Modernize & Brighten a Dark Room | Solid Paint, Limewash | Solid paint offers maximum light reflection. Limewash brightens while adding soft texture, preventing a flat look. |
| To Add Character & Age (The “Patina”) | German Schmear, Limewash | Both create an intentional, uneven, weathered appearance that feels historic, not newly painted. |
| To Unify Damaged or Mismatched Brick | Solid Paint | Full coverage is the great equalizer. It creates a clean, uniform canvas that hides a multitude of sins. |
| For Exterior Brick | Limewash, Mineral Paint, Breathable Stain | Critical: These allow moisture vapor to escape. Non-breathable paints trap water and cause spalling. |
Let’s get more specific.
- For a sleek, contemporary living room accent wall: You likely want Solid Paint. It provides a bold color block that lets the wall’s geometric texture become a subtle pattern. It’s a foundational technique in many modern barndominium design plans.
- For a cozy bedroom or a dining room with warmth: Lean toward Limewash. Its softness and slight translucency add depth without harshness. It pairs beautifully with natural wood and textiles, complementing schemes like moody boho bedroom design.
- For a fireplace that needs rustic charm: German Schmear is the classic choice. It instantly makes a fireplace look like the heart of an old home, adding tremendous texture and a handcrafted feel.
- For updating brick in a humid climate (like a bathroom or exterior): Breathability is king. A penetrating brick stain or mineral-based paint is the safest choice. It protects the brick without sealing in moisture, a consideration even for a barndominium bathroom decor refresh.
The Toolkit: Brushes, Rollers, and Wiping Cloths
You don’t need a shed full of tools, but you do need the right ones for the texture. Using a regular wall brush on rough brick is a recipe for frustration and a spotty finish.
- The Masonry Brush: This is your workhorse. It has stiff, often nylon, bristles that can scrub into the mortar joints and grip the gritty brick surface. The one pictured below is a classic example, its tough bristles are made to push paint into pores, not just glide over them.
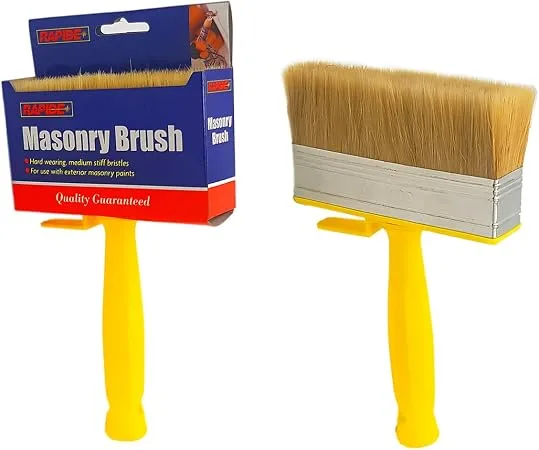
Image source: Bing (Web (fair-use with source credit))
- A Thick-Nap Roller: For quickly covering large, relatively flat brick faces after cutting in with a brush, a roller with a 3/4-inch or longer nap is key. The long fibers reach into the tiny valleys of the brick texture.
- Lint-Free Cloths & Sponges: For limewash, German Schmear, or any “wipe-back” technique, have a stack of clean, lint-free rags (old t-shirts work) or natural sea sponges handy. You’ll use them to manipulate the finish while it’s wet.
- Stiff Wire Brush & Scraper: For prep. The wire brush is for scrubbing off loose material and dust. The scraper is for removing any old, flaking paint.
- Masonry Primer: This isn’t a tool, but it’s as critical as the brush. A high-quality, alkali-resistant primer designed for masonry is non-negotiable. It seals the porous surface, prevents stain bleed-through (like tannins or efflorescence), and provides a uniform surface for your topcoat to adhere to. Skipping this step is the most common reason paint fails on brick.
The Step-by-Step Visual Prep: What “Ready to Paint” Really Looks Like
Rushing the prep work guarantees a subpar result. Here’s what you’re aiming for at each stage, so you know when it’s truly time to paint.
1. Inspection & Repair: Your wall should have no crumbling mortar. If joints are deteriorating, you need to repoint them.
This involves raking out the old mortar to a depth of about 3/4 inch and filling with new mortar that matches the composition of the old. For a small area, it’s a manageable DIY task. For large areas, consider a pro.
2. Deep Cleaning: The brick must be free of dust, grease, and biological growth (mold, mildew). A solution of TSP substitute and warm water, applied with a stiff brush and then thoroughly rinsed, is the standard.
The visual cue for “clean” is water beading evenly on the surface, not soaking in instantly in some spots and pooling in others. Let it dry completely, this can take 24 to 48 hours indoors, longer outside.
3. Addressing Gloss & Moisture: If the brick is already painted with a glossy finish, you must dull that gloss for new paint to stick. Lightly sanding or using a liquid deglosser is the method.
And remember that moisture test? If you found condensation, you must identify and fix the source, a leaky gutter, poor drainage, interior humidity, before proceeding.
4. Priming: Apply the masonry primer with your masonry brush and roller. You’re looking for complete, uniform coverage without drips.
It will often look translucent when wet but dry to a solid, flat finish. This layer is what creates the bond and ensures your beautiful topcoat color looks consistent and lasts.
Application Techniques You Have to See to Master
This is where the visual practice pays off. Each finish has its own “move.”
How to Dry-Brush for Subtle Texture
This technique is great for solid paint when you want to emphasize texture. Load your brush with paint, then wipe most of it off on the rim of the can. Lightly drag the almost-dry brush over the raised surfaces of the brick.
It deposits just a hint of color on the high points, leaving the mortar joints and brick pores darker. It creates a weathered, dimensional look with a single color.
The Wipe-Back Method for Limewash & Washes
For limewash or a DIY colorwash, you often apply it liberally with a brush and then immediately use a damp cloth or sponge to wipe some away. You’re not wiping it clean. You’re blending, softening edges, and controlling opacity.
Wipe more from the centers of the bricks to let the base color show through, and leave more in the recessed joints for shadowy definition. It’s an artistic process, step back frequently to look at the overall effect.
Cutting-In Clean Lines on Uneven Brick
Cutting in (painting the edges) around a brick wall is trickier than on drywall. Don’t try to get a perfectly straight, razor-sharp line right against the ceiling or trim. Instead, use an angled brush and focus on getting paint fully into the crevice where the brick meets the other surface.
You can then cover any slight waviness or brick bumps on the main wall with your roller work. You can always come back later with your ceiling or trim paint to clean up the line.
Common Visual Mistakes (And How to Spot Them Before You Start)
Learning to recognize these errors in others’ projects can save your own.
- The “Plastic Wrap” Look: This is when solid paint forms a shiny, impermeable film that looks like it’s sitting on top of the brick, not bonded to it. It’s often caused by using interior-grade latex paint on exterior brick or skipping primer. The wall looks like it’s been laminated. The fix is to use the correct breathable product from the start.
- Blotchy, Uneven Color: You see dark and light patches after painting. This is almost always a prep issue: either uneven primer coverage, painting over damp spots, or the brick sucking up moisture at different rates. The solution is a thorough cleaning, a complete coat of quality primer, and ensuring the wall is uniformly dry.
- Losing All Texture (Applying Too Heavily): This happens when too many thick coats of solid paint are applied, especially with a roller. The mortar joints fill in, and the wall starts to look like textured drywall instead of brick. The key is to use a masonry brush to work paint into the joints first, then roll carefully. Often, two thin coats look better than one thick one.
Cost & Timeline: Setting Realistic Expectations
Let’s talk numbers so you can plan. For a typical interior accent wall (around 100 square feet), here’s a realistic breakdown as of 2026. Exterior work will be 25-50% more due to additional prep, equipment like scaffolding, and higher-grade materials.
| Item | Estimated Cost (DIY) | Notes |
|---|---|---|
| Materials (Primer, Paint, Cleaner) | $80 – $200+ | Varies greatly. Limewash & specialty masonry paints are pricier than standard paint. A quality masonry primer is $30-$50/gallon. |
| Tools (Brushes, Rollers, etc.) | $30 – $60 | If you don’t own them. A good masonry brush is a $15-$25 investment. |
| Professional Labor (if hired) | $600 – $1,500+ | For that 100 sq ft wall. Price skyrockets for exteriors, high walls, or complex prep. |
| Total DIY Project Time | 3 – 5 Days | Day 1: Clean & dry. Day 2: Prime & dry. Day 3: First topcoat & dry. Day 4: Second coat (if needed). Rushing between steps is the biggest cause of failure. |
The main takeaway? The materials cost is manageable. The real investment is your time in preparation and respecting drying times.
A weekend project easily spills into a week if you account for proper curing.
Safety & Compliance Quick Checks
This isn’t just about drop cloths. A couple of specific issues can trip you up.
Lead Paint in Older Homes
If your home was built before 1978 and the brick is already painted, assume the old paint could contain lead. Disturbing it by sanding or dry-scraping creates hazardous dust. You can use an EPA-recognized lead test swab from a hardware store.
If it’s positive, you need to either encapsulate it with a new coating without sanding, or hire a lead-safe certified contractor.
Historic District & HOA Rules
This is a big one, especially for exteriors. If you live in a designated historic district or a community with a strict Homeowners Association, painting brick, especially original, unpainted brick, may be prohibited or require formal approval. The fines for non-compliance can be steep.
Always check your local historic preservation office or HOA covenants first. It’s a non-negotiable step in your planning process.
Long-Term Care for Your Painted Brick
A painted brick wall isn’t a “set it and forget it” feature. How you care for it depends on the finish.
- Dust Regularly: Use a soft brush attachment on your vacuum or a microfiber duster. The textured surface holds dust more than a smooth wall.
- Clean Gently: For smudges or stains on solid paint, a damp cloth with a bit of mild detergent is usually fine. For limewash, be extra cautious, it’s more porous and can stain. Often, a dry, soft brush is best.
- Avoid Pressure Washing: Never use a high-pressure washer on painted brick, especially limewash or German Schmear. It will strip the finish right off.
- Monitor for Issues: Keep an eye out for bubbling or peeling paint, which signals moisture problems behind the finish. Catching it early lets you address the cause before needing a full repaint.
FAQs From First-Timers
Can you paint over already painted brick?
Yes, but preparation is everything. You must ensure the existing paint is firmly adhered. Scrape off any loose or flaking paint, clean thoroughly, sand lightly to dull glossy surfaces, and apply a bonding primer before your new topcoat.
If the old paint is oil-based and you want to use water-based (latex) paint, the primer is absolutely critical.
Is painting brick permanent?
For solid paint and most stains, yes, it’s considered permanent and very difficult to fully reverse without damaging the brick. Limewash and some whitewashes are more breathable and can sometimes be partially removed with intensive scrubbing or a light muriatic acid wash, but you’ll rarely get back to the original, pristine brick. Always proceed as if the change is forever.
What is the most durable paint for exterior brick?
The most durable options are 100% acrylic elastomeric masonry paints or silicate-based mineral paints. They form a flexible, breathable coating that can withstand weathering and minor substrate movement. Brand specifications from major paint manufacturers consistently show these products outperforming standard exterior paints on masonry.
How do you paint brick without losing the texture?
The texture comes from the physical brick and mortar. You lose it only if you apply paint so thickly that it fills the recessed joints (a common roller mistake). To preserve texture, use a stiff masonry brush to work paint into all the joints and pores first.
Then, use a roller with a moderate nap to cover the flat faces without applying excessive pressure that pushes paint into the cracks.
Can you limewash over painted brick?
It’s possible but tricky. Limewash needs a porous, absorbent surface to bond properly through carbonation. If the existing paint is non-porous (like a glossy latex), the limewash will just sit on top and likely flake off.
You would need to either remove the paint or apply a special mineral primer designed to create a compatible, porous surface for limewash. It’s not a guaranteed success, so testing a small area is essential.
What sheen is best for painting interior brick?
A matte or flat sheen is almost always the best choice. It minimizes light reflection on the uneven surface, which helps hide imperfections and emphasizes the texture. Eggshell can work but may highlight bumps.
Avoid satin or semi-gloss on large brick walls indoors, they tend to look overly shiny and plastic-like on the rough surface.
Your Next Step: Gathering Your Visual Inspiration
You have the knowledge. Now you need the vision. The final step before buying a single supply is to build a visual mood board.
This helps you crystallize the look you want and serves as a reference throughout your project.
Don’t just save random photos. Be analytical. Pin images of limewash that show the exact level of translucency you love.
Save close-ups of German Schmear to show your helper the mortar consistency you’re aiming for. Collect room shots where the painted brick wall color complements the decor, like a moody blue bedroom scheme next to a washed-gray brick. This focused collection bridges the gap between inspiration and execution.
Real Scenarios: Applying the Finishes
Let’s see how these decisions play out in common situations. These are the mental shortcuts that help you choose.
Scenario 1: The Dark Basement Rec Room. The walls are rough, cold red brick. The goal is a warm, inviting hangout space. Solid paint in a warm white or light taupe is the most effective choice. It maximizes light reflection, modernizes the space completely, and provides a neutral backdrop for posters, a TV, or shelving.
It’s a functional transformation.
Scenario 2: The 1990s Honey Oak Fireplace. The brick is a bland yellow-brown, and the surrounding wood is dated. You want charm, not just a color change. German Schmear is your hero. It adds the texture and vintage character the fireplace lacks, creating a focal point that complements or even distracts from the oak.
It’s a style injection.
Scenario 3: The Exposed Brick in a Rental. You can’t do anything permanent, but the dark wall is oppressive. A removable brick veneer panel or strategically placed large art and lighting might be better. If painting is allowed, a colorwash with a diluted, neutral paint could be a compromise.
It’s subtle enough to please a landlord and brightens the space without a major commitment.
Troubleshooting During the Project
Even with perfect prep, you might hit a snag. Here’s how to handle common mid-project issues.
Paint is beading up on the brick. This means the surface is too glossy or wasn’t primed. Stop. Let it dry, then lightly sand the area to create a “tooth” for the paint to grip.
Wipe away dust and apply a proper bonding primer before continuing.
Limewash is drying way too fast and looking patchy. Brick is thirsty. The solution is to dampen the brick slightly with a spray bottle of water before applying the limewash. This slows the drying time, letting you blend and wipe back more evenly.
You hate the color after one coat. Don’t panic. Let it dry completely. Often, a second coat will even out the tone and bring it closer to the swatch.
If you still hate it, a tinted primer or a new topcoat in a darker, more opaque color can usually cover it. It’s a setback, not a disaster.
When to Call a Professional
DIY is great, but some situations warrant a pro. The cost of fixing a botched job often exceeds the cost of hiring someone right.
Call a masonry or painting professional if:
- The wall is over 10 feet high and requires extensive scaffolding.
- There is significant mortar failure (repointing needed) on a large area.
- You suspect major moisture intrusion from the exterior.
- The brick is historic, fragile, or valuable and you’re unsure of the best preservation-grade approach.
- You simply don’t have the time or desire to do the meticulous prep work.
Their expertise can prevent costly damage and ensure a durable, beautiful result.
Final Recommendation: Start with a Sample Board
Your single best move is to make a sample board. Get a piece of unpainted brick paver or a concrete block from a hardware store. Clean and prime it exactly as you would your wall.
Then, paint sections with your top 2-3 finish and color choices. Let it dry completely. Move this sample board around the room at different times of day.
See how the color and texture look in your actual light.
This small investment of time and money eliminates guesswork. It turns abstract brick wall painting inspiration into a tangible, confident decision you can see and touch right in your own space. That’s how you get a result you’ll love.