Simple Pink Wall Painting Ideas for a Fresh, Stylish, and Modern Home
Let’s be honest. You go looking for simple pink wall painting ideas, you end up with a hundred photos of flawless rooms and zero practical advice. They don’t tell you why the pink you loved in the store looks orange on your wall, or why that beautiful matte finish shows every fingerprint.
It’s frustrating.
The core issue isn’t the color itself, it’s understanding how light, undertone, and finish work together. As of 2026, the most common mistake is picking a paint based on a small swatch without testing it in the room. Let’s fix that by starting with what really matters.
Quick Answer
Here are the simplest, most effective pink wall painting ideas. First, use a single bold accent wall. Second, paint clean, taped-off geometric shapes or stripes.
Third, add subtle texture with a sponge or rag. Always test your chosen pink on the wall in natural and artificial light first. Pink’s undertone changes dramatically with light.
Choose an eggshell or satin finish for durability and ease of cleaning in most living spaces.
Why Picking Pink Is Harder Than It Looks
Most people think picking a pink is just about choosing a shade you like. The real challenge is that pink is a chameleon. It’s not a primary color.
It’s a tint of red, which means its appearance is entirely dependent on its underlying color bias, or undertone.
A pink can lean peach, red, blue, or even brown. The same pink paint will look completely different in a north-facing room with cool light versus a south-facing room flooded with warm afternoon sun. This is why that perfect “blush” swatch can turn aggressively peachy or strangely purple on your actual wall.
Aggregate feedback from painters and DIYers consistently points to undertone confusion as the number one reason for repainting. The good news is, once you learn to see the undertone, you can control the result. It’s the single most important skill for getting pink right.
First, Find Your Pink’s Undertone (This Is the Secret)
Think of undertone as the hidden color whispering beneath the main pink. Identifying it is your secret weapon. It’s what makes one pink feel soft and calming and another feel vibrant and energetic.
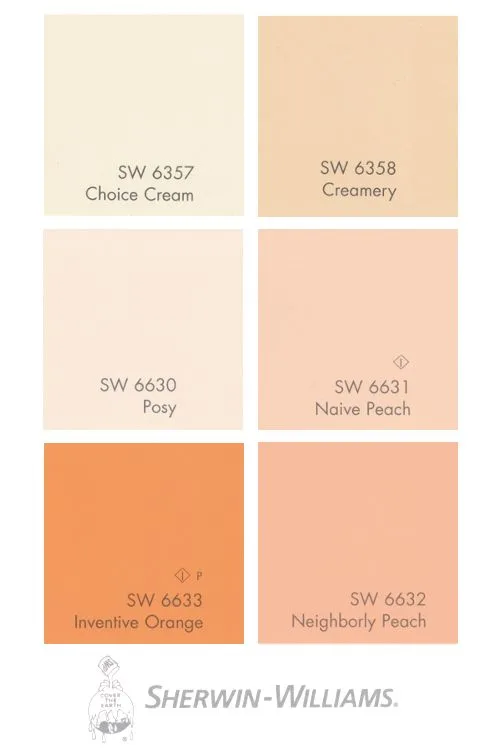
To find it, you need to look at colors in relation to each other. Never judge a swatch in isolation. Hold it against a pure white piece of paper or a bright white wall.
Does the pink start to look a little dirty, orangey, or brownish? That’s a warm (peach/red) undertone. Does it look a bit icy, purplish, or gray?
That’s a cool (blue) undertone.
Here’s how to use this knowledge in practice:
- Warm Undertones (Peach, Coral, Red): These pinks feel cozy, inviting, and sunny. They work brilliantly in north-facing rooms or spaces with little natural light because they add warmth. They also pair beautifully with wood tones, creams, and terracotta. A dusty rose with a red undertone is a classic for a sophisticated adult bedroom.
- Cool Undertones (Blue, Purple, Mauve): These pinks feel more serene, modern, and elegant. They excel in south-facing rooms that get lots of warm light, as they provide a balancing coolness. Think of the pink in a moody bedroom design, it often has a blue or mauve base that creates depth and calm.
- Neutral Undertones: These are the most forgiving. They have a balanced mix of warm and cool pigments, so they shift less in different lights. A neutral blush pink is a safe, beautiful choice for a main bedroom or living area if you’re unsure of your light.
The only way to be sure is to get a sample pot and paint a large two-foot square directly on your wall. Look at it at different times of day and under your room’s lighting. This small investment saves you from the cost and hassle of a whole wall you hate.
Sheen Isn’t Just Shine: Matching Finish to Your Room
The finish, or sheen, of your paint is about much more than gloss level. It dictates durability, cleanability, and how the color itself is perceived. A high-gloss pink will look more saturated and vibrant than the exact same color in a flat finish, which will appear softer and more muted.
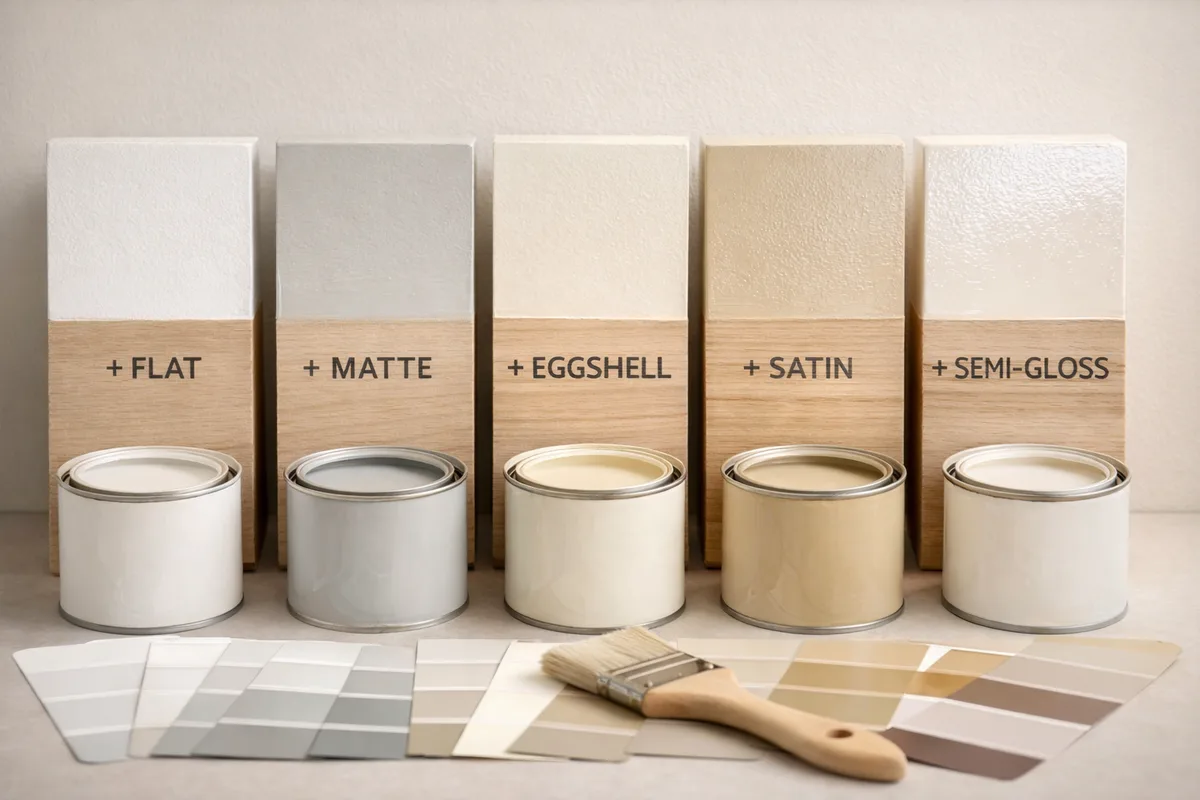
Each sheen reflects light differently and has a specific job. Choosing the wrong one is a common pitfall, especially with a noticeable color like pink. Here’s a breakdown to make the choice simple:
| Sheen | Look & Feel | Best For | Watch Out For |
|---|---|---|---|
| Matte/Flat | Velvety, no shine. Hides wall imperfections best. | Adult bedrooms, ceilings, low-traffic areas. Creates a soft, elegant look. | Not durable. Hard to clean without damaging the finish. |
| Eggshell | Very slight luster, like an eggshell. Good balance. | Living rooms, dining rooms, hallways. The most popular all-purpose choice. | Can show application flaws like roller marks if not applied evenly. |
| Satin | Gentle, pearl-like shine. More durable than eggshell. | Kids’ rooms, bathrooms, kitchens, trim. Great for a vibrant girly space that needs wiping. | Highlights any bumps or patches on the wall surface. |
| Semi-Gloss | Noticeable shine. Very tough and washable. | Trim, molding, doors, cabinets. Makes details pop. | Shows every single wall imperfection. Use only on very smooth surfaces. |
Our research into manufacturer specifications confirms that higher sheens have higher scrubability ratings, meaning they can withstand more cleaning. For a simple pink wall in a living space or bedroom, an eggshell or satin finish is almost always the right call. It provides enough durability for occasional cleaning without over-emphasizing texture.
The Simple Idea #1: The Bold Accent Wall
This is the simplest idea with the biggest payoff. You transform the feel of a room by painting just one wall. It’s less work, less paint, and less commitment than painting the entire room, but it creates an instant focal point.
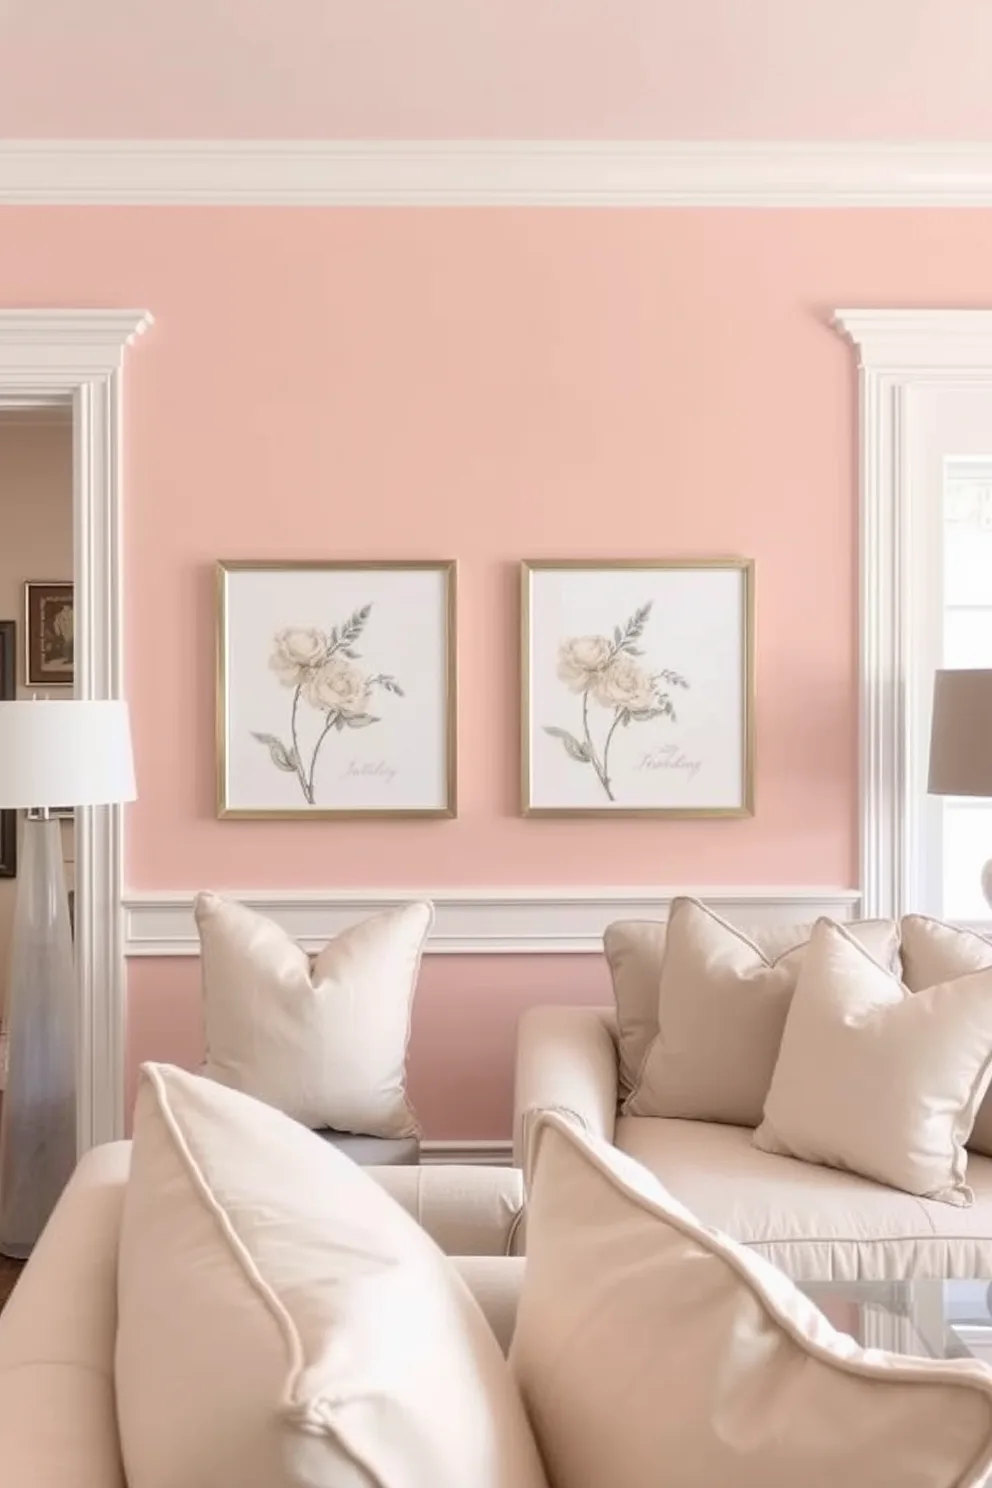
The key is choosing the right wall. Don’t just pick the one behind the bed or sofa by default. The accent wall should be the wall your eye naturally goes to when you enter the room.
Often, it’s the wall with the most interesting architectural feature, like a fireplace, built-in shelves, or the wall opposite the main entrance.
Here’s how to make it work with pink:
- Go Bold or Go Home: An accent wall is meant to stand out. Don’t pick a whisper-soft pink that barely reads. Choose a color with enough presence to define the space. A saturated dusty rose or a warm blush can be stunning.
- Anchor the Room: Use your pink accent wall to ground your furniture arrangement. In a bedroom, it’s the perfect backdrop for a dark wood bed frame. In a living room, it can make a neutral sofa and artwork pop. This concept of a defined focal point works in any style, from modern barndominium designs to classic homes.
- Consider the Adjacent Walls: The other three walls should be a complementary neutral. A crisp white, a warm off-white, or a very light gray will make your pink pop without fighting it. This contrast is what makes the idea “simple”, you’re only dealing with one complex color.
This approach is perfect for renters or anyone who wants a dramatic change without overwhelming a space. It’s also a great way to experiment with a pink you love but might be nervous to use everywhere.
The Simple Idea #2: Framed Color Blocks or Stripes
If an entire accent wall feels like too much, breaking the pink into defined geometric shapes is a fantastic middle ground. This technique adds modern graphic interest without the full-wall commitment. It feels intentional and designed, yet the process is straightforward with careful taping.
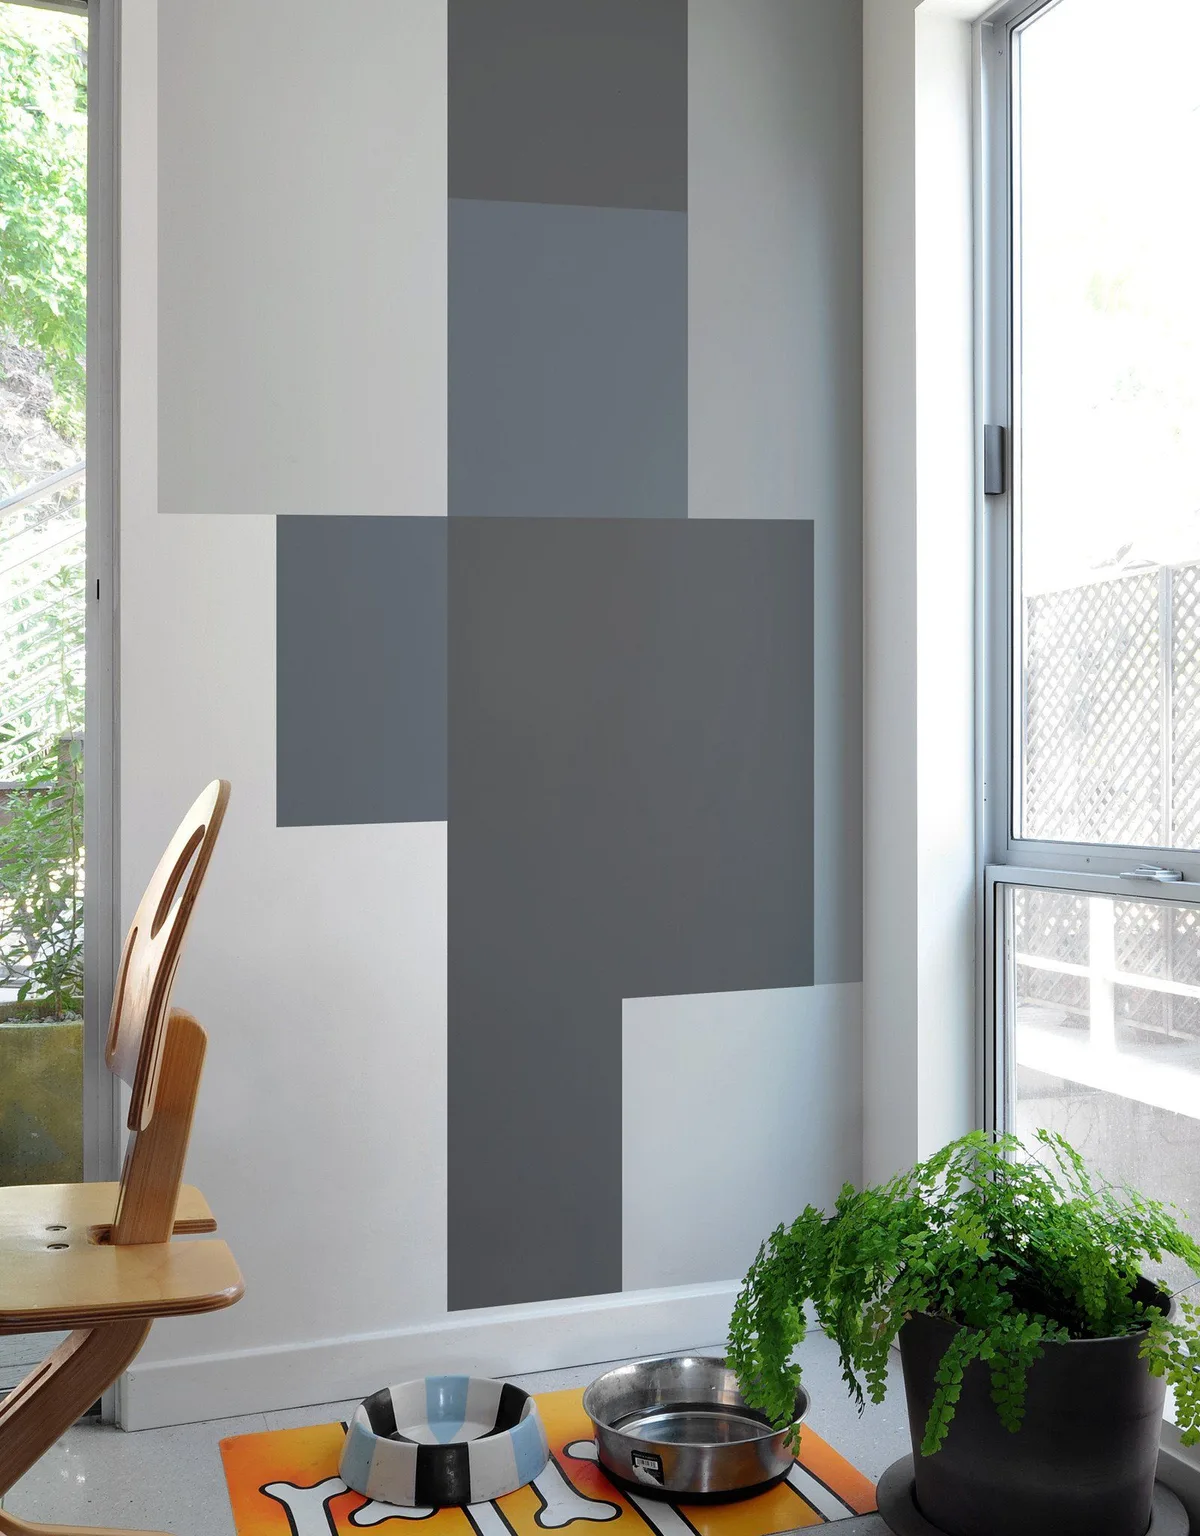
The concept is simple: you paint crisp, taped-off sections of pink against a neutral wall color. Think of it as creating large, flat artwork directly on your wall.
How to Plan Your Color Blocks:
- Start Simple: A large rectangle behind a bed’s headboard, or a vertical stripe from floor to ceiling beside a doorway, has huge impact.
- Use Painter’s Tape for Sharp Lines: This is non-negotiable. Use a high-quality tape designed for crisp edges. Press the tape down firmly along its entire length to prevent paint from bleeding underneath.
- Seal the Tape: For the absolute sharpest line, take a tiny bit of your base wall color (the color you’re painting over) and paint it lightly along the taped edge. This seals any tiny gaps. Let it dry, then paint your pink over it. When you peel the tape, you’ll have a perfect edge.
Where It Works Best: This idea is incredibly versatile. It can make a child’s room feel playful, add architectural interest to a bland rental, or create a striking backdrop in a home office or creative space. The scale can be adjusted to fit any room size.
The Simple Idea #3: Subtle Texture with Sponging or Ragging
Maybe you love the idea of pink but want a more organic, layered look than a flat wall of color. This is where textural techniques like sponging or ragging come in. They create visual depth and movement, perfect for achieving a cozy, earthy moody feel or a soft, romantic vibe.
These techniques involve applying a top glaze coat in a pattern over a solid base coat. It sounds fancy, but it’s one of the easiest faux finishes to master.
The Basic Two-Coat Process:
- Base Coat: Paint your entire wall with your chosen pink. Let it dry completely. This is your dominant color.
- Glaze Coat: Mix a glaze medium (available at paint stores) with a second color. This second color is usually a slightly darker or lighter shade of your base pink, or a complementary neutral like a soft taupe or cream. The glaze thins the paint and extends the working time.
- Apply the Texture: For sponging, dip a natural sea sponge into the glaze, blot off the excess, and gently pounce it onto the wall in a random pattern. For ragging, crumple a clean, lint-free rag, dip it in the glaze, blot, and press and twist it onto the wall. The key is to work in small sections and keep the application light and varied.
The result is a beautiful, mottled effect where the base color shows through. It’s forgiving, if you don’t like a section, you can blend it out while the glaze is still wet. This technique is ideal for hiding minor wall imperfections and adding a custom, artisanal touch that feels far from a basic paint job.
What You’ll Need: The Realistic Shopping List
You don’t need a professional painter’s kit, but having the right tools makes the job faster and the results better. Here’s a no-fuss list for a simple pink wall project.
Paint & Prep:
- Paint: 1-2 gallons (One gallon covers ~350-400 sq ft. Measure your wall: height x width to get square footage). Get a quality interior paint in your chosen pink and sheen.
- Primer: 1 quart or gallon. Needed if you’re painting over a dark color, a glossy surface, or new drywall. A stain-blocking primer is essential if covering any marks or stains.
- Painter’s Tape: 1-2 rolls of high-quality edge-locking tape (like FrogTape). Cheaper tape often bleeds.
- Drop Cloths: Canvas or heavy-duty plastic to protect floors and furniture.
- Spackle & Sandpaper: For filling nail holes and smoothing imperfections. A sanding sponge works well.
Tools for Application:
- Brushes: A 2-inch angled sash brush for “cutting in” edges (painting along trim, ceilings, and corners).
- Roller Frame & Sleeves: A 9-inch roller frame with a medium-nap roller sleeve (3/8 inch) for smooth walls, or a thicker nap for slightly textured walls.
- Roller Tray & Liners: A sturdy tray and disposable plastic liners make cleanup a breeze.
- Paint Stir Sticks: Several, for stirring paint thoroughly.
- 5-in-1 Tool: For opening paint cans, scraping drips, and other quick fixes.
Safety & Cleanup:
- Ventilation: Open windows, use fans.
- Safety Glasses & Gloves: To protect from drips and splatters.
- Rags & Water/Bucket: For wiping drips and cleaning tools if using water-based (latex) paint.
Your Pre-Paint Prep: The Non-Negotiable Steps
Skipping prep is the single biggest mistake DIY painters make. The time you spend here directly determines how professional your pink walls will look. Think of it as building a perfect canvas.
Step 1: Clear and Protect the Room
Move all furniture to the center and cover it with drop cloths. Cover the floor completely, extending the cloths a few inches up the baseboard. Remove outlet and switch plate covers.
Step 2: Clean and Repair the Walls
Wipe down walls with a damp sponge to remove dust and grease. Fill any holes, dents, or cracks with spackle. Once dry, sand the patches smooth and sand any glossy areas lightly to help the new paint adhere.
Wipe away all sanding dust with a tack cloth.
Step 3: Tape Everything Off
Apply painter’s tape to protect trim, ceilings, windows, and adjacent walls. Take your time. Press the tape down firmly with a putty knife or your fingernail to ensure a tight seal.
This step is crucial for the clean lines of an accent wall or color block.
Step 4: Prime (If Needed)
If your walls are dark, stained, or you’re painting new drywall, apply a coat of primer. It ensures true color and even coverage. Let it dry according to the manufacturer’s instructions.
A Foolproof Painting Process (No Streaks, Promise)
Now for the satisfying part. Following a logical order prevents streaks, lap marks, and frustration. This method, often called “cutting in and rolling,” is the professional standard.
Step 1: Cut In the Edges
Using your angled brush, paint a 2-3 inch band along all the edges where your roller can’t reach. This includes the ceiling line, corners, and around trim and outlets. Don’t worry about being super neat here, just get paint along the edge.
Step 2: Load and Roll in Sections
Pour paint into your tray. Load the roller evenly, then roll it back and forth on the ribbed part of the tray to distribute the paint. On the wall, paint in a “W” or “M” pattern about 3 feet wide, then fill it in without lifting the roller.
This spreads the paint evenly.
Step 3: Keep a Wet Edge
Work in manageable sections (about 3 ft. x 3 ft.), and always roll back into the area you just painted before the edge dries. This “feathering” blends the sections together seamlessly and prevents visible lines.
Step 4: Apply the Second Coat
Let the first coat dry completely (check the can for timing, usually 2-4 hours). Then, apply a second coat using the exact same technique. Two thin coats are always better than one thick, streaky coat.
They ensure rich, uniform color.
Step 5: The Tape Trick
Remove the painter’s tape before the final coat is fully dry. Pull it off at a 45-degree angle, slowly and steadily. If you wait until the paint is rock hard, it can peel off with the tape.
Common Pink Paint Pitfalls and How to Dodge Them
Even with the best plan, things can go sideways. Knowing these common issues lets you avoid them or fix them quickly.
- The Pink Looks Peach or Orange: This is an undertone and lighting issue. Your pink has a strong warm (yellow/peach) undertone that’s amplified in your room’s light. Fix: Repaint with a pink that has a cooler (blue) or more neutral undertone. Always sample first.
- Streaky or Patchy Coverage: This happens from over-rolling paint that’s starting to dry, using a cheap roller, or applying too little paint. Fix: Always maintain a wet edge, use quality tools, and don’t skimp on paint. A proper second coat usually fixes this.
- Paint Bleeds Under the Tape: Usually caused by low-quality tape, uneven wall texture, or not sealing the tape edge. Fix: Use premium painter’s tape. On textured walls, run a putty knife along the tape to seal it. The “seal with base color” trick described earlier is a pro’s secret.
- The Color Overwhelms the Room: You chose a pink that’s too saturated or cool for the space’s size and light. Fix: Soften it. If repainting entirely isn’t an option, balance it with lots of neutral elements, white bedding, light wood furniture, a large beige rug. A dusty pink is inherently softer and less dominant than a hot pink.
- Sheen Highlights Wall Flaws: You used a satin or semi-gloss on a textured or imperfect wall. Fix: For future projects, choose a flat or matte finish to hide flaws. For now, you can sometimes minimize the effect by ensuring lighting in the room is diffuse, not direct.
Budget, Timing, and What to Expect
Let’s talk realistic numbers and schedules. A simple pink wall project is affordable, but costs can vary.
Cost Breakdown (Approximate):
- Paint: $40-$70 per gallon for quality interior paint.
- Primer: $20-$40 per gallon.
- Tools & Supplies: $50-$100 (brushes, rollers, tape, drop cloths). This is a one-time investment.
- Sample Pots: $5-$8 each. Plan to buy 2-3.
For a single 10×12 foot accent wall, you’ll likely use less than a gallon of paint. A full room might need 2 gallons. Always buy a little more than you calculate for touch-ups later.
Timeline:
- Day 1: Prep (clearing, cleaning, taping, priming). 2-4 hours.
- Day 2: First coat of pink. 1-2 hours of work, then 4+ hours of dry time.
- Day 3: Second coat of pink, remove tape, light cleanup. 1-2 hours.
So, the actual hands-on work is 4-8 hours spread over a few days. Never rush drying times, it leads to tacky paint and ruined finishes.
Expert Tips for a Pro-Looking Finish
These small details separate a DIY job from a result that looks like you hired a pro.
- Use a Extension Pole: For walls, always use a roller on an extension pole. It lets you apply even pressure and cover large areas without straining, leading to a more consistent texture.
- Stir, Don’t Shake: Stir your paint thoroughly with a stir stick before and during use. Shaking a can introduces tiny air bubbles that can show up on your wall as bumps.
- Light from the Side: When painting, if possible, have your light source (a window or lamp) come from the side of the wall you’re painting. This casts shadows that instantly reveal any missed spots or uneven application.
- Box Your Paint: If you need more than one can of the same color for a project, “box” them. Mix all the paint together in a large bucket. This guarantees a perfect color match, as there can be slight variations between cans.
- Fix Drips Immediately: Keep a damp rag handy. If you see a drip or run, smooth it out with your brush or roller right away before it dries.
Making It Last: Touch-Ups and Care
Your beautiful pink wall will stay that way with minimal care. Quality paint in a durable sheen (eggshell or satin) is designed to last.
For cleaning, wait at least two weeks for the paint to fully cure. Then, use a soft sponge or cloth with warm water and a mild detergent. Gently wipe the area, don’t scrub aggressively.
Keep a small amount of your original paint for touch-ups. Store it in a sealed glass jar (like a mason jar) rather than the original can, which can rust. When touching up a small scuff, feather the edges of the new paint into the old with a small brush to help it blend.
Over time, if you want to change the mood, remember that pink is a fantastic base for many styles. Adding moody purple accents or deep blue furnishings can completely transform the space without repainting.
Frequently Asked Questions
What is the most popular pink for walls right now?
The trend leans towards soft, sophisticated pinks with neutral or cool undertones. Think “blush” or “dusty rose” rather than bright bubblegum. These shades feel adult, calming, and pair easily with other colors, making them a versatile choice for living rooms and bedrooms.
Can I paint a pink wall in a small room without it feeling smaller?
Absolutely. The key is to use a light-value pink (one with a high Light Reflectance Value, or LRV) and a matte or eggshell finish. Light colors recede, making walls feel farther away.
Avoid dark, saturated pinks in a tiny space, and ensure the room has good, diffuse lighting.
How do I choose between warm and cool pink undertones?
Look at the room’s fixed elements and light. If you have warm wood floors or brass fixtures, a warm pink will feel cohesive. If the room gets lots of warm afternoon sun, a cool pink will balance it.
In a north-facing room with cool light, a warm pink will add needed warmth. Always test a sample.
Is primer always necessary for painting over a white wall?
Not always. If your existing white wall is in good condition, is a flat or eggshell finish, and is a similar color tone, you can often get away with two coats of your new pink. However, primer is mandatory if you’re covering a dark color, stains, glossy paint, or patching new drywall.
It ensures adhesion and true color.
How long should I wait to hang pictures or shelves after painting?
For best results, wait at least two weeks for the paint to fully cure and harden. Before that, the surface can still be slightly soft and tape or hardware can pull the paint off. If you must hang something sooner, use extreme care and be prepared for possible touch-ups.
What colors go well with pink walls?
Pink is surprisingly versatile. It creates beautiful harmony with other neutrals: crisp white, charcoal gray, warm beige, and black. For a more colorful scheme, it pairs wonderfully with sage green, navy blue, terracotta, and muted gold.
The undertone of your pink will guide the best pairings, cool pinks with cool colors, warm pinks with warm colors.
Expert Tips for a Pro-Looking Finish
Pay attention to the smaller details that make a wall look professionally done. The edge work, the texture, and the light all play a part.
Use an extension pole for your roller. It lets you apply even pressure across the entire wall without straining. This prevents the common issue of a darker, heavier texture at the bottom where you stand.
Keep a damp rag and a dry brush handy. If you see a drip or a run, wipe it gently with the rag and then feather the edge with the dry brush. Fixing mistakes while the paint is wet is far easier than sanding and repainting later.
Always paint from dry into wet areas. This blends the paint seamlessly and avoids visible lap marks. Work in small, manageable sections to maintain that crucial wet edge.
Making It Last: Touch-Ups and Care
Let the paint cure fully before you subject it to daily life. While it may feel dry to the touch in hours, it takes about two weeks to fully harden. Avoid washing the wall or leaning furniture against it during this time.
For cleaning, use a soft sponge and a mild soap solution. Gently wipe the area. Abrasive scrubbers or harsh chemicals will damage the finish and dull the color.
Keep a small jar of your paint for future touch-ups. Store it in a sealed glass container to prevent rust and skinning. When touching up a scuff, paint a small, feathered area rather than just a dot, which can be more noticeable.
FAQ: Your Quick-Answer Corner
Here are direct answers to the most common final questions.
Can I paint over a dark wall with pink without primer?
You cannot. A dark color will bleed through and distort your pink, making it look muddy. A high-quality stain-blocking primer is a mandatory first step.
It creates a neutral, uniform base so your pink shows up true and vibrant.
How do I clean my brushes and rollers after using pink paint?
For water-based latex paint, clean tools immediately with warm, soapy water. Rinse until the water runs clear. For oil-based paint, you’ll need mineral spirits or paint thinner.
Proper cleaning preserves your tools for the next project.
What’s the difference between a pink accent wall and a feature wall?
The terms are often used interchangeably. Technically, an accent wall is defined by color, while a feature wall can be created with color, texture, materials like wood or stone, or wallpaper. A pink painted wall is an accent wall that also serves as a feature.
Is pink a good color for a home office?
Yes, especially softer pinks. Research into color psychology suggests certain pinks can have a calming effect, which is beneficial for focus. A dusty rose or blush can feel more sophisticated and less distracting than a bright primary color.
How do I choose pink for a nursery that will grow with the child?
Opt for a timeless, neutral-leaning pink rather than a trendy pastel. Pair it with furniture and decor in classic neutrals like white, gray, or natural wood. As tastes change, you can update the room by swapping out accessories, not repainting.
What if I hate the pink after I paint the whole room?
Don’t panic. Paint is one of the easiest things to change. You have two main options.
First, you can repaint with a new color, using primer to cover the pink. Second, you can embrace it and try to balance it with a strong neutral on other elements, like a large area rug or curtains, to tone it down visually.
Your Next Steps: Putting It All Together
You now have the knowledge to avoid the common pitfalls. The path forward is clear. Start by identifying your room’s light and fixed elements.
Then, get samples of two or three pinks that fit the undertone profile you need.
Paint those large test patches. Live with them for a full day. Look at them in the morning light, the afternoon sun, and under your room’s lamps at night.
This step is non-negotiable and saves you time, money, and regret.
Once you’ve chosen your winner, follow the prep and painting process outlined here. With the right tools and a methodical approach, you’ll have a beautiful pink wall that looks intentional and professionally done. It’s a simple update with a powerful impact on your space.