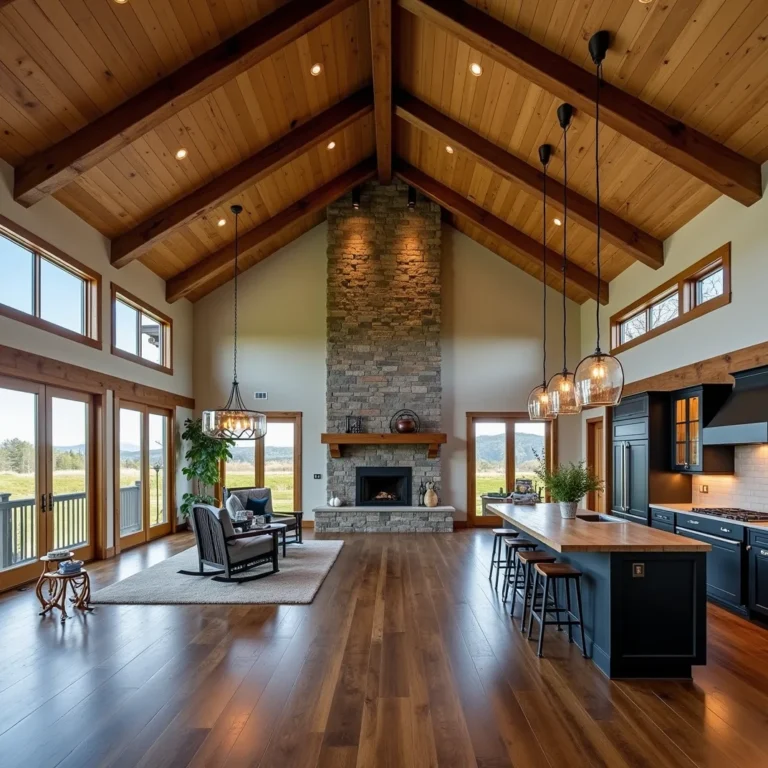
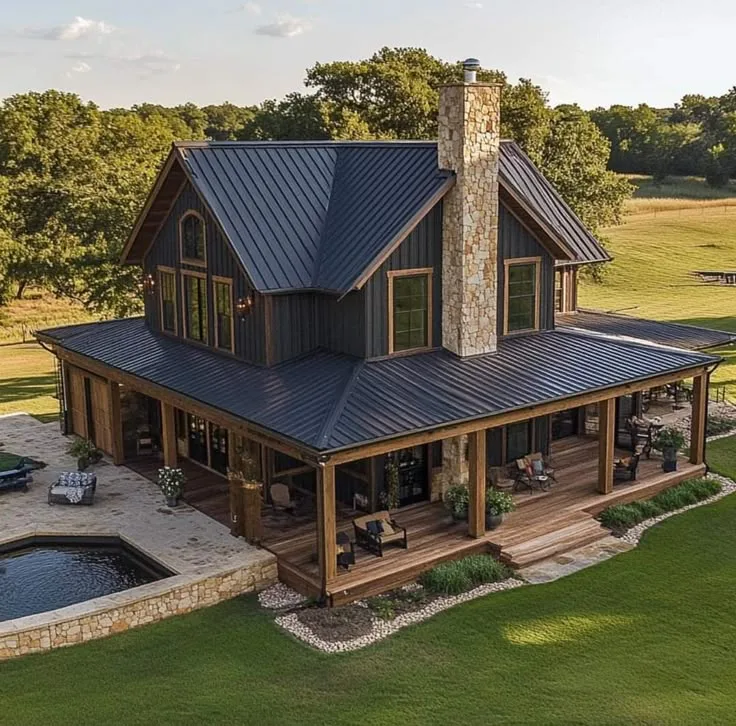
Cheap Barndominium Ideas: Budget-Friendly Ways to Build a Stylish Home
So you’re dreaming of a barndominium but your budget is giving you nightmares. We get it. The idea of a spacious, custom home with a massive workshop attached sounds expensive, but that’s where cheap barndominium ideas come into play.
This isn’t about cutting corners on safety or quality. It’s about smart design, strategic material choices, and knowing exactly where your money goes to maximize every dollar.
The biggest savings come from starting with a pre-engineered metal building kit, which can cut your shell cost to as low as $20-$40 per square foot. That’s a fraction of traditional stick-built construction. From there, your interior finishes and DIY ambition determine the final price.
Let’s break down how to make it happen without breaking the bank.
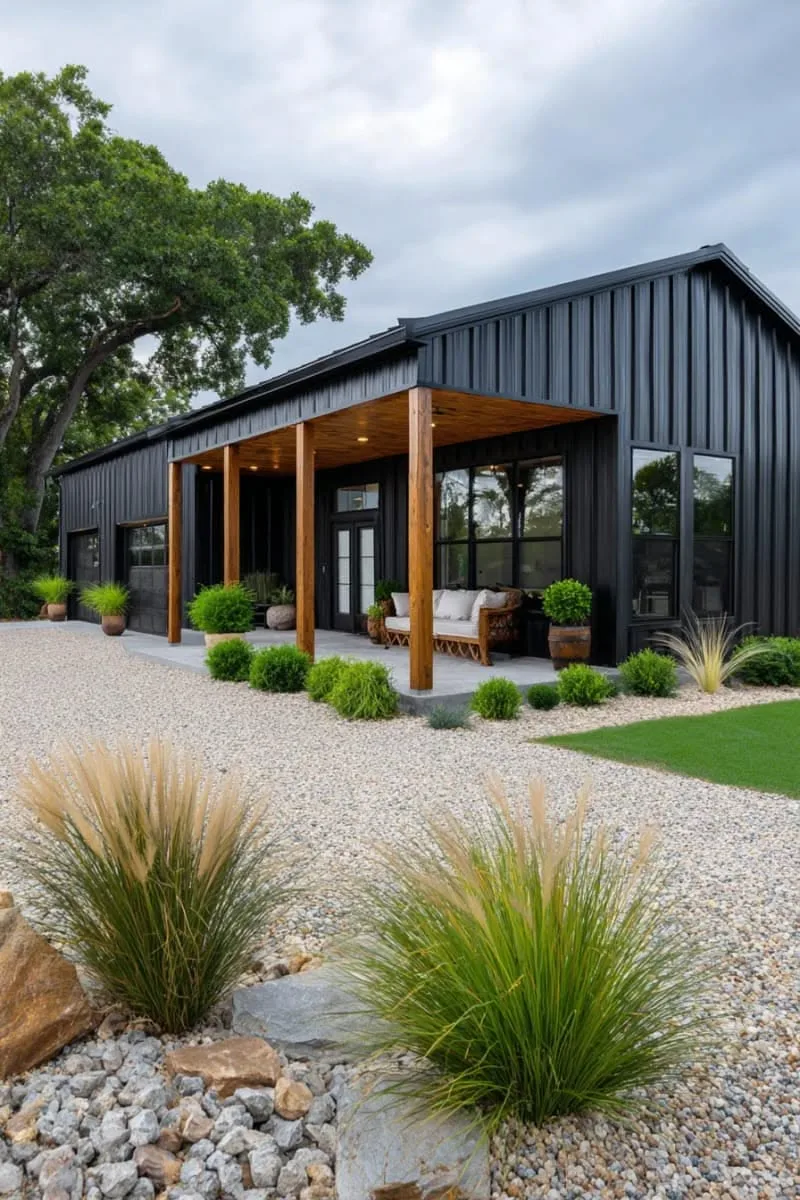
Image source: Web (Bing) / pinterest.com (Web image (fair-use with source credit))
Quick Answer
Focus on a simple rectangular or square floor plan to minimize construction costs. Choose a shell-only metal building kit and handle the interior finish work yourself. Use an open concept layout to reduce interior walls.
Opt for budget-friendly materials like polished concrete floors and repurposed wood accents. Prioritize a loft space for sleeping instead of a full second story to save significantly on build-out costs.
Why Barndominiums Are a Smart Choice for Budget Builders
Let’s clear something up first. A barndominium isn’t just a fancy barn. It’s a type of home built using post-frame construction, which means large, widely spaced posts support the roof.
This method creates massive, open interior spaces without the need for numerous load-bearing walls. That open concept isn’t just trendy; it’s a huge money-saver. You’re using fewer materials for framing and drywall right from the start.
The real financial advantage comes from the building envelope itself. Erecting the metal shell and roof is incredibly fast compared to traditional framing. This speed translates directly into lower labor costs, especially if you’re working with a contractor on a timeline.
Furthermore, these structures are notoriously durable and low-maintenance. You won’t be repainting siding every few years or worrying about rot. That’s a long-term saving that makes the initial investment even smarter.
For more on creating a cohesive look in large, open spaces, explore our ideas for an earthy moody bedroom.
The Single Biggest Cost-Saver: Start With a Shell
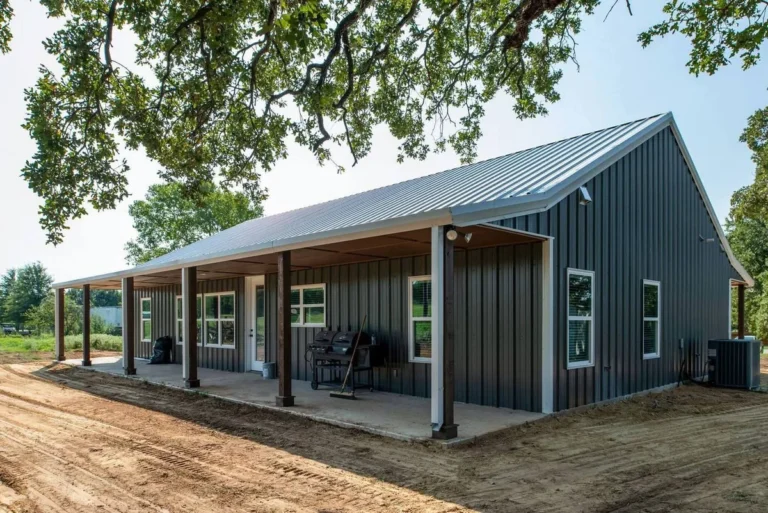
If you remember one thing from this guide, make it this. The most effective way to build a cheap barndominium is to buy a “shell-only” package and become your own general contractor for the interior finish work. This approach puts you in control of the budget and lets you phase the project as money is available.
A shell-only kit typically includes the structural steel frames, roof and wall sheeting, trim, and all the necessary fasteners. What it doesn’t include is the concrete slab, the installation labor, or any of the interior work, that’s all on you. This is where the DIY spirit pays off big time.
You can subcontract out the parts you’re uncomfortable with (like pouring the foundation or electrical work) and handle the rest yourself.
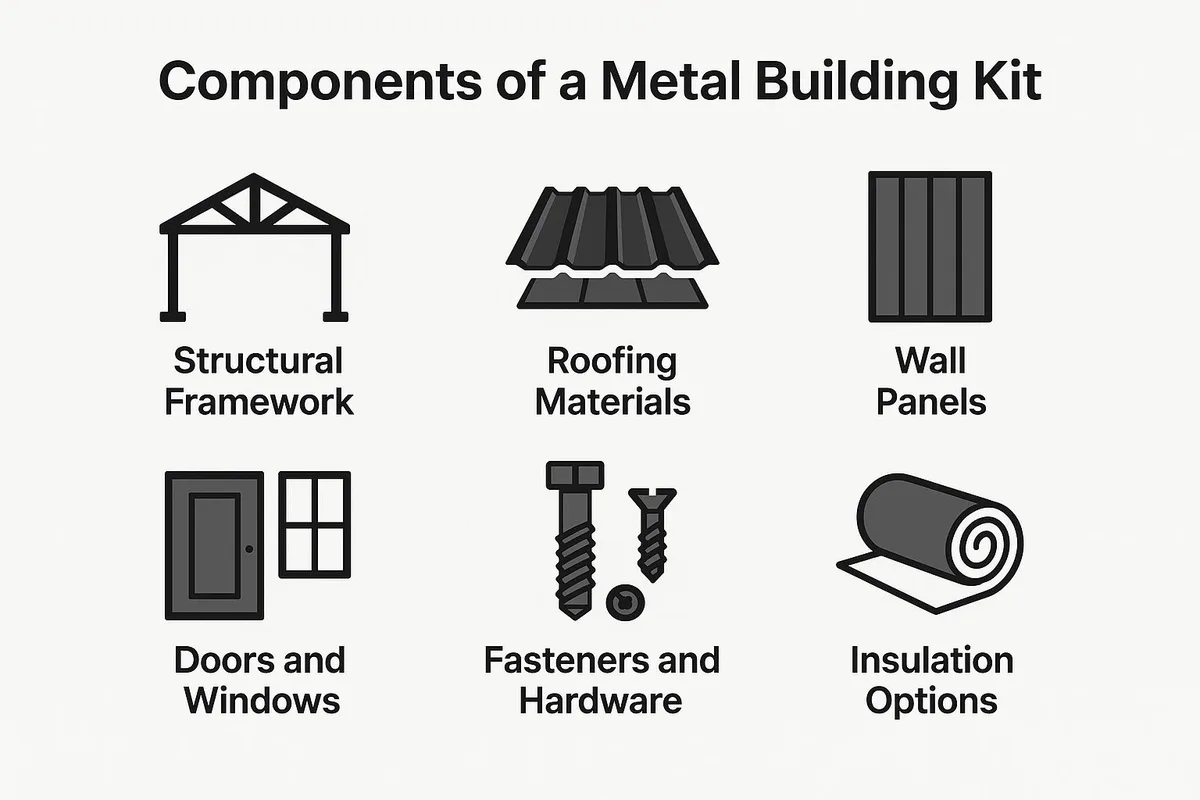
Image source: Web (Bing) / steelbuildingszone.com (Web image (fair-use with source credit))
What a “Shell-Only” Kit Actually Includes
It’s crucial to know what you’re buying. While specifics vary by manufacturer, a standard shell package generally covers:
- Primary and Secondary Structural Framing: The main columns, roof trusses, and supporting girts and purlins.
- Roof and Wall Sheeting: The corrugated metal panels that form the exterior.
- Trim and Flashing: All the pieces that finish the edges and keep water out.
- Fasteners and Hardware: Every bolt and screw needed to assemble it.
- Delivery: It’s usually shipped to your build site on a flatbed truck.
Where Your DIY Skills Make the Biggest Impact
Your budget will thank you if you can tackle these interior tasks yourself. The highest ROI for DIY labor is in:
- Insulation: Installing batt insulation or, better yet, closed-cell spray foam yourself can save thousands. Proper insulation is non-negotiable for comfort in a metal building.
- Interior Framing: Building non-load-bearing interior walls for rooms like bathrooms and bedrooms is straightforward carpentry.
- Hanging Drywall: This is labor-intensive but very achievable for a determined DIYer.
- Flooring: Pouring and polishing a concrete slab is a professional job, but laying laminate, LVP, or even staining concrete is DIY-friendly.
- Painting and Trim Work: These finishing touches add character and are perfect for saving on contractor costs.
Visual Inspiration: Cheap Barndominium Floor Plans That Work
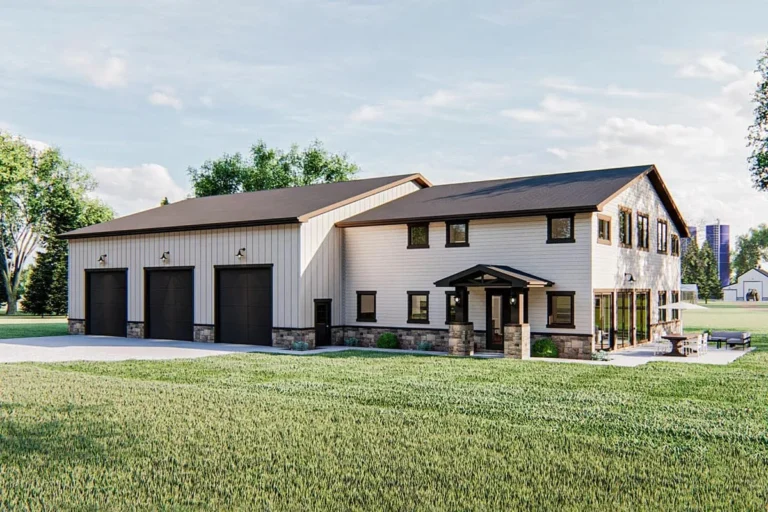
You don’t need a complicated design to have a beautiful home. In fact, simplicity is your best friend when building on a budget. The most cost-effective barndominium plans are basic rectangles or squares with a simple gable roof.
Every bump-out, angle, or dormer adds complexity and cost to the foundation, framing, and roofing.
The goal is to maximize the use of your square footage with a layout that requires minimal interior walls. This open flow feels modern and spacious while drastically reducing material and labor costs for framing and drywall. Think of the main living area as one great room that blends the kitchen, dining, and living space.
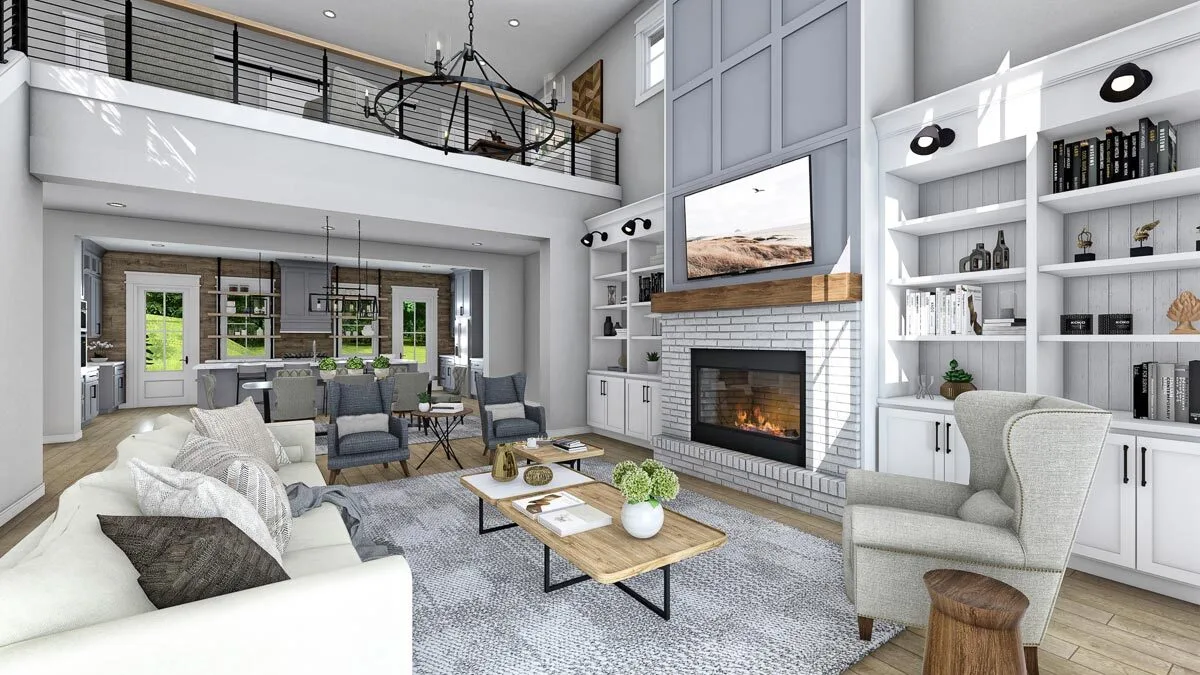
Image source: Web (Bing) / architecturaldesigns.com (Web image (fair-use with source credit))
The Efficient Single-Story Layout
A sprawling ranch-style barndominium is often the most budget-friendly option. You eliminate the cost of stairs, complex engineering for a second story, and additional plumbing stacks. Place all the wet walls (for the kitchen, bathrooms, and laundry) back-to-back to simplify plumbing and save on pipe runs.
Keep bedrooms and living areas on the perimeter for natural light. This layout is also ideal for single-level living as you age, making it a smart long-term investment.
The Money-Saving Loft Bedroom Design
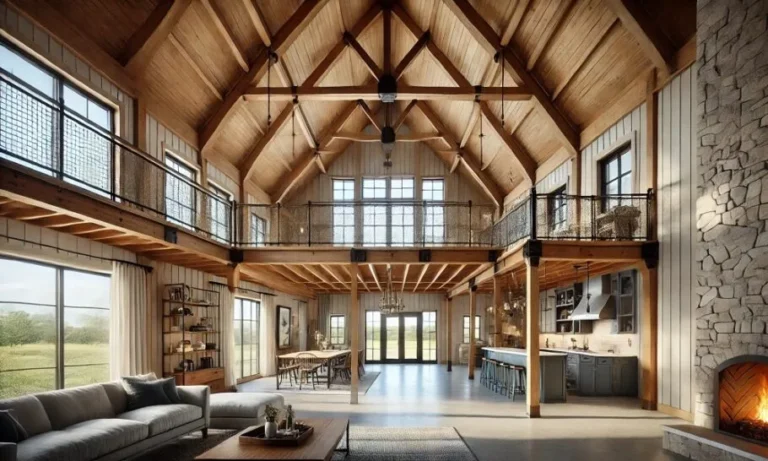
If you need more space but don’t want the expense of a full second story, a loft is your answer. By building a mezzanine or loft area overlooking the great room, you create a dedicated sleeping or office space without the full cost of a second floor. You’ll still need a code-compliant railing and stairs, but it’s far less expensive than framing entire rooms upstairs.
This approach leverages the vertical height of your barndominium, which is often a feature of the building kit itself.
Maximizing Your Shop or Garage Space
For many people, the whole point of a barndominium is the shop space. When planning your layout, consider how you’ll use the area. A simple, clear-span space is cheapest to build.
If you need to separate the shop from the living area, an insulated roll-up door is a more budget-friendly divider than a full wall. You can also use this area for storage or future expansion, keeping your initial build costs focused on the living quarters. This practical approach to space mirrors the functional yet stylish thinking behind a moody boho bedroom.
Smart Material Choices That Look Great for Less
Your material selections will make or break your budget. The key is to choose finishes that are inherently inexpensive but look intentional and stylish. This is where you can get creative and add real character to your home without a high-end price tag.
It’s about embracing the industrial nature of the building rather than fighting it.
Think texture and patina. Materials that would be a cost-add in a traditional home can be your baseline in a barndo. The goal is a cohesive look that feels warm and lived-in, not like a cold metal shed.
This often means mixing materials, like sleek metal with warm wood, to balance the overall aesthetic. For other rooms in your home, this same principle of balancing materials can create a unique moody purple bedroom vibe.
Why Polished Concrete Floors Are a Budget Win
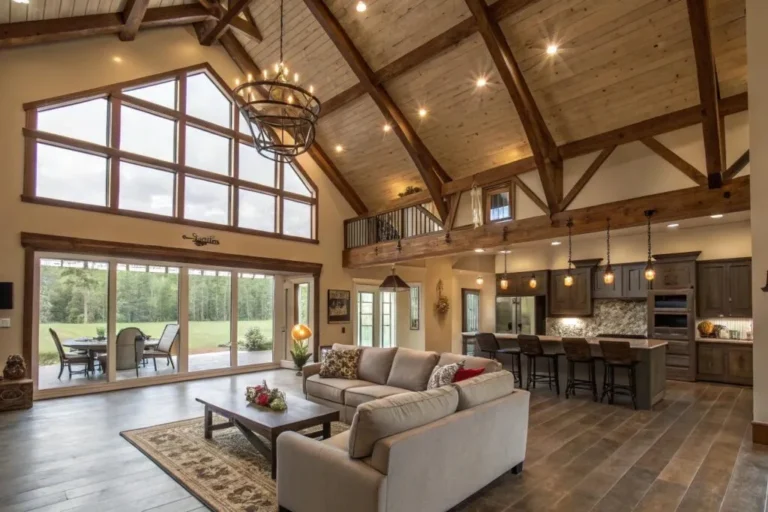
If you’re pouring a new concrete slab foundation, you already have your floor. Polishing and sealing that concrete is one of the most affordable and durable flooring options available. It costs a fraction of hardwood or tile and provides excellent thermal mass, helping to regulate the temperature inside your home.
You can stain it to add color or add area rugs to define spaces and add warmth. It’s a perfect example of a multifunctional material that saves money.
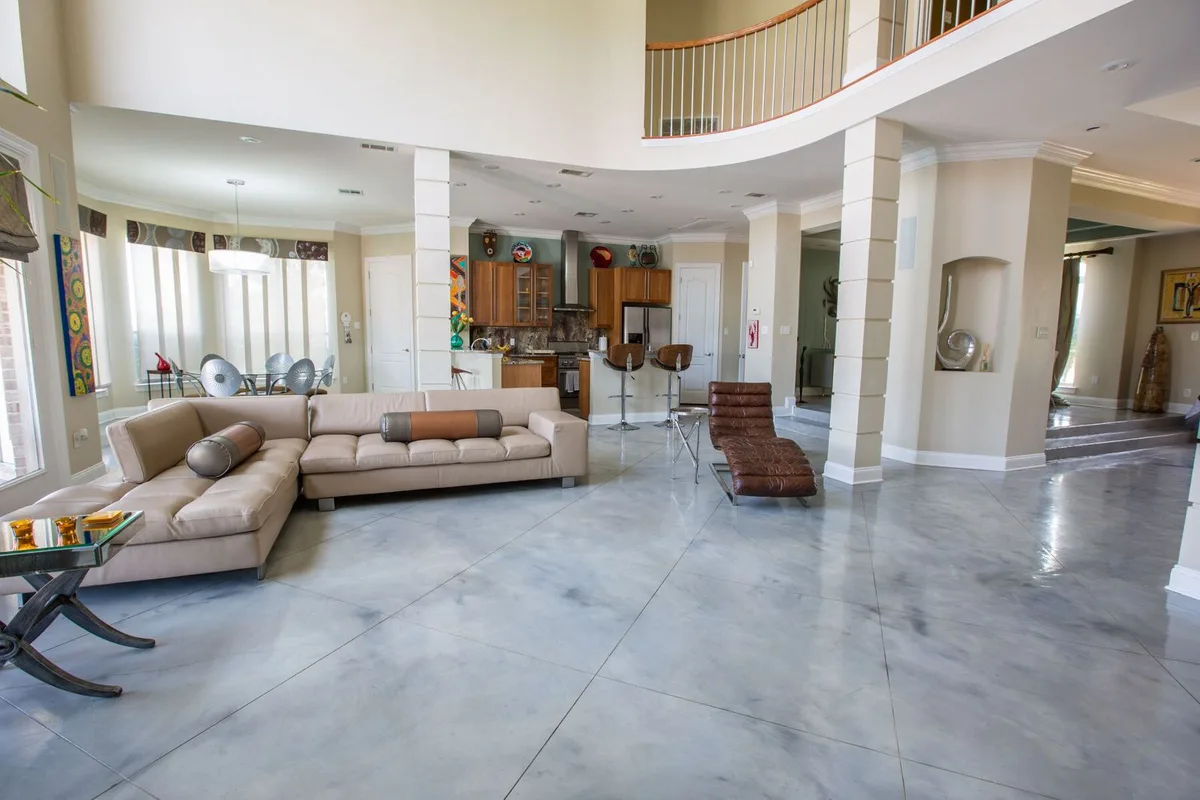
Image source: Web (Bing) / devmv.sling.com (Web image (fair-use with source credit))
Using Shiplap and Salvaged Wood as Accents
You don’t need to cover every wall in expensive wood. Instead, use it strategically as an accent. Shiplap is a relatively inexpensive material that adds instant texture and a farmhouse feel to a room.
Even better, use salvaged barn wood or pallet wood for a feature wall or to box in structural posts. This adds a story and warmth to the space for very little money. The contrast between the raw metal shell and warm wood accents is a hallmark of great barndominium design.
Choosing Siding and Roofing That Lasts
While your kit may come with standard options, your choices here impact long-term value. Standard corrugated galvalume steel is the most economical choice and is highly durable. For a more residential look, you can opt for ribbed metal panels or even add a porch with traditional wood framing.
Don’t skimp on the quality of your roofing and siding, it’s your home’s first defense against the elements. Investing in a good finish now prevents costly repairs later. This practical consideration is as important as the aesthetic ones, much like choosing the right bathroom false ceiling style for moisture resistance.
The Real Cost Breakdown: What You’ll Actually Spend
Let’s talk numbers. A cheap barndominium isn’t free, but understanding where the money goes helps you plan realistically. As of 2026, you can expect a wide range, but it all boils down to how much work you do yourself.
The biggest cost differentiator is the finish level. A shell-only kit might run you $20,000 to $40,000 for a 1,500 sq ft structure. But that’s just the beginning.
The finished cost includes site work, the foundation, insulation, utilities, and all interior finishes. This is where your budget can balloon if you’re not careful.
Shell Kit vs. Finished Square Foot Pricing
It’s helpful to break costs into two buckets: the shell and the finish-out.
| Cost Component | Low-End Estimate (DIY Focus) | High-End Estimate (Contractor Managed) |
|---|---|---|
| Shell Package & Erection | $20 – $40 per sq ft | $30 – $50 per sq ft |
| Site Prep & Foundation | $10,000 – $20,000 | $15,000 – $30,000 |
| Insulation & Interior Walls | $8,000 – $15,000 | $20,000 – $40,000 |
| Plumbing, Electrical, HVAC | $15,000 – $25,000 | $30,000 – $50,000 |
| Interior Finishes (flooring, cabinets, etc.) | $20,000 – $40,000 | $50,000 – $100,000+ |
| Total Cost (for 1,500 sq ft) | $130,000 – $180,000 | $250,000+ |
Note: These are rough estimates and vary drastically by region, material choices, and labor rates.
Where Most People Blow Their Budget (And How to Avoid It)
The budget killers are usually hidden in the details. First is site preparation. If your land needs extensive grading, rock removal, or a long driveway, costs can skyrocket.
Always get a professional site evaluation before you buy your kit. Second is change orders. Once the build starts, changing your mind on a window placement or a wall layout is incredibly expensive.
Finalize your plans and stick to them.
The third major budget-buster is underestimating the mechanical systems. While you can DIY framing and drywall, plumbing and electrical often require licensed professionals to meet code and ensure safety. Get multiple quotes for this work early in the process so you aren’t shocked later.
This kind of detailed planning is just as crucial as when designing a specialized space like a gaming room false ceiling with integrated lighting.
Financing a Non-Traditional Build
This is often the biggest hurdle. Most big banks are hesitant to finance a barndominium because they aren’t considered “traditional” homes, which makes them harder to resell. This can affect their appraisal value.
You’ll have better luck with local credit unions or community banks familiar with rural properties and construction loans.
Another route is builder financing. Some metal building companies offer their own financing programs. You can also consider a land loan or using equity from another property.
Be prepared to have a larger down payment and more detailed construction plans than you would for a tract home. The lender will want to see exactly where their money is going.
Navigating Zoning, Permits, and Building Codes
Before you fall in love with a design, you need to make sure you can legally build it. This isn’t the fun part, but it’s absolutely critical. Zoning laws, building codes, and permit requirements vary wildly from one county to the next, even within the same state.
Your first call should be to your local county building department. Ask them three specific questions: Is a barndominium (or post-frame residential building) allowed on my property? What are the setback requirements from my property lines?
And what are the specific building code requirements for residential occupancy? Don’t assume anything. Getting this info upfront prevents costly mistakes and delays later.
For any building project, understanding the rules is as fundamental as knowing the principles behind a hospital false ceiling design for safety and functionality.
How to Talk to Your Local Building Department
Be clear and direct when you speak with officials. Describe your project as a “post-frame home” or “steel-framed residence” rather than just a “barndominium,” which can sometimes carry a non-residential connotation. Bring a rough sketch of your planned layout and site plan.
Showing you’re prepared and serious goes a long way. They’re not there to block your dream; they’re there to ensure it’s built safely and to code.
Key Code Requirements You Can’t Ignore
While your kit manufacturer will provide engineering for the shell, the interior must meet all residential building codes. This includes:
- Minimum Room Sizes: Especially for bedrooms and emergency egress from sleeping areas.
- Electrical and Plumbing Codes: All work must be permitted and inspected.
- Energy Code Compliance: This primarily revolves around your insulation’s R-value for your climate zone. Proper insulation is a non-negotiable for both comfort and code.
- HVAC Calculations: Your heating and cooling system needs to be properly sized for the space, which is crucial in a large, open area with high ceilings.
The Pros and Cons of a DIY Barndominium Build
Taking on a barndominium build yourself is a massive undertaking. It’s essential to weigh the advantages and disadvantages honestly before you commit.
The Pros:
- Significant Cost Savings: Labor is one of the biggest expenses in any build. Doing it yourself can save you tens of thousands of dollars.
- Total Control: You make every decision, from the layout to the finish details. There’s no compromising with a contractor.
- Personal Satisfaction: The pride of building your own home is an incredible feeling and a story you’ll tell for a lifetime.
The Cons:
- Time Investment: A DIY build will take significantly longer than a professional one. We’re talking months or even years of evenings and weekends.
- Steep Learning Curve: You’ll need to learn new skills constantly, and mistakes can be costly to fix.
- Stress and Fatigue: Managing a project of this scale while potentially working a day job is exhausting.
- Financing Challenges: As mentioned, lenders may be wary of a owner-builder project.
Where to Hire Pros vs. Where to Do It Yourself
A smart approach is to mix DIY with strategic hiring. Even the most seasoned DIYer should hire out a few key trades:
- Always Hire a Pro: Foundation/slab pour, major electrical panel work, and complex HVAC ductwork. These require specialized tools and licensing.
- Good to Hire a Pro: Roofing installation (for safety and warranty), drywall finishing (for a seamless look), and plumbing rough-in.
- Ideal DIY Projects: Interior framing, painting, trim work, flooring installation (like LVP), and cabinet assembly.
5 Common Mistakes That Inflate Your Budget
Learning from others’ errors is the cheapest way to build. Here are the most frequent budget-killers we see in barndominium projects.
- Underestimating Site Prep Costs: This is the number one surprise. Wetlands, rock, and a lack of utilities on the property can add $10,000 to $50,000 to your project before you even pour the slab. Always get a soil test and a site survey.
- Poor Insulation Planning: Trying to cheap out on insulation is a false economy. A metal building is a conductor of heat and cold. In our research, skimping here leads to monstrous heating and cooling bills that erase any upfront savings. Spray foam is expensive but often the most effective solution for the envelope.
- Overcustomizing the Initial Build: You can always add later. Focus your initial budget on the core structure and essential living spaces. That dream wraparound porch, custom built-ins, and elaborate landscaping can be phased in over time as funds allow.
- Not Planning for Water Management: Water is the enemy of any structure. Failing to plan for proper grading, gutter systems, and drainage can lead to foundation problems and moisture intrusion down the road, which are incredibly expensive to fix.
- Choosing the Wrong Windows: Windows are a major investment. The wrong size, poor quality, or incorrect placement can ruin your energy efficiency and aesthetic. Take your time selecting them, and prioritize quality over quantity.
Realistic Timeline: From Empty Lot to Moving In
A traditional contractor-built home might take 9-12 months. A barndominium timeline is different. If you’re managing it yourself while working another job, be realistic.
A full DIY build can easily take 18 to 24 months from purchasing the land to moving in.
Here’s a rough breakdown:
- Planning & Permits (1-3 months): Finalizing plans, securing financing, and getting permits.
- Site Prep & Foundation (1-2 months): Clearing, grading, and pouring the slab.
- Shell Erection (1-2 weeks): The kit goes up surprisingly fast.
- Weathering-In (1-2 months): Installing insulation, windows, doors, and roofing.
- Interior Rough-Ins (1-2 months): Running electrical, plumbing, and HVAC.
- Interior Finishing (3-6+ months): Drywall, flooring, painting, cabinets, and trim. This is the longest DIY phase.
- Final Inspections & Move-In (1 month): Getting the certificate of occupancy and moving.
Is a Barndominium Right For Your Lifestyle?
A barndominium isn’t for everyone. It’s perfect for someone who values wide-open spaces, has a hands-on DIY mentality, and perhaps needs a large workshop or garage. It’s ideal for rural settings where its style fits in naturally.
It might not be the best choice if you prefer traditional, compartmentalized home layouts, don’t enjoy maintenance projects, or are building in a strict suburban subdivision with homeowner association rules. The resale market can also be thinner, as it appeals to a specific buyer.
Think about your daily life. Do you love the sound of rain on a metal roof? Do you want to roll your ATV right into your garage?
Does the idea of polishing concrete floors excite you? If so, a barndominium could be your perfect affordable home.
Frequently Asked Questions
### How much does a basic barndominium cost to build?
You can expect to spend between $130,000 and $180,000 for a finished 1,500 sq ft barndominium if you act as your own general contractor and do a significant portion of the labor yourself. This price includes the shell kit, foundation, utilities, and basic finishes.
### Are barndominiums cheaper than regular houses?
Yes, generally. The shell itself costs less per square foot than traditional stick framing. The overall savings come from the faster erection of the shell and the potential for more DIY involvement.
However, the final cost is determined by your interior finish choices, just like a regular house.
### What is the most expensive part of building a barndominium?
The interior finish-out is almost always the most expensive phase. This includes insulation, plumbing, electrical, HVAC, drywall, flooring, cabinets, and appliances. These costs are similar to those of a standard home and can easily surpass the cost of the shell itself.
### Is it hard to get a loan for a barndominium?
It can be more challenging than getting a loan for a traditional home. Large national banks are often hesitant. Your best bets are local credit unions, community banks, or agricultural lenders who understand rural property and alternative building styles.
Be prepared with detailed plans and specs.
### Do barndominiums hold their value?
They can, especially in rural areas where they are desirable. Their value is closely tied to the quality of the construction and the interior finishes. A well-built, well-maintained barndominium on a good piece of property should appreciate similarly to other homes in the area.
### What’s the best way to insulate a barndominium?
Closed-cell spray foam insulation is widely considered the best option for the walls and roof deck. It provides a high R-value per inch, creates an airtight seal that blocks moisture, and adds structural rigidity. It is more expensive upfront but offers superior energy efficiency and comfort.
Your Next Steps: How to Start Planning
Ready to move from idea to action? Your first step is to get your finances in order. Talk to a lender about construction loan options and get pre-qualified.
This tells you exactly what budget you’re working with.
Next, find your land if you haven’t already. Consider access, utilities, and zoning. Then, start requesting quotes from metal building manufacturers.
Provide them with your basic dimensions and see what shell packages fit your budget.
Final Recommendation
A barndominium is one of the most cost-effective ways to build a custom home. The key is embracing a shell-first approach and being willing to put in sweat equity. Focus on a simple design, smart material choices, and phased finishing.
For the right person, it’s an incredibly rewarding project. You get a durable, low-maintenance home tailored exactly to your needs without a massive mortgage. Just go in with a solid plan, a realistic budget, and patience.