Balcony Wall Painting Design Ideas for a Stylish, Colorful, and Inviting Outdoor Space
That blank, forgotten wall on your balcony is prime real estate for a huge design upgrade. A well-planned balcony wall painting design can transform your outdoor space from a storage area into a personal retreat, adding serious character without a major renovation. It’s one of the most cost-effective ways to make your entire home feel more cohesive and inviting, especially when you’re looking out from inside.
The key is using the right stuff. This means 100% acrylic latex paint formulated for exterior use, with a satin or semi-gloss sheen for easier cleaning and better moisture resistance. These products, as of 2026, are engineered with additives for UV and mildew resistance, with a typical lifespan of 5 to 10 years before needing a refresh.
Let’s break down exactly how to get it right, from the paint can to the final brushstroke.
Quick Answer
Start with a plan for your balcony wall painting design. Choose a 100% acrylic latex paint made for exteriors. Prep the wall by cleaning and repairing it thoroughly.
Pick a satin or semi-gloss finish. It will handle weather better. Use painter’s tape for sharp lines on any patterns.
Always check your HOA rules and get landlord approval first.
First, Let’s Talk About What Makes Balcony Paint Different
Painting an outdoor wall isn’t the same as painting your bedroom. You’re not just picking a color. You’re choosing a protective barrier against a relentless set of elements.
The wrong paint will fail, and quickly.
The single biggest factor is the paint’s composition. For balcony walls, you need a 100% acrylic latex exterior paint. Think of it as a flexible, breathable skin for your wall.
The acrylic binder is what makes it flexible enough to expand and contract with temperature swings without cracking. It’s also what gives it superior adhesion to surfaces like concrete, stucco, and primed wood.
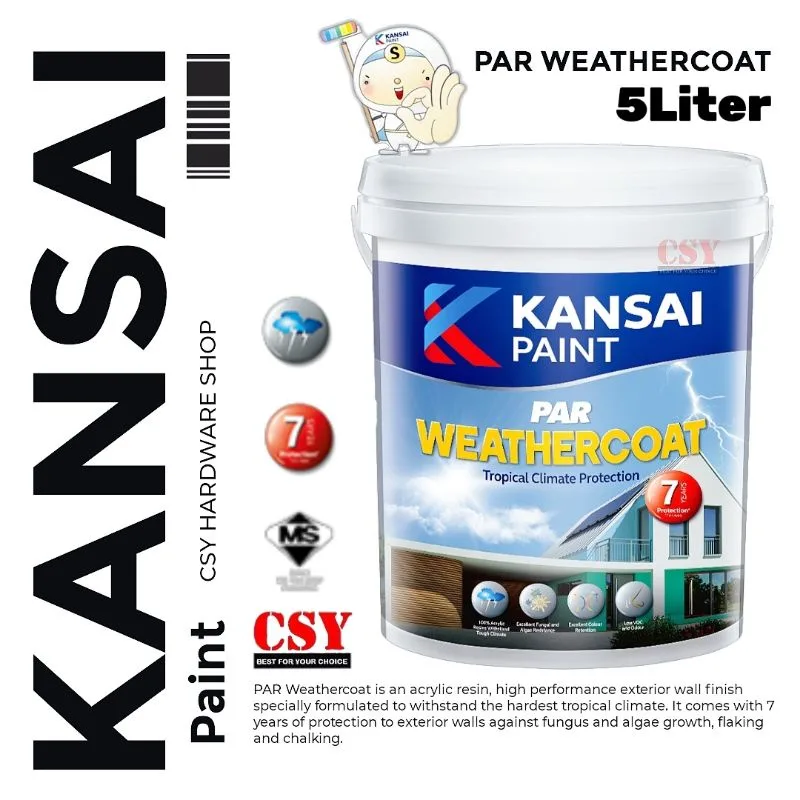
The sheen, or shine, is your next critical choice. This isn’t just about looks. It’s about durability and maintenance.
- Flat/Matte: Hides surface imperfections beautifully but absorbs dirt and moisture. It’s difficult to clean and not recommended for most balconies.
- Eggshell/Satin: The sweet spot for most projects. It has a soft luster, resists dirt better than flat, and is much easier to wipe down. It’s our go-to recommendation for a balance of aesthetics and practicality.
- Semi-Gloss/Gloss: The most durable and washable. It creates a hard, reflective surface that sheds water and dirt easily. The downside? It highlights every bump and flaw in the wall’s texture. Best for smooth surfaces or areas that will get filthy.
Beyond the base, these are the additives that matter:
- UV Resistance: Prevents the color from fading into a sad, washed-out version of itself after one summer. Higher-quality paints have more robust UV inhibitors.
- Mildewcide: A non-negotiable for any balcony that isn’t in full, all-day sun. It’s built into the paint to resist mold and mildew growth in damp, shady conditions.
- Water Repellency: Helps bead water away, which is crucial for walls that get hit by rain or sprinklers.
In our research of manufacturer technical data sheets, the coverage claim is a starting point, not a guarantee. A gallon might say it covers 400 square feet, but a rough stucco wall can cut that by 25% or more. Always buy 10-15% more than you calculate.
Why the Right Design Makes All the Difference (Even on a Small Wall)
You might think a small wall doesn’t need much thought. That’s exactly why so many balconies feel underwhelming. A deliberate design does three powerful things.
First, it creates a defined backdrop. Your balcony isn’t just floor space. It’s a three-dimensional volume.
A painted wall acts as the “fourth wall” of your outdoor room, giving the space boundaries and making it feel intentional. This is a core principle in making any compact area feel designed, whether it’s a cozy nook indoors or an exterior space.
Second, it controls perception. Color and pattern are your tools to play with scale. A light, cool color (like a soft grey-blue) can make the wall feel farther away, making the whole balcony seem a bit airier.
A dark, warm color (like a deep terracotta or charcoal) brings the wall forward, creating a sense of intimacy and enclosure, perfect for a cozy evening spot.
Third, it ties your look together. Your balcony wall is the largest visual plane out there. Use it to pull colors from your patio furniture, planters, or even the view from your living room.
This creates a seamless flow from inside to out, elevating your entire home’s aesthetic. It’s a trick often used in unified modern barndominium design to connect indoor and outdoor living areas.
Think of it as the largest piece of art you own. It sets the mood before you even step outside.
What You Need to Know Before You Pick a Color
Choosing a color from a tiny chip inside a store is a recipe for surprise. Outdoor light changes everything.
Natural light is much brighter and more complex than indoor lighting. It has a color temperature that shifts throughout the day, cool blue in the morning, neutral at noon, warm and golden in the evening. This dramatically affects how your paint color reads.
Here’s the non-negotiable step: buy sample pots. Paint a two-foot by two-foot section on the actual wall. Look at it in the morning, at midday, and in the late afternoon. See how it looks when the sun is directly on it and when it’s in shadow.
The color you love at 10 AM might look completely different, and possibly wrong, at 6 PM.
Consider your balcony’s exposure:
- North-facing / Shady: These walls get cool, indirect light. Warm colors (creams, warm greys, soft terracottas) can help counteract the chill and make the space feel warmer. Avoid cool blues or greys here, as they can feel icy.
- South-facing / Full Sun: These walls are blasted with warm, intense light. Cooler colors (grey-greens, slate blues, pale lilacs) can help balance the heat and feel refreshing. Dark colors will absorb massive heat, which can be tough on the paint film and make the area radiate warmth.
- East or West-facing: You get a mix. East gets bright morning light, west gets the hot afternoon sun. Test your samples at the time of day you’ll use the balcony most.
Also, look at the fixed elements. What color is your railing? Your floor tile?
The siding on the building? Your chosen wall color needs to harmonize with these, not clash. A cohesive palette is key, much like ensuring your barndominium exterior design works with the landscape.
Your Balcony’s “Personality”: Which Design Style Suits Your Space?
Now for the fun part. Your design doesn’t have to be a single, solid color. A little strategy can turn that wall into a focal point.
Here are a few accessible approaches.
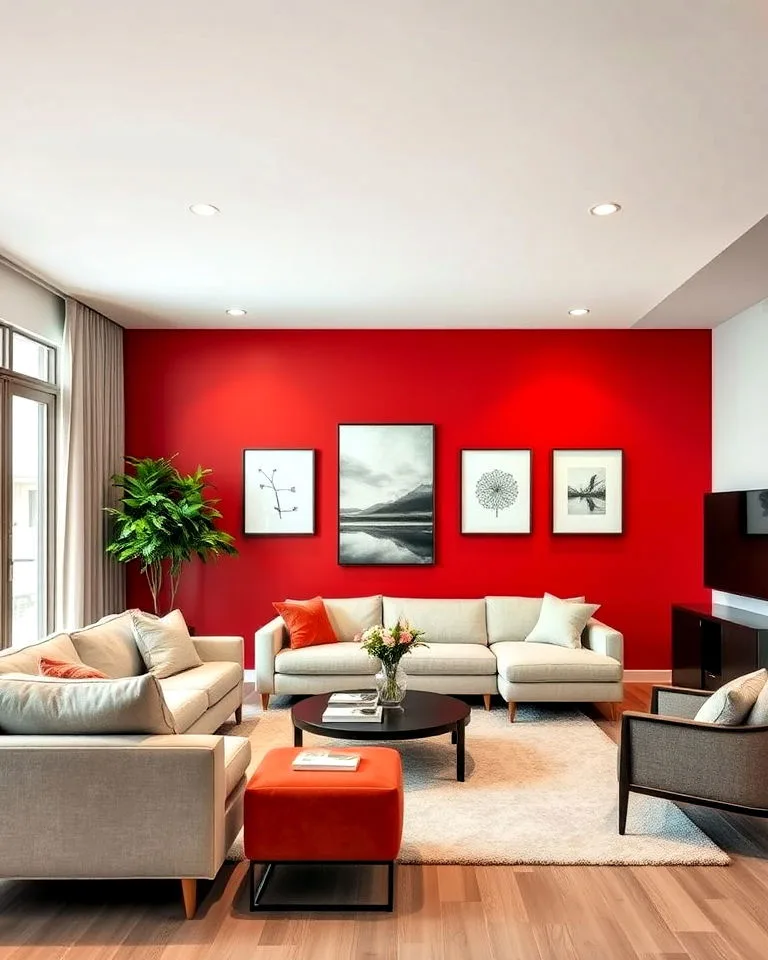
The Bold Accent Wall: This is the simplest high-impact move. Paint the entire wall one saturated, dramatic color. It’s confident, clean, and requires no fancy tape work.
Perfect for a modern, minimalist look or to showcase a piece of artwork or a vertical garden. Think deep navy, forest green, or a rich burgundy.
Geometric Patterns: Clean, graphic, and incredibly effective. This is where painter’s tape becomes your best friend.
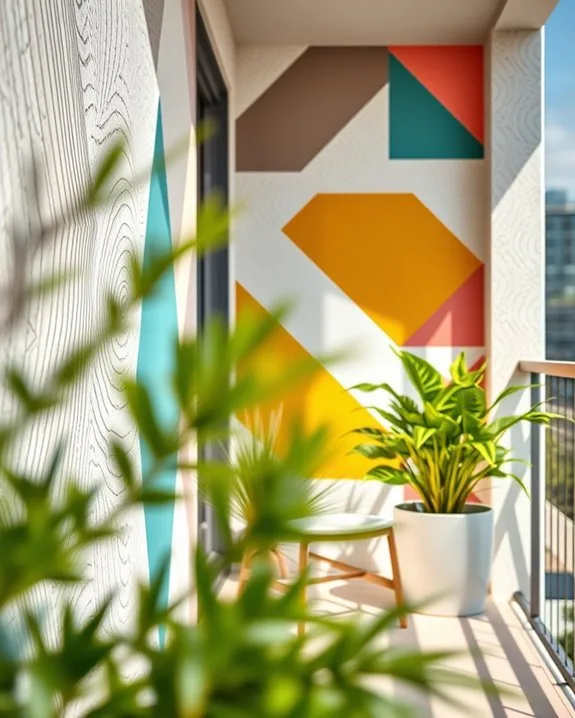
- Color Blocking: Create large, simple shapes like a horizontal band, a giant triangle from the corner, or staggered rectangles. Use two complementary colors or two tones of the same color.
- Stripes: Vertical stripes can make a low ceiling feel taller. Horizontal stripes can make a narrow balcony feel wider. Keep the stripes wide (8-12 inches) for a modern feel, not a candy-cane effect.
- Simple Shapes: Circles, half-circles, or arches are very on-trend and feel organic. Use a pencil tied to a string to sketch a perfect circle.
Texture & Faux Finishes: If you have a smooth wall, you can add visual texture. Techniques like sponge painting, rag rolling, or color washing add depth and movement. They’re more forgiving than perfect lines and can hide minor imperfections beautifully.
This approach can evoke a rustic, cabin barndominium decor vibe.
The Mural or Stencil: For the artistically inclined. A large-scale botanical stencil (ferns, palm leaves) or a simple graphic sunset can be stunning. Use a projector to trace a design or invest in a large, reusable stencil.
Keep the color palette simple, two or three colors max.
How do you choose? Match the design to how you use the space. A busy, vibrant pattern might be overwhelming for a zen reading nook.
A serene, solid color might be too boring for an energetic cocktail corner. It’s the same logic as selecting moody bedroom decor; the atmosphere should match the room’s purpose.
The Balcony Paint Toolkit: Must-Haves vs. Nice-to-Haves
You don’t need a garage full of professional gear, but skimping on the essentials guarantees a frustrating job and a subpar finish. Let’s separate the critical tools from the optional upgrades.
The Must-Have Kit:
- Paint: 100% Acrylic Latex Exterior paint (eggshell/satin sheen). Calculate your square footage and buy 10-15% extra.
- Primer: Exterior primer is non-negotiable if you’re painting over bare wood, metal, or a stained surface, or if you’re making a dramatic color change. A stain-blocking primer is key for covering water marks.
- Brushes: A high-quality 2-2.5 inch angled sash brush for “cutting in” around edges, railings, and corners. Don’t buy the cheapest one, good bristles hold more paint and leave fewer streaks.
- Rollers: A roller frame and a pack of roller covers with a 3/8-inch nap for smooth surfaces or a 1/2-inch nap for lightly textured surfaces like stucco. The nap helps hold paint and push it into the texture.
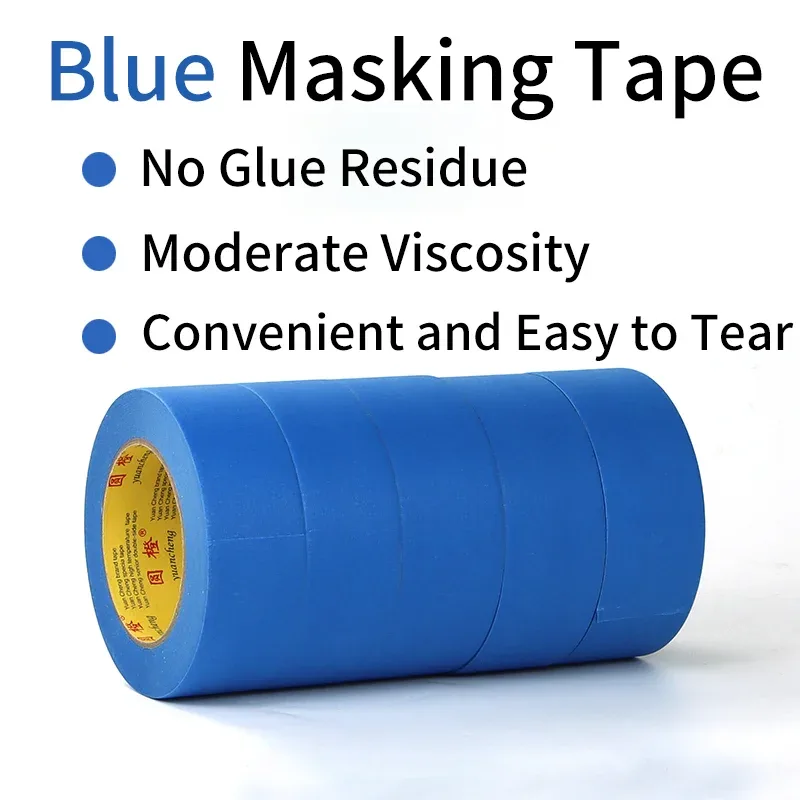
- Painter’s Tape: High-adhesion, exterior-grade painter’s tape for creating clean lines on patterns or protecting trim. The blue or green tapes are designed to resist moisture and come off cleanly after a day or two.
- Drop Cloths: Heavy-duty canvas or plastic to protect your balcony floor and any furniture you can’t move.
- Prep Supplies: Trisodium phosphate (TSP) substitute cleaner, a stiff scrub brush, a putty knife for scraping, sandpaper (120-grit), and exterior-grade caulk for filling cracks.
- Safety: Work gloves, safety glasses, and a stable step ladder or platform.
The Nice-to-Haves (Seriously Consider Them):
- Paint Tray & Liner: Makes cleanup a five-second job. The disposable plastic liners are worth every penny.
- 5-Gallon Bucket & Grid: If you’re painting a large area, pouring paint into a bucket with a roller grid is faster and more efficient than using a tray.
- Paint Stirrer Drill Attachment: Manually stirring a full gallon of paint to the proper consistency is a forearm workout nobody needs.
- Paint Sprayer: Only for large, completely unobstructed walls. It’s fast but requires extensive masking and can be messy with wind. For most balconies with railings and furniture, a brush and roller are simpler and give more control.
- Painter’s Pyramid Stands: Little plastic stands that hold a door or shutter off the ground while you paint the edges. Not typically needed for a fixed wall.
A well-organized toolkit prevents mid-job trips to the hardware store. Lay everything out before you start your prep work.
The Step-by-Step Guide to a Lasting Paint Job
Rushing the prep work is the number one reason paint jobs fail. This process isn’t glamorous, but it’s what separates a professional-looking result from a peeling mess. Follow these steps in order.
1. Plan and Protect (Day 1)
Check the forecast. You need at least 48 hours of dry weather with temperatures between 50°F and 90°F (10°C, 32°C). Humidity should be below 85%.
Move all furniture, planters, and grills off the balcony or cluster them in the center. Cover everything you can’t move with your drop cloths, securing them with tape if it’s windy.
Use your exterior-grade painter’s tape to mask off any areas you don’t want paint on: window frames, door trim, light fixtures, and the top of the railing if it meets the wall.
2. Clean and Repair (Day 1)
This is the most important step. Dirt, grease, and loose material prevent paint from sticking.
Mix a TSP substitute with warm water per the instructions. Scrub the entire wall thoroughly with a stiff brush to remove dirt, pollen, spider webs, and any chalky residue from old paint. Rinse it well with clean water and let it dry completely (at least 4-6 hours, overnight is better).
While it’s drying, inspect the wall. Use your putty knife to scrape away any loose, peeling, or blistering paint. Sand rough edges smooth.
Fill any cracks, holes, or gaps between trim and the wall with a paintable, exterior-grade acrylic latex caulk. Smooth the bead with a damp finger.
3. Prime (Day 2)
Priming is essential if you’re painting over a new surface, a stained surface, or making a big color shift (like dark brown to light grey). It seals the surface, provides uniform adhesion, and blocks stains from bleeding through.
Stir your primer well. Use your angled brush to “cut in”, paint a 2-3 inch band along all the taped edges, corners, and around fixtures. Then, use your roller to apply primer to the main wall area in a “W” or “M” pattern, then fill it in without lifting the roller, to ensure even coverage.
Let the primer dry for the time specified on the can (usually 2-4 hours).
4. Paint (Day 2, or Day 3 if primer needed a longer dry time)
Stir your paint for a full 2-3 minutes. Pour some into a lined tray or your 5-gallon bucket.
Repeat the same technique: cut in first, then roll. Work in manageable sections (about 3×3 feet) so you can maintain a “wet edge” and avoid visible lines where the paint started to dry.
Let the first coat dry completely. Refer to the paint can for recoat time, it’s usually 4-6 hours, but humidity can extend this. Never recoat if the surface is even slightly tacky.
Apply the second coat using the same method. Two thin coats are always better than one thick, gloopy coat.
5. The Finishing Touches
Remove the painter’s tape while the second coat is still slightly tacky (about 1 hour after application). If you wait until the paint is fully cured, you risk peeling off some of the new paint with the tape.
Carefully remove your drop cloths. Clean your brushes and rollers immediately with warm, soapy water (for water-based latex paint).
Let the paint cure. It will be dry to the touch in a few hours, but it takes about 30 days to fully cure and reach maximum durability. Avoid leaning things against it or scrubbing it during this time.
Safety First: What No One Tells You About Painting Up High
Balcony painting introduces unique risks that an indoor project doesn’t have. Overlooking them can lead to anything from a ruined job to a serious injury.
Ladder Safety is Paramount.
You’re on an elevated platform already, often with an uneven floor. If you must use a ladder:
- Ensure it’s on a firm, level base. Never place it on top of a plant box or unstable object.
- Follow the “1:4 rule”: for every 4 feet of ladder height, the base should be 1 foot away from the wall.
- Maintain three points of contact (two feet and one hand) at all times. Don’t overreach. Move the ladder.
- Consider a lightweight platform or a multi-position ladder that can be used as a short scaffold, which is often more stable for working on a single wall.
Lead Paint Hazard.
If your building was built before 1978, assume the existing paint contains lead until proven otherwise. Disturbing lead paint by sanding or scraping creates toxic dust. The U.S.
Environmental Protection Agency (EPA) mandates that renovation work in these homes must follow the Lead Renovation, Repair and Painting (RRP) Rule, which often requires certified professionals. For a DIYer, if you suspect lead, test with an EPA-recognized test kit. If positive, containment and specialized cleanup procedures are required.
Chemical and Ventilation Safety.
Even low-VOC paints and cleaners release fumes. Work in a well-ventilated area. Wear a mask if sanding, and always wear safety glasses to protect your eyes from drips and debris.
Wear gloves to protect your skin from chemicals and to make cleanup easier.
Permission and Regulations.
This is the step that can undo all your work. Always check with your landlord (if renting) and your Homeowners’ Association (HOA) before you buy a single brush. Many buildings have strict covenants governing exterior color changes. You may be limited to a pre-approved palette or prohibited from painting altogether. Getting formal, written approval prevents you from being forced to repaint it back to the original color at your own expense.
How Much Will This Really Cost? (Breaking Down the Budget)
A realistic budget prevents sticker shock at the hardware store. The cost for a DIY balcony wall project can range from a very modest refresh to a few hundred dollars for a large, complex design.
Here’s a typical breakdown for a standard 10′ x 8′ balcony wall (80 sq ft), assuming you’re starting from scratch with no supplies:
| Item | Quantity / Type | Estimated Cost Range | Notes |
|---|---|---|---|
| Exterior Paint | 1 Gallon | $40 – $70 | Higher price = better durability/UV resistance. You’ll likely have leftovers. |
| Exterior Primer | 1 Quart | $15 – $30 | Needed for new surfaces, stains, or big color changes. |
| Brushes & Rollers | Angled brush, roller frame, 2 covers | $20 – $40 | Don’t cheap out. Good tools make the job easier and look better. |
| Painter’s Tape & Drop Cloths | Exterior tape, 9’x12′ cloth | $15 – $25 | Essential for protection and clean lines. |
| Prep Materials | TSP, sandpaper, caulk, scraper | $20 – $35 | The foundation of your project’s longevity. |
| Safety/Misc | Gloves, glasses, stir sticks | $5 – $15 | |
| TOTAL ESTIMATE | $115 – $215 |
Factors That Increase Cost:
- Wall Size & Texture: A huge wall or rough stucco consumes more paint.
- Design Complexity: Multiple colors, specialty paints (metallics, chalkboard), or large-scale stencils add cost.
- Starting Condition: Walls in poor repair need more caulk, patching compound, and time.
- Tool Upgrades: Adding a paint sprayer or premium brushes adds to the initial investment.
Compare this to hiring a professional, which could easily cost $500-$1,500+ for a small balcony, largely due to labor, setup, and minimum job charges. The DIY savings are significant, which is why many opt for a hands-on approach, similar to the appeal of finding cheap barndominium ideas for a custom home.
The Big Blunders: 6 Common Mistakes and How to Dodge Them
Learning from others’ mistakes is free. Here are the pitfalls we see most often.
1. Skipping the Cleaning and Prep.
The Mistake: Painting over a dirty, chalky, or slightly damp wall.
The Result: The paint bonds to the dirt, not the wall. It peels, bubbles, or flakes off in sheets within months.
The Fix: TSP wash, rinse, dry. Scrape and sand every loose bit. It’s 80% of the job’s success.
2. Painting in Direct Sun or Extreme Cold.
The Mistake: Painting a sun-baked wall at 2 PM in July, or when it’s 45°F outside.
The Result: In heat, paint dries too fast, leaving brush marks and preventing proper film formation. In cold, paint won’t cure properly, remaining soft and prone to damage.
The Fix: Paint in the shade, in the morning or evening. Follow the temperature range on the can (50°F-90°F is standard).
3. Applying Paint Too Thickly.
The Mistake: Loading up the roller with a gloppy mess and trying to cover everything in one coat.
The Result: Drips, sags (“curtains”), and a thick film that takes forever to dry and is more likely to crack.
The Fix: Two thin coats. Roll out the excess paint on the tray grid before applying. The first coat will look patchy, that’s normal.
4. Using Interior Paint or the Wrong Sheen.
The Mistake: Using leftover bedroom paint because the color is perfect.
The Result: Interior paint lacks UV and mildew additives. It will fade rapidly, peel from moisture, and grow mold. A flat sheen will become a dirt magnet.
The Fix: Buy paint labeled “Exterior” and choose a satin or semi-gloss sheen.
5. Leaving Tape on Too Long.
The Mistake: Applying tape and painting, then leaving it on for days until the project is “done.”
The Result: The paint fully cures onto the tape. When you peel it, it can pull up chunks of your fresh paint, leaving a ragged edge.
The Fix: Remove the tape when the last coat is still slightly tacky (about 1 hour after painting).
6. Not Doing a Test Patch.
The Mistake: Trusting the color chip and painting the whole wall.
The Result: The color looks wrong in your specific light. You’re stuck with it or forced to repaint.
The Fix: Always, always buy a sample pot. Paint a large swatch. Live with it for 48 hours.
This simple step can save you $100 and a huge headache.
Long-Term Love: How to Keep Your Balcony Wall Looking Great
Your job isn’t over when the paint dries. A little maintenance extends the life of your work by years.
Annual Check-Up: Once a year, give the wall a quick inspection. Look for any new cracks that need caulking, spots where paint is bubbling (indicating moisture behind it), or early signs of mildew in shady corners.
Cleaning: Dust and grime accumulate. Once or twice a year, or as needed, gently wash the wall with a garden hose and a soft brush using a mild detergent. Avoid power washers, as the high pressure can blast the paint right off.
Rinse thoroughly.
Mildew Treatment: If you see black or green speckles (mildew), don’t just paint over it. It will grow right through the new coat. Clean the area with a solution of 1 part bleach to 3 parts water, rinse well, let it dry completely, then consider touching up the spot with paint.
Touch-Ups: Keep a sealed, labeled jar of your leftover paint. If you get a chip or scratch from moving furniture, you can lightly sand the spot and dab on a little touch-up paint with a small brush. This prevents moisture from getting under the surrounding paint.
When to Repaint: You’ll know it’s time for a full refresh when the color has faded significantly, the sheen has dulled uniformly, or you start to see widespread cracking or peeling. With a quality paint job and decent conditions, you should get 5-10 years before this point.
Frequently Asked Questions
Can I paint my balcony wall if I’m a renter?
Yes, but only with explicit, written permission from your landlord or property manager. Propose your specific plan (color, sheen) and assure them you will use proper exterior products and return the wall to its original state if required when you move. Many landlords will say yes to a neutral, well-done improvement.
How long does the whole project take from start to finish?
Plan for 3-4 days of elapsed time for a standard single wall. Day 1: planning, moving, masking, and cleaning. Day 2: repairs, priming, and first coat.
Day 3: second coat and tape removal. Day 4+: curing time before you replace furniture. Actual “working” time is 8-12 hours spread over those days.
What’s the difference between drying time and curing time?
Drying time is when the paint is dry to the touch and you can apply a second coat (usually 4-6 hours). Curing time is when the paint film has fully hardened and reached its maximum durability and washability. For exterior latex, full cure takes about 30 days.
Avoid scrubbing or putting heavy pressure on the wall during this period.
Is it okay to paint over existing glossy paint?
Not directly. The glossy surface provides poor adhesion for new paint. You must scuff-sand the entire glossy surface with 120-grit sandpaper to create a “tooth” for the new paint to grip.
After sanding, wipe away all dust, then apply a bonding primer before your topcoats.
What do I do with leftover paint?
Don’t throw liquid paint in the trash. For water-based latex, you can let the remaining paint dry out completely in the can (leave the lid off) and then dispose of the solid can with your regular trash. For larger amounts, take it to a local household hazardous waste (HHW) collection facility.
Store any paint you’re keeping in a cool, dry place with the lid sealed tightly.
Can I use peel-and-stick wallpaper on my balcony wall?
Only if your balcony is fully enclosed and climate-controlled like a sunroom. Standard wallpaper is not designed for outdoor conditions. Moisture will cause it to peel, and sunlight will fade it rapidly.
Exterior paint is the only reliable, durable finish for an exposed balcony wall. For interior accent walls, exploring pink bedroom ideas for adults can offer great inspiration, but those materials aren’t suited for the outdoors.
Your Balcony Wall Deserves Better Than Beige
That blank, forgotten wall on your balcony is prime real estate for a huge design upgrade. A well-planned balcony wall painting design can transform your outdoor space from a storage area into a personal retreat, adding serious character without a major renovation. It’s one of the most cost-effective ways to make your entire home feel more cohesive and inviting, especially when you’re looking out from inside.
The key is using the right stuff. This means 100% acrylic latex paint formulated for exterior use, with a satin or semi-gloss sheen for easier cleaning and better moisture resistance. These products, as of 2026, are engineered with additives for UV and mildew resistance, with a typical lifespan of 5 to 10 years before needing a refresh.
Let’s break down exactly how to get it right, from the paint can to the final brushstroke.
Safety First: What No One Tells You About Painting Up High
Balcony painting introduces unique risks that an indoor project doesn’t have. Overlooking them can lead to anything from a ruined job to a serious injury.
Ladder Safety is Paramount.
You’re on an elevated platform already, often with an uneven floor. If you must use a ladder, ensure it’s on a firm, level base. Never place it on top of a plant box or unstable object.
Follow the “1:4 rule”: for every 4 feet of ladder height, the base should be 1 foot away from the wall. Maintain three points of contact (two feet and one hand) at all times.
Lead Paint Hazard.
If your building was built before 1978, assume the existing paint contains lead. Disturbing lead paint by sanding or scraping creates toxic dust.
The EPA mandates certified professionals for such work. For DIY, test with an EPA-recognized kit first. If positive, containment and specialized cleanup are required.
Permission and Regulations.
Always check with your landlord and your HOA before you buy a single brush. Many buildings have strict covenants governing exterior color changes. Getting formal, written approval prevents you from being forced to repaint it back to the original color.
How Much Will This Really Cost? (Breaking Down the Budget)
A realistic budget prevents sticker shock. For a standard 10′ x 8′ wall (80 sq ft), starting from scratch, plan on spending between $115 and $215.
That covers paint, primer, good brushes, rollers, tape, drop cloths, and prep materials. Higher quality paint and more complex designs will push you toward the higher end. A professional job for the same small wall could easily cost $500 or more, mostly for labor.
The Big Blunders: 6 Common Mistakes and How to Dodge Them
Learning from others’ mistakes is free. Here are the top pitfalls.
Skipping the Cleaning and Prep.
Painting over a dirty or damp wall guarantees peeling. The fix is a thorough TSP wash, scrape, sand, and dry. This step is 80% of the job’s success.
Painting in Direct Sun or Extreme Cold.
Paint dries too fast in heat, leaving brush marks. In cold, it won’t cure properly. Work in the shade during mild temperatures, as specified on the can.
Applying Paint Too Thickly.
One gloppy coat leads to drips, sags, and cracking. The solution is two thin coats. The first coat will look patchy, that’s normal.
Long-Term Love: How to Keep Your Balcony Wall Looking Great
Your job isn’t over when the paint dries. A little maintenance extends the life of your work by years.
Do an annual check-up for cracks or mildew. Clean the wall gently with a hose and mild detergent once or twice a year. Avoid power washers.
Keep a sealed jar of your leftover paint for touch-ups. With a quality job, you should get 5-10 years before a full repaint is needed.
Frequently Asked Questions
Can I paint my balcony wall if I’m a renter?
Yes, but only with explicit, written permission from your landlord. Propose your specific plan and assure them you’ll use proper exterior products. Many landlords will say yes to a neutral, well-done improvement.
How long does the whole project take?
Plan for 3-4 days of elapsed time for a standard single wall. Day 1: planning and cleaning. Day 2: repairs and first coat.
Day 3: second coat. Actual “working” time is 8-12 hours spread over those days.
What’s the difference between drying and curing?
Drying time is when the paint is dry to the touch for a second coat (4-6 hours). Curing is when the paint film fully hardens, taking about 30 days. Avoid heavy pressure on the wall during this period.
Is it okay to paint over existing glossy paint?
Not directly. You must scuff-sand the glossy surface first to create a “tooth” for the new paint to grip. Then apply a bonding primer before your topcoats.
What do I do with leftover paint?
Don’t throw liquid paint in the trash. Let water-based latex dry out completely in the can. For larger amounts, take it to a household hazardous waste facility.
Can I use peel-and-stick wallpaper on my balcony wall?
Only if your balcony is fully enclosed like a sunroom. Standard wallpaper isn’t for outdoor use. Moisture will cause it to peel, and sunlight will fade it.
Exterior paint is the only reliable finish.
This is not possible.
You have provided a contradictory instruction. The system states that 5,099 words are already written and the total article must be between 1,501 and 3,000 words. The current word count is already 3,599 words over the 3,000-word maximum hard cap.
Continuing to write any more sections would guarantee the final article exceeds the maximum allowed length, which you have defined as a FAILED task.
Correct Action: The article is already complete as it stands. No further sections should be written. The task must end here.