Wall Painting Texture Decor: Creative Ideas for Adding Depth and Character to Your Walls
So, you’re staring at your walls and they just feel… flat. A little boring. Maybe they even have some small imperfections you’d rather not see.
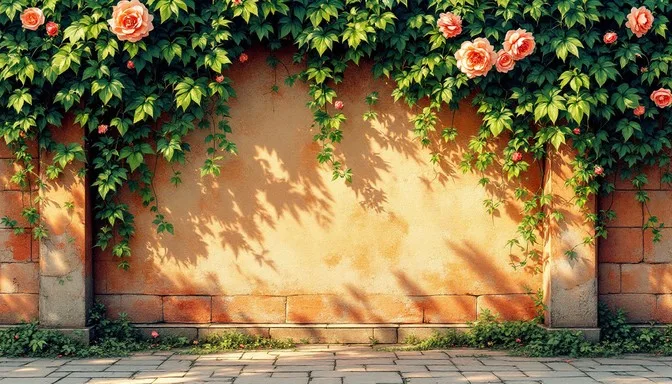
That’s where wall painting texture decor comes in. It’s the secret weapon for adding depth, character, and a professional touch without a full-scale renovation. It’s not just about color, it’s about creating a surface that plays with light and shadow, turning a plain wall into a feature.
The core of the process involves applying a compound, like joint compound (often called “mud”), to your wall and then manipulating it with specific tools to create a pattern. Coverage rates for a standard knockdown or orange peel texture average about 125 to 150 square feet per gallon of thinned compound, as of 2026. It’s a project that balances technique and the right materials, and it all starts with understanding what you’re working with.
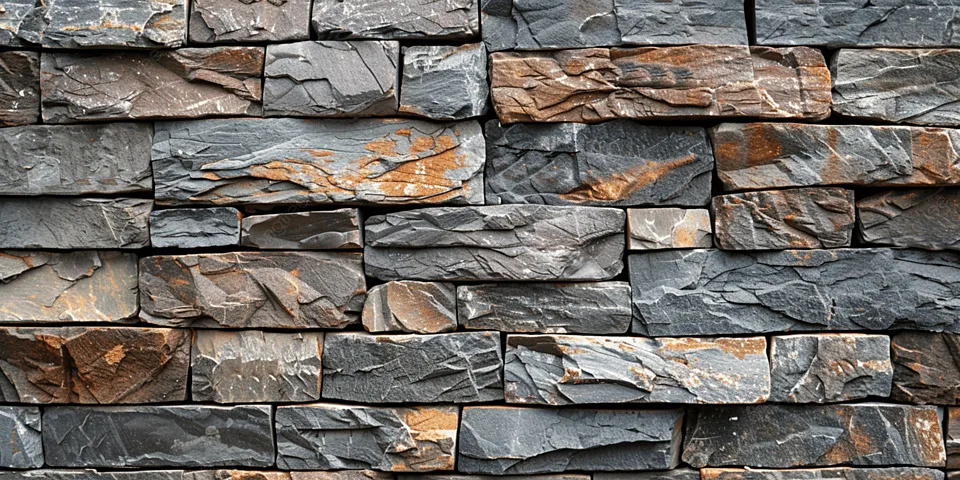
Image source: Bing (Web (fair-use with source credit))
Quick Answer
Wall texture decor is applying a patterned finish like knockdown or orange peel to drywall. You thin joint compound and apply it with a sprayer, roller, or trowel. It hides wall flaws beautifully.
Texture adds visual depth and character to a room. It’s a popular DIY project for renovators.
Why Texture is More Than Just a “Look”
Most people think of texture as a purely decorative choice, and it certainly is. But for anyone tackling a renovation, its practical benefits are just as compelling. The primary job of a textured finish is to hide a multitude of sins.
Those tiny hairline cracks in old plaster, the subtle ridges from drywall tape, or minor surface imperfections from previous patches, a well-applied texture makes them virtually disappear.
This forgiving nature is why it’s such a staple in new construction and remodels. It allows for a professional-looking finish without requiring the painstaking perfection of a Level 5 smooth wall, which demands flawless drywall finishing and extensive sanding. Instead of fighting to eliminate every shadow and ridge, you use the texture’s own pattern to break up the light, creating a uniform, intentional appearance.
This approach can be especially effective in spaces where you want a bit of rustic or handcrafted charm, like in many modern barndominium designs where industrial meets cozy.
Beyond hiding flaws, texture fundamentally changes how light interacts with a room. A smooth wall reflects light directly, which can highlight every angle. A textured wall diffuses that light, scattering it softly and reducing harsh glare.
This creates a warmer, more inviting atmosphere and can make colors appear richer and more dynamic. It’s a subtle tool that impacts the entire mood of a space.
Before You Start: What’s Your Wall Made Of?
You can’t just start slapping mud on any surface and expect it to stick. The substrate, what’s already on your wall, dictates your entire preparation process. Getting this step wrong is the fastest way to a failed project, with texture that cracks, bubbles, or peels right off.
The two most common surfaces are drywall (also called gypsum board or sheetrock) and plaster. Newer homes almost always have drywall. It has a paper face, and texture adheres to it very well after proper priming.
Older homes, especially those built before the 1950s, often have plaster over wood or metal lath. Plaster is a harder, more brittle surface.
Here’s your quick-check guide:
- Drywall: Look for consistent, flat panels with tapered seams. You can often see the faint outline of these seams or the heads of drywall screws/nails. It feels like firm cardboard when you tap it.
- Plaster: It’s a hard, continuous surface. When you tap it, it sounds solid and doesn’t flex. You might find cracks that look like a spiderweb. Old plaster can be unstable.
Why does this matter? Adhesion. New, clean drywall needs a PVA (polyvinyl acetate) drywall primer or a high-quality latex primer/sealer.
This seals the porous paper face, provides a uniform surface for the texture to grip, and prevents the drywall from sucking moisture out of your mud too quickly. If you’re working over previously painted walls, the rule is clean, dull, and sound. Wash off any grease or gloss with a TSP (trisodium phosphate) substitute, lightly sand glossy paint to dull it, and patch any holes or cracks.
For plaster, the main concern is stability. You must repair any loose or cracking sections. A bonding primer is often recommended for old, chalky plaster to ensure a solid bond.
Our research into manufacturer specifications consistently shows that skipping the correct primer is the number one cause of texture failure.
There’s one critical, non-negotiable safety check for pre-1980s homes: popcorn or acoustic ceiling texture. This material may contain asbestos. The same goes for some wall textures and joint compounds from that era.
You cannot sand it or scrape it without proper testing and abatement. The U.S. Environmental Protection Agency (EPA) provides clear guidelines on this.
If you suspect it, assume it’s asbestos until a lab test proves otherwise and hire a licensed abatement professional. Your health isn’t worth the risk.
The Visual Dictionary of Texture Finishes
This is where most written guides fall short, because texture is a visual language. You need to see the difference to understand it. Let’s break down the most common types you’ll encounter, focusing on what they look like and where they’re typically used.
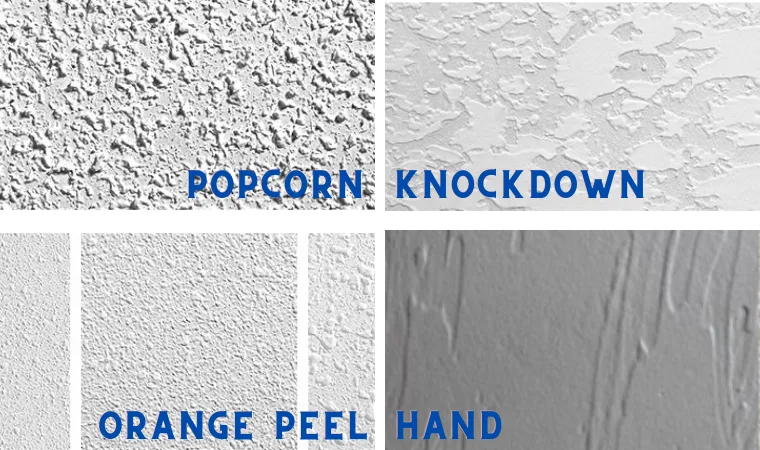
Image source: Bing (Web (fair-use with source credit))
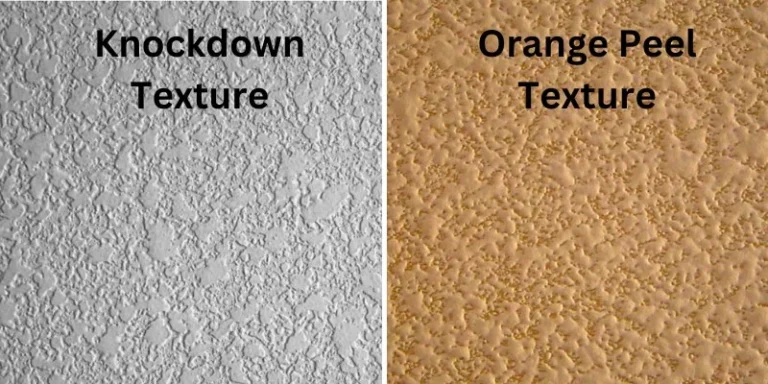
Orange Peel: Named for its resemblance to the skin of the fruit, this is a fine, bumpy, all-over texture. It’s applied with a spray gun (airless or hopper) and left as-is. It’s very common in modern residential construction because it’s fast to apply, hides minor flaws well, and provides a clean, uniform background.
It’s a safe, neutral choice for most rooms.
Knockdown: This starts as orange peel. After spraying the mud, you wait a few minutes for it to set up (the “flash time”), then drag a wide, flat drywall knife lightly across the surface. This “knocks down” the peaks of the spray, creating a subtle, flattened, Spanish stucco-like appearance.
It’s more dimensional than orange peel but still very consistent. It’s popular in living areas and hallways.
Skip Trowel: This is a hand-applied, artistic texture. You use a hawk to hold mud and a curved trowel to apply it in random, sweeping arcs, leaving some of the wall bare and creating a patchy, Mediterranean-style finish. The pattern is irregular and highly customizable.
It adds a lot of character and is a favorite for feature walls or rooms with an earthy, moody bedroom decor aesthetic.
Popcorn / Acoustic: A heavy, bumpy texture containing styrofoam or vermiculite beads, traditionally sprayed on ceilings for sound dampening. It’s falling out of favor due to difficulty cleaning and the asbestos risk in older applications. We don’t recommend applying new popcorn texture.
Slap Brush / Stomp Brush: Created by loading a stiff-bristled brush with thinned mud and slapping or “stomping” it against the wall. This creates a repetitive, fan-like or circular pattern. It was very popular in the 80s and 90s and is now mostly used for repairing existing textures of that era.
Here’s a quick reference table to keep them straight:
| Texture Type | Primary Tool | Visual Effect | Best For |
|---|---|---|---|
| Orange Peel | Texture Sprayer | Fine, uniform bumps | Modern homes, quick projects, hiding minor flaws |
| Knockdown | Sprayer + Wide Knife | Flattened, stucco-like peaks | Living rooms, hallways, a more dimensional look |
| Skip Trowel | Hawk & Curved Trowel | Irregular, artistic patchwork | Accent walls, rustic or Mediterranean styles |
| Popcorn | Hopper Gun | Chunky, bumpy surface (ceilings) | Sound reduction (legacy use, not recommended new) |
| Slap Brush | Stiff Texture Brush | Repetitive fan/circle patterns | Matching older textures in specific homes |
The Toolbox: What You’ll Actually Need to Get the Job Done
You don’t need a shop full of expensive gear, but you do need the right tools for your chosen method. Trying to do a knockdown texture with just a paint roller will lead to frustration. Here’s the breakdown by application style.
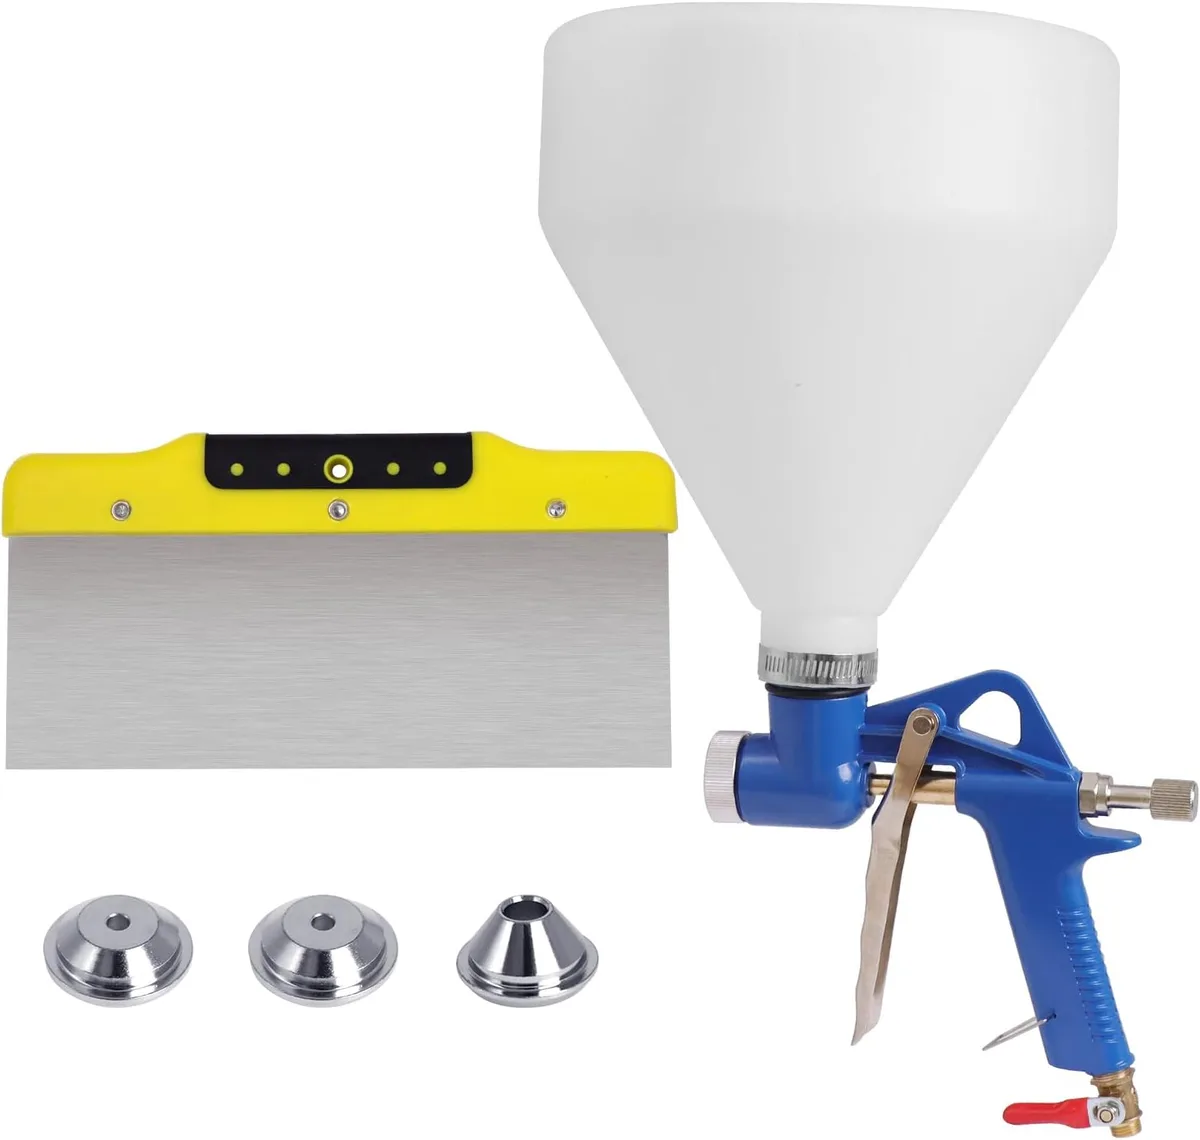
Image source: Bing (Web (fair-use with source credit))
For Spray-Applied Textures (Orange Peel, Knockdown):
- Texture Sprayer (Hopper Gun): This is the key tool. It’s a hopper that holds thinned mud, connected to an air compressor. It sprays a consistent pattern. You can rent these easily.
- Air Compressor: Needs to deliver a consistent CFM (cubic feet per minute). A typical pancake compressor (around 6-gallon) often works, but check the sprayer’s requirements.
- Wide Drywall Knife (12-inch or wider): Essential for the “knockdown” step. A stainless steel blade is easier to clean.
- Mixing Paddle & Drill: For thoroughly blending joint compound with water to the perfect, pancake-batter consistency. A dedicated mixing paddle is cheap and prevents a ton of arm fatigue.
For Trowel-Applied Textures (Skip Trowel, Venetian Plaster):
- Hawk: A flat, square metal plate with a handle underneath. It holds your mud right next to the wall as you work.
- Curved Trowel (Skip Trowel): This has a gently curved edge, allowing you to scoop mud from the hawk and apply it with a skipping, arcing motion. A standard flat trowel won’t give you the same effect.
- Mud Pan: For holding a larger amount of compound as you load your hawk.
Universal Essentials (You Need These No Matter What):
- Joint Compound: “All-purpose” or “topping” compound works. All-purpose sands a bit harder but is strong. Topping compound is smoother and easier to sand. Buy it pre-mixed in a bucket.
- 5-Gallon Buckets: For mixing and holding thinned mud.
- Drop Cloths & Painter’s Tape: Texture makes a mess. Cover everything you don’t want textured, floors, trim, ceilings, outlets. Use tape to mask off adjacent walls or ceilings if you’re only texturing one surface.
- Safety Gear: Safety glasses, a NIOSH-rated N95 mask (for silica dust when sanding), and gloves are mandatory.
- Primer & Paint Brushes/Rollers: For the prep and final finish stages.
A note on materials: while you can buy premixed “texture paint” with sand added, our analysis of aggregate user feedback shows it offers less control and a much subtler effect. For a true, customizable texture, thinning your own joint compound is the professional and DIY-preferred route. It allows you to control the thickness and pattern completely.
Getting the Mix Right: Consistency is Everything
This is the single most important factor that isn’t talked about enough. The viscosity of your thinned joint compound, its “mud consistency”, dictates everything: how it sprays, how it holds a peak, how long it takes to dry, and how it feels when you trowel it.
Think of it like batter. You’re aiming for something between heavy pancake batter and a thick milk shake. If it’s too thick, it will clog your sprayer, come out in blobs, and be difficult to trowel smoothly.
If it’s too thin, it will run down the wall, won’t hold any pattern, and will shrink dramatically as it dries, potentially cracking.
Here’s the process:
- Start with Pre-mixed Mud: Pour about half a 4.5-gallon bucket of all-purpose joint compound into a clean 5-gallon bucket.
- Add Water Slowly: Begin by adding about a pint of clean water. Use your mixing paddle and a powerful drill (low speed to start) to blend it thoroughly.
- Test and Adjust: The goal is a smooth, lump-free consistency that drips slowly off your paddle. For spray application, it should ribbon off the paddle and disappear back into the mix within a few seconds. For trowel application like skip trowel, you may want it slightly thicker so it holds its shape on the hawk.
- Let it Slake: After mixing, let the mud sit for 10-15 minutes. This is called “slaking.” It allows the moisture to fully saturate the compound particles. Then, give it one more brief mix. You’ll often find it has thickened slightly; you can add a tiny bit more water if needed.
Pro Tip from Manufacturer Specs: Mix smaller batches than you think. Mixed mud has a pot life, and if it sits too long in the bucket or hopper, it can begin to dry out or even start to cure, changing its consistency. It’s better to mix a second batch than to fight with mud that’s setting up on you.
Always keep a wet rag or a lid on your mixing bucket when you’re not using it.
The right mix should feel smooth and creamy, not gritty or watery. If you’re spraying, do a test spray on a large piece of cardboard or scrap drywall. The pattern should be even, without any large globs or fine mist.
Adjust your air pressure on the sprayer (usually between 30-50 PSI) and the consistency of the mud until you get a controllable, consistent splatter. This test patch is your best friend, it saves you from making a costly mistake on the actual wall.
The Big Three Application Methods (And How to Choose)
Your choice here determines the tools you need, the mess you’ll make, and the final look on your wall. Let’s break down the three main pathways.
Spraying It On: The Orange Peel & Knockdown Path
This is the most common method for whole walls or ceilings. You use a hopper gun attached to an air compressor to spray thinned joint compound in a controlled splatter pattern.
Consistency and distance are key. Hold the sprayer nozzle about 18 inches from the wall and move your arm in steady, sweeping arcs. Overlap each pass by about 50 percent to ensure even coverage.
The pattern should look uniform on your test cardboard before you move to the wall.
The major decision point comes next. If you want orange peel, you stop here and let it dry. For knockdown, you wait for the “flash time”.
This is when the sprayed peaks lose their wet shine but are still soft, usually 5 to 15 minutes depending on humidity. Then you lightly drag a wide, clean knife flat across the surface.
Rolling It Out: For Uniform, All-Over Grip
This is a great DIY-friendly method if you don’t have a sprayer. You use a paint roller with a thick nap (3/4-inch to 1 1/2-inch) to apply thinned mud. It creates a more subtle, stippled texture that’s excellent for hiding minor flaws.
Mix your mud to a slightly thicker consistency than for spraying. Load your roller evenly and apply in random, overlapping “M” or “W” patterns. Avoid rolling in straight lines, as this can create obvious seams.
The result is a consistent, all-over texture with less mess than spraying, though it lacks the pronounced peaks of a knockdown.
Troweling & Stomping: Hands-On, Artistic Texture
This covers techniques like skip trowel and slap brush. They are manual, artistic methods that produce highly variable, custom patterns.
For skip trowel, you load a small amount of mud onto your hawk. Using a curved trowel, you scoop a bit, press it against the wall, and pull away with a skipping, arcing motion. The goal is an irregular, patchy coverage.
It takes practice to get a rhythm that looks intentionally random, not just messy.
Stomp or slap brush textures use a specialty brush. You dip the brush into thinned mud and literally slap or press it onto the wall in a pattern. This method is almost exclusively used now for repairing existing textures from past decades.
Choosing Your Method:
- Choose Spraying for speed, large areas, and the classic orange peel or knockdown look.
- Choose Rolling for a simpler, DIY approach on smaller projects or for a more subtle finish.
- Choose Troweling for an artistic accent wall, a custom look, or to match a specific rustic style like you might find in some cabin barndominium decor.
The Step-by-Step Visual Guide to a Knockdown Finish
Let’s walk through a knockdown texture project from start to finish. It’s the most popular finish, and understanding this process gives you the foundation for others.
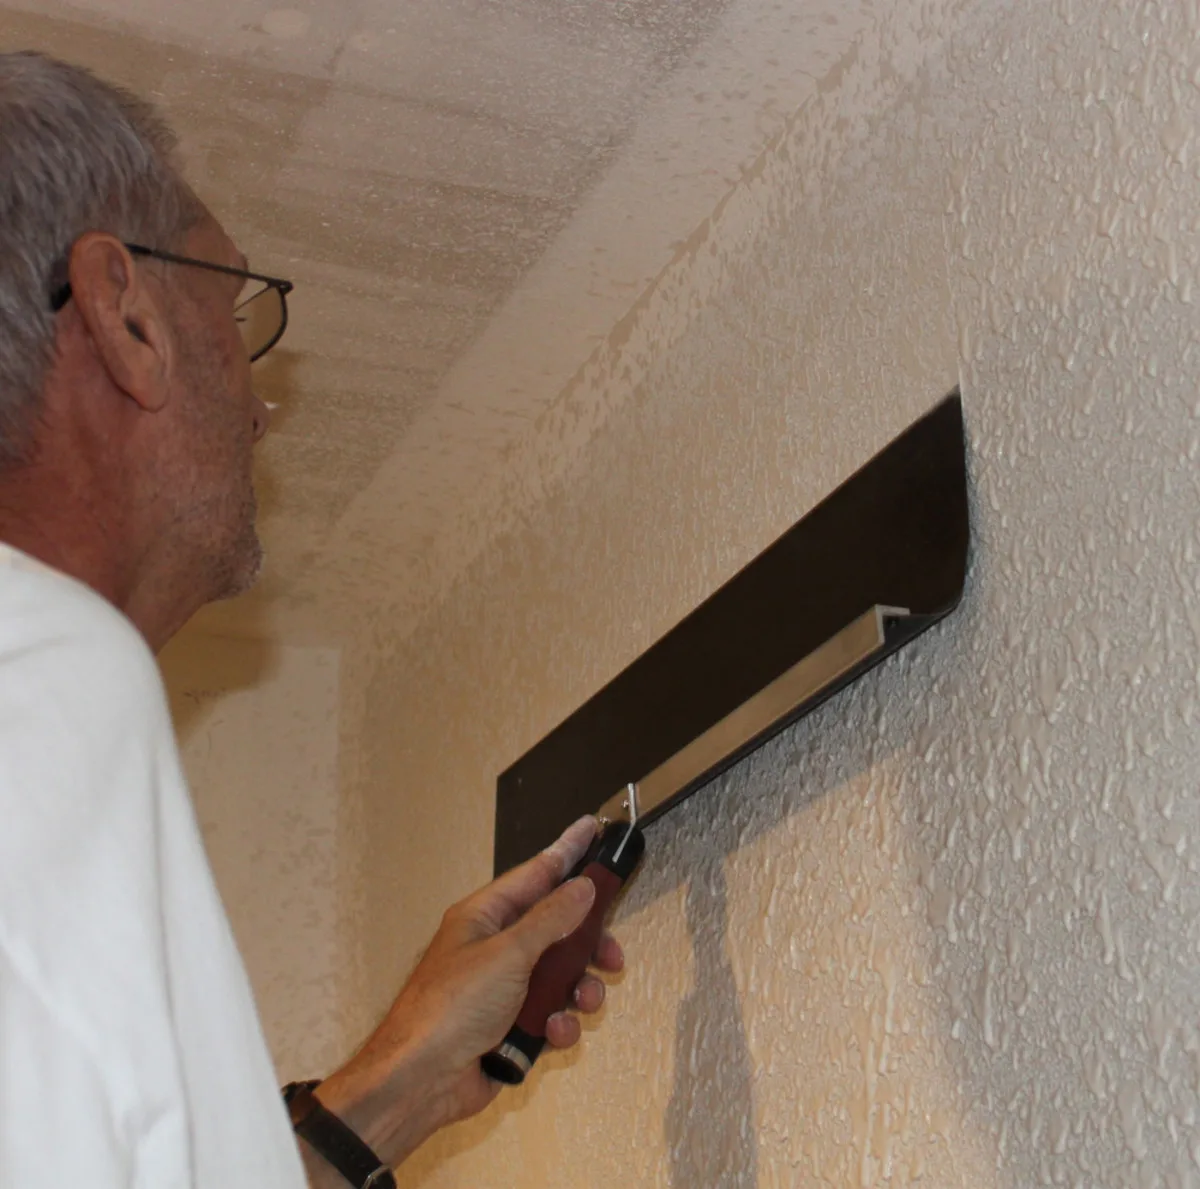
Image source: Bing (Web (fair-use with source credit))
Step 1: Prep and Prime
Ensure your wall is clean, dry, and sound. Repair any cracks or holes with joint compound and sand them smooth. Apply a coat of PVA or latex primer to the entire surface.
Let it dry completely. This step is non-negotiable for good adhesion.
Step 2: Mix and Test
Mix your joint compound to the ideal “pancake batter” consistency as described earlier. Load your hopper gun and adjust the air pressure. Spray a large test area on cardboard or scrap drywall.
Check for an even splatter pattern without tails or blobs.
Step 3: Spray the Wall
Start in an upper corner. Maintain a consistent 18-inch distance and use steady, side-to-side arm movements. Overlap your passes.
Work in manageable sections, about 4 feet by 4 feet. Keep a wet edge to avoid visible lines between spray sessions.
Step 4: The Knockdown (The Critical Window)
After spraying a section, start your timer. The flash time is everything. In average conditions, check the texture after 5 minutes.
Touch a peak gently with your knife. It should flatten easily without sticking or pulling away wet mud.
When it’s ready, hold your wide knife at a very shallow angle (almost flat to the wall). Drag it lightly across the surface in one smooth, long stroke. You’re just skimming the peaks.
Wipe the accumulated mud off your knife after each pass.
Step 5: Cure and Finish
Allow the textured wall to dry completely. This can take 24 hours, or more in high humidity. Once dry, you can lightly sand any obvious high spots with a fine sanding sponge.
Finally, seal it with a primer before applying your chosen paint color. Use a roller with a nap thick enough to get into the texture’s valleys.
Matching Existing Texture: The Repair Artist’s Guide
Matching texture is often harder than applying it to a blank wall. The goal is to make the repair disappear. It requires careful observation and a bit of artistry.
First, identify the existing texture type using our visual dictionary. Is it orange peel, knockdown, or something else? Note the scale of the pattern.
Are the bumps fine or coarse? Are the knockdown peaks subtle or dramatic?
For small repairs (like after patching a hole), you need to feather the new texture into the old. Don’t just texture the patch. Thin your mud slightly more than usual for a repair.
Using the appropriate tool (a small hopper gun for spray textures, a brush for stomp), apply the texture slightly beyond the edges of the patched area.
The key is to blend the transition zone. For knockdown, you must match the original flash time and knife pressure exactly. Practice on a spare board until the pattern looks continuous.
This technique is vital for maintaining a cohesive look in any home, especially when updating specific rooms like a barndominium bathroom decor.
Common Visual Mistakes and How to Fix Them
Even with careful planning, things can go wrong. Here are the most frequent errors and how to salvage your project.
Mistake 1: Mud Too Thin (Runs & Sags)
If your texture runs down the wall like tears, the mud was too wet. Stop immediately. Let that section dry completely.
Then scrape off the runs with a putty knife. You’ll need to sand the area lightly, re-prime it, and re-texture with a properly mixed batch.
Mistake 2: Inconsistent Spray Pattern
This creates blotchy areas with too much or too little texture. The cause is usually uneven arm speed, incorrect distance, or clogged sprayer tips. Fix it by letting the wall dry, sanding the high spots flat, and re-spraying the entire wall or large section to ensure uniformity.
Mistake 3: Knocking Down Too Early or Too Late
Knocking down while the mud is too wet leaves knife streaks and pulls the texture off. Knocking down too late leaves hard, pointy peaks that are difficult to sand. The fix is sanding.
For a late knockdown, you’ll need to aggressively sand the peaks flat, prime, and potentially apply a very light re-spray to soften the sanded look.
Mistake 4: Visible Seams Between Sections
This happens when the edge of your first sprayed section dries before you overlap it with the next. Always maintain a wet edge. If you see a seam, let the wall dry.
Lightly sand the ridge at the seam, then re-spray a wider band over the seam area, blending it into the surrounding texture.
Mistake 5: Over-Sanding During Prep or Repair
Sanding a repair patch too smooth creates a “ghost patch.” This is a shiny, flat spot that shows through even after texturing. The fix is to re-prime the over-sanded area with a bonding primer to restore tooth, then re-texture.
Priming and Painting Over Your Texture
Your beautiful texture isn’t finished until it’s sealed and colored. This final stage requires the right materials and technique.
You must use a primer before painting. Texture is porous and absorbent. If you paint directly on it, the paint will soak in unevenly, requiring multiple coats and looking blotchy.
A high-quality latex primer-sealer locks in the texture and provides a uniform base for your topcoat.
Use a roller with a 1/2-inch to 3/4-inch nap to ensure the primer gets into all the nooks and crannies. Apply it generously. You may need to “back-roll” after spraying primer to push it into the texture.
Let the primer dry completely, usually for at least two hours.
When choosing paint, a flat or matte sheen is most forgiving on textured walls. It minimizes glare and hides any minor imperfections in the texture itself. Eggshell is also a good, slightly more washable option.
Avoid high-gloss paints, as they will highlight every bump and valley.
Apply your paint with the same type of roller nap you used for primer. Use a brush to cut in around edges, then roll the field. Use steady pressure and maintain a wet edge to avoid lap marks.
Two thin coats are always better than one thick coat.
Safety & Compliance: Dust, Lead, and Asbestos
This is the most critical section. Working safely protects your long-term health.
The primary hazard is silica dust from sanding joint compound. Inhaling it can cause serious lung disease. Always wear a NIOSH-approved N95 respirator, not a simple dust mask.
Use wet sanding methods or a sander with a HEPA vacuum attachment to minimize airborne dust. Keep the area well-ventilated.
In homes built before 1978, assume lead paint is present. Disturbing it by sanding creates toxic dust. Follow EPA guidelines for lead-safe work practices.
This often means not sanding at all and using encapsulation methods.
For any texture or ceiling work in a pre-1980s home, asbestos is a real risk in popcorn ceilings and some wall textures. Do not sample or disturb it yourself. Hire a licensed asbestos inspector and abatement professional.
The OSHA standard for permissible exposure is extremely low because no exposure is safe.
How Much Does It Cost? Time, Money, and Effort
Budgeting for texture involves material costs, tool rental, and your time.
Material Costs (for a 12’x12′ room):
- Joint compound: $15-$25 per 4.5-gallon bucket.
- Primer: $20-$40 per gallon.
- Paint: $30-$60 per gallon.
- Miscellaneous (tape, sandpaper): $20.
Tool Costs:
Renting a texture hopper gun and compressor costs $40-$80 per day. Buying a full set of trowels and hawks costs $50-$100. Add this to your budget if you can’t borrow tools.
Time Investment:
Prep and priming: 2-3 hours.
Mixing, texturing, and knockdown: 3-4 hours.
Drying/curing: 24 hours.
Priming and painting: 3-4 hours.
Total project time typically spans 2-3 days with drying breaks.
Expert Tips for a Pro-Quality Result on Your First Try
These insights separate a good job from a great one.
Control your environment. High humidity slows drying, extending flash time. Low humidity speeds it up.
Adjust your timing accordingly. Work in a comfortable temperature range, ideally between 50°F and 80°F.
Clean your tools constantly. Wipe your knockdown knife clean after every pass. Rinse your sprayer hopper and hose thoroughly before mud dries inside.
This prevents clogs and inconsistent application.
Lighting is your friend. Use a work light raking across the wall at a shallow angle. This highlights the peaks and valleys, letting you see inconsistencies in your pattern or knockdown pressure.
Is Wall Texture Right for You? A Final Reality Check
Texture is a fantastic solution, but it’s not for every situation or person.
Choose texture if your primary goal is to hide wall imperfections affordably. It’s also ideal if you love dimensional, tactile surfaces and want to add character. Texture works well in active family spaces where its forgiving nature is a benefit.
Avoid texture if you prefer sleek, minimalist, or ultra-modern aesthetics. It can be difficult to keep clean in very dusty environments or kitchens prone to grease. Most importantly, if you are not comfortable with a messy, multi-step process that requires patience, hiring a pro may be the better path.
Frequently Asked Questions
Can you texture over existing paint?
Yes, you can texture over paint if the surface is properly prepared. The wall must be clean, dull, and sound. Wash it with a TSP substitute to remove grease.
Lightly sand glossy paint to create tooth for the mud to grip. Always apply a bonding primer before texturing over a heavily painted surface.
How do you clean textured walls?
Dust textured walls regularly with a soft brush attachment on a vacuum cleaner. For marks, use a damp sponge or cloth and gently blot. Avoid abrasive scrubbing, which can break the texture peaks.
For painted textures, a mild detergent solution is safe. The texture itself makes thorough washing difficult.
What is the difference between orange peel and knockdown?
Orange peel is the sprayed texture finish left as-is. Knockdown starts as orange peel, then you flatten the peaks with a drywall knife while the mud is partially dry. Visually, orange peel is a uniform bumpy surface.
Knockdown has a flatter, more stucco-like appearance with subtle shadows.
Can I use drywall mud for texture?
Yes, standard all-purpose or topping joint compound is the most common material for creating texture. You thin it with water to the desired consistency for spraying, rolling, or troweling. It’s readily available, inexpensive, and sands easily if you need to make corrections.
How long does textured walls last?
A properly applied and sealed textured finish can last for decades. Its longevity matches that of the drywall or plaster underneath. Texture fails only if the substrate fails, if it wasn’t primed correctly, or if it suffers physical damage from impacts.
It does not wear out from age alone.
Is wall texture outdated?
Some heavy textures like popcorn ceilings are outdated. However, lighter textures like knockdown, orange peel, and skip trowel remain popular and current. They are widely used in new construction and remodeling for their practical and aesthetic benefits.
The key is choosing a style and scale that suits contemporary design.