Modern Boho Wall Painting Ideas: Creative Ways to Add Warmth and Character
Modern boho wall painting design is a perfect middle ground for anyone who loves the free-spirited feel of traditional bohemian style but wants a cleaner, more intentional look. It’s about using color, texture, and hand-drawn shapes to create a focal point that feels warm, personal, and curated, not cluttered. You get the cozy, inviting vibe without the overwhelm.
Getting the look right comes down to a few key principles: a balanced color palette, deliberate texture, and embracing imperfection. The use of low-VOC and zero-VOC paints has become a standard expectation for indoor projects as of 2026, aligning the style with healthier living spaces. Let’s break down exactly how to bring this popular look to your own walls.
Quick Answer
Modern boho wall painting uses earthy colors, hand-drawn patterns, and textured finishes. Start with a neutral base like cream or white. Layer on terracotta, sage, or deep jewel tones.
Create imperfect shapes like arches or organic blobs. The style is less cluttered than traditional boho. It prioritizes curated, intentional design over maximalism.
This approach creates a warm, personalized accent wall easily.
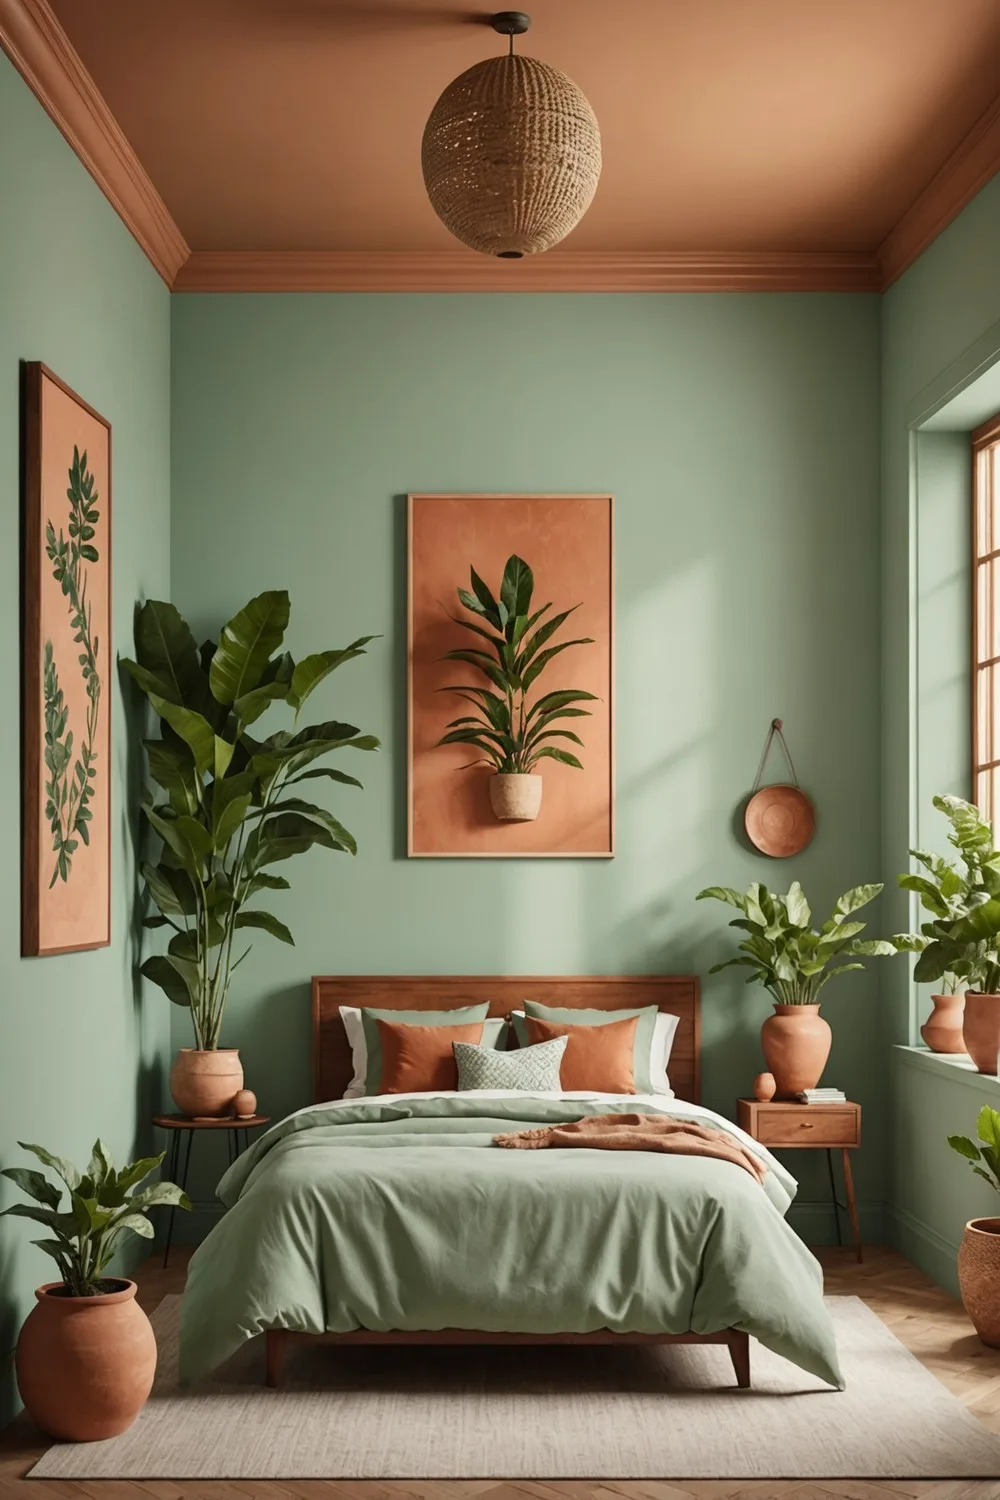
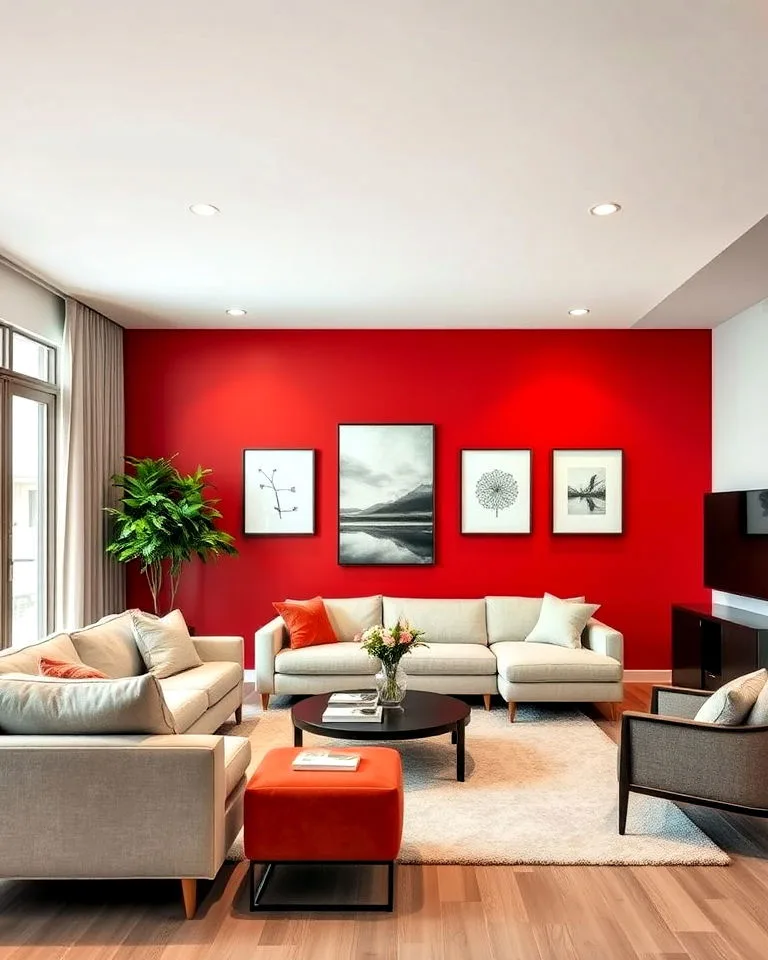
Image source: Bing (Web (fair-use with source credit))
What Modern Boho Wall Painting Is Really About (And Why It’s So Popular)
At its core, modern boho wall painting is a visual language. It speaks in layers, textures, and a specific, harmonious color story. It takes the global, collected feel of classic boho and edits it for contemporary spaces.
Think less marketplace stall, more art gallery with soul.
The popularity stems from a few key cultural shifts. First, people crave personalized spaces that tell a story, especially after years of sterile, all-gray interiors. This style allows for that expression without needing to buy a truckload of new decor.
Second, it’s incredibly renter-friendly. A painted accent wall is a high-impact, low-commitment change compared to structural renovations or even expensive wallpaper.
Finally, the “modern” twist makes it accessible. You don’t need to master intricate paisley or perfectly symmetrical patterns. The ethos celebrates the human hand.
Wobbly lines, slightly uneven color washes, and asymmetrical layouts are features, not bugs. It’s a forgiving style for DIYers, which is a big part of its widespread appeal on platforms like Pinterest and Instagram.
You Can’t “Get” Modern Boho Without Seeing It: The Core Visual Cues
Reading a description only gets you so far. This style is fundamentally visual. To plan your project, you need to recognize the recurring elements that make a wall read as “modern boho” instead of just “colorful.”
The most telling cue is the combination of organic and geometric shapes on the same plane. You might see a series of soft, hand-painted arches next to a few abstract, blob-like forms. The lines aren’t razor-straight from a machine.
They have a slight tremor, a human quality.
Texture is another non-negotiable visual element. From a distance, the wall shouldn’t look perfectly flat. Up close, you should see the variation from techniques like sponging, color washing, or even a rough roller nap.
This texture adds depth and a tactile, earthy feel that flat paint can’t achieve.
Finally, look at the color relationships. Modern boho palettes are never monochromatic. They’re a conversation.
A deep, moody teal might be grounded by large fields of creamy white. A burst of terracotta is balanced by calm sage green. The visual interest comes from this curated contrast, not from using every color in the rainbow at once.
Before You Pick Up a Brush: Your Quick-Start Mood Board Checklist
Skipping the planning phase is the number one reason DIY paint projects go sideways. For something as visually driven as modern boho, you need a reference. Don’t just imagine it, collect it.
Start digitally. Create a folder on your phone or a Pinterest board dedicated solely to walls. Pin or save every image that gives you the right feeling, even if you can’t articulate why.
Don’t overthink it at this stage. After you have 20-30 images, look for patterns. What colors keep showing up?
Are the shapes mostly round or angular? Is the texture subtle or dramatic?
Next, make it physical. Head to the paint store and grab sample cards for every color you’re drawn to. Don’t limit yourself to one brand.
Bring them home and look at them in your actual room’s light, at different times of day. Tape them to your wall and live with them for a few days. This is where you’ll see if that beautiful mustard yellow turns sickly under your cool-toned LED lights.
Finally, create a small-scale test. Get a sample pot of your top two colors and a piece of poster board or a primed scrap of drywall. Practice the texture techniques and draw your chosen shapes.
This “sketch” is invaluable. It confirms your color choice, tests your technique, and gives you the confidence to scale up to the full wall. It’s the single best step to prevent regret.
Your Modern Boho Color Palette: How to Mix Earthy, Neutral, and Bold
The color strategy is what separates a cohesive modern boho wall from a chaotic one. The goal is harmony, not shock. Think of your palette in three distinct roles: the foundation, the earth tones, and the punctuation.
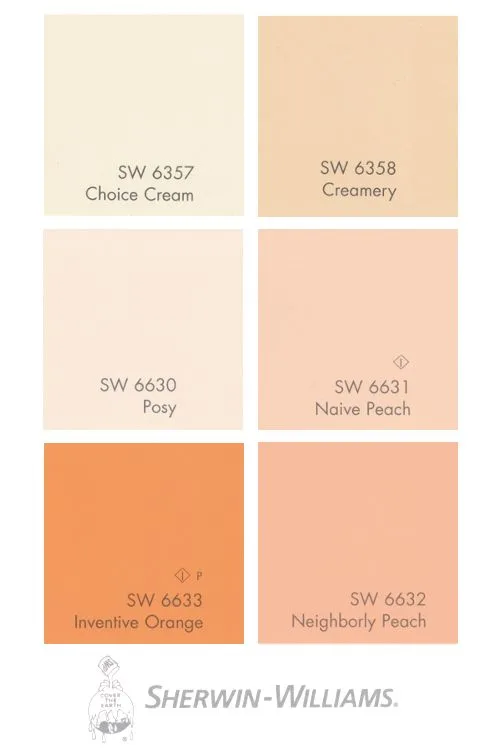
The Foundation (60% of the wall): This is your neutral base. It’s typically the lightest color and covers the most surface area. Opt for warm whites (think Swiss Coffee by Benjamin Moore), soft creams, very light greiges, or even pale, dusty pink.
This base keeps the space feeling open and airy, allowing the other colors to pop without overwhelming the room.
The Earth Tones (30% of the wall): These are your grounding, nature-inspired hues. They bring the warmth and comfort. This category includes:
- Terracotta and clay
- Sage, olive, and eucalyptus green
- Ochre and mustard
- Warm, sandy beige
These colors often form the main bodies of your shapes or larger blocks of color.
The Punctuation (10% of the wall): This is where you add a spark of depth or energy. Use these as the smallest accents, a thin outline, a tiny shape within a shape, or a single bold arch. Think:
- Deep jewel tones like magenta, emerald, or peacock blue
- Inky black or charcoal
- Metallic accents in gold or brass (applied with specialty paint)
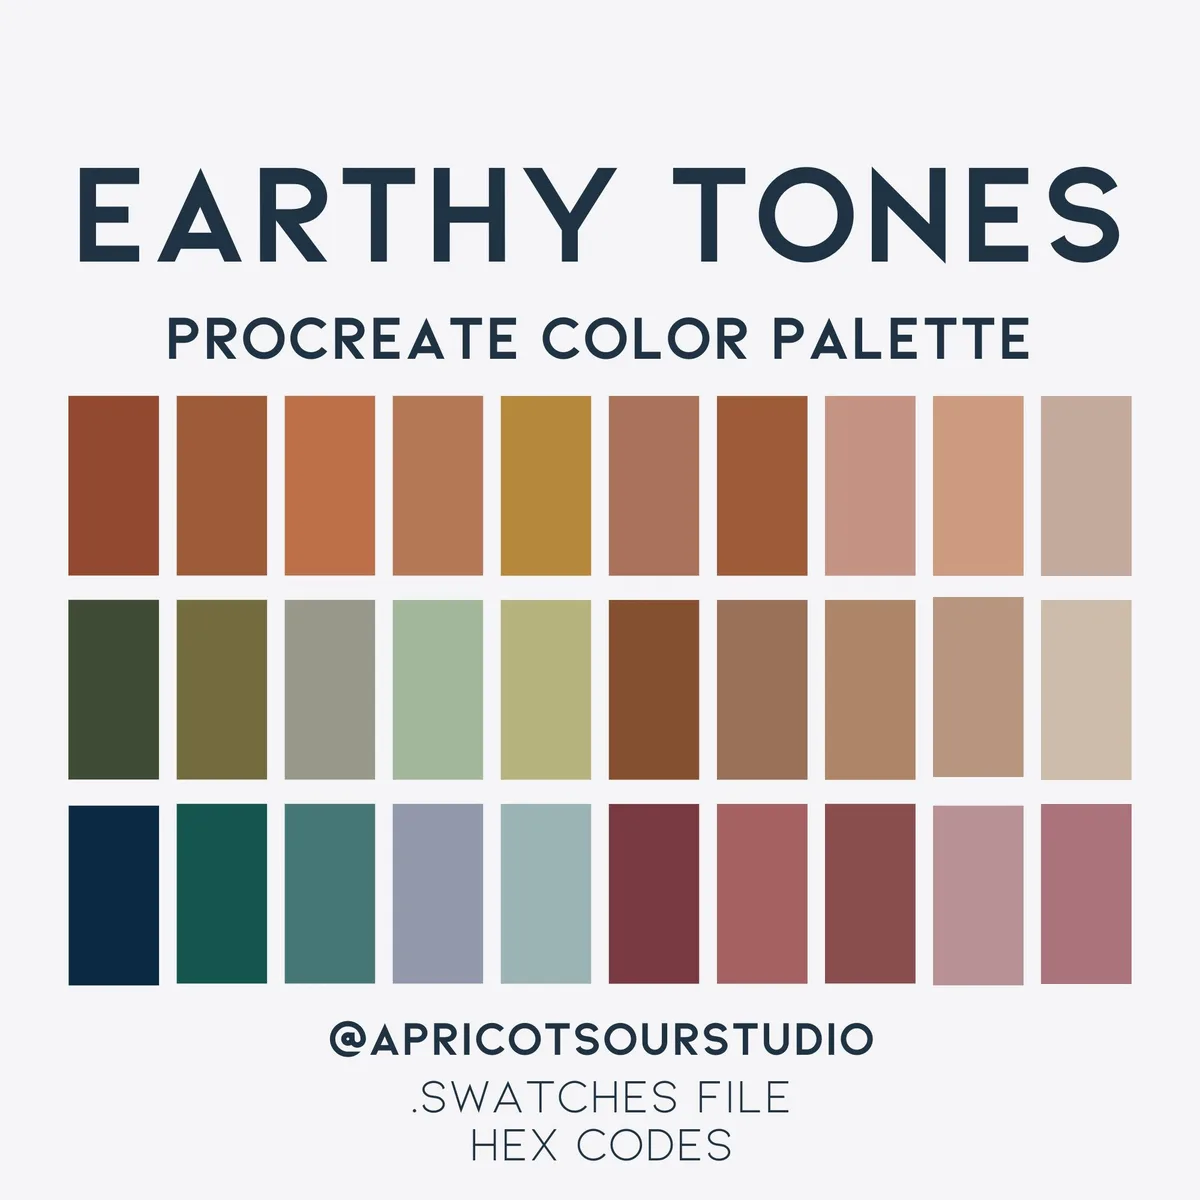
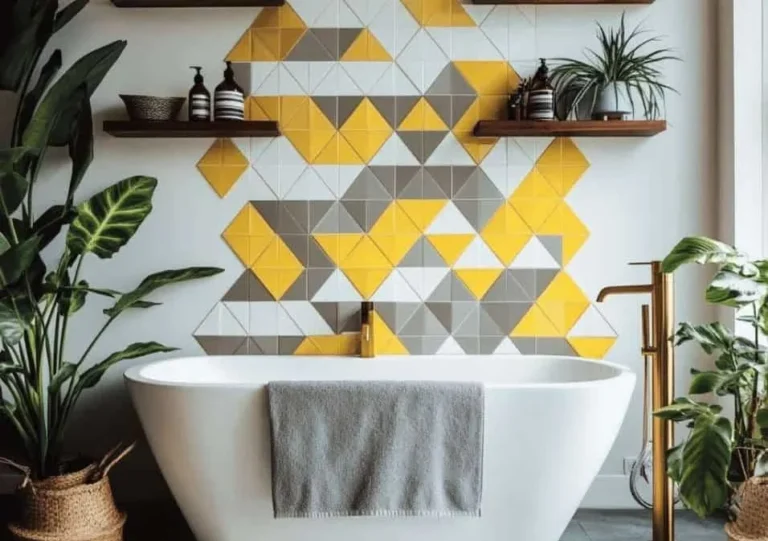
Image source: Bing (Web (fair-use with source credit))
A pro tip for cohesion? Make sure all your colors share a common undertone. If your base cream is warm (yellow/red undertones), choose a terracotta (inherently warm) and a sage with a yellow undertone, not a blue one.
Mixing warm and cool undertones on the same wall is a common mistake that makes the design feel unsettled.
Essential Tools & Materials: What You Actually Need for Textured, Hand-Drawn Looks
You don’t need a professional painter’s kit, but having the right tools for the specific techniques makes all the difference. Here’s a breakdown of what to gather before you start.
The Paint: For the base coats and larger shapes, a standard interior wall paint in a matte or flat finish is ideal. Matte finishes help hide imperfections and give a velvety, sophisticated look that absorbs light. For texture techniques and small details, you can use the same paint, but consider artist’s acrylics for ultra-fine detail work.
Always opt for low-VOC or zero-VOC formulas, a standard backed by the U.S. Environmental Protection Agency (EPA) for better indoor air quality.
Brushes & Applicators:
- Angled Sash Brush (1-2 inch): Your workhorse for “cutting in” clean edges at the ceiling and trim, and for painting precise shapes.
- Small Round Artist Brushes: Crucial for drawing fine lines, adding dots, and creating small details.
- High-Quality Roller and Frame (3/8″ nap): For applying base coats smoothly. A shorter nap gives a smoother finish; a 3/4″ nap will leave more texture.
- Natural Sea Sponge: The best tool for creating organic, mottled texture. Synthetic sponges can work but often create a more repetitive pattern.
- Clean Rags or Cheesecloth: For the “color wash” technique, where you apply paint and then blot or wipe it back to create a translucent, layered effect.
Prep & Protection:
- Painter’s Tape (like FrogTape): Essential for creating crisp geometric lines and protecting trim. The yellow “Delicate Surface” tape is often best for freshly painted walls.
- Drop Cloths: Canvas or plastic-backed fabric to protect your floors.
- Sandpaper (120-150 grit): For lightly sanding walls between coats for a smooth finish and sanding down any drips.
- Wall Spackle & Putty Knife: To fill any holes or dings before you begin.
- TSP (Trisodium Phosphate) Substitute or Sugar Soap: To clean walls of grease and dust so the paint adheres properly.
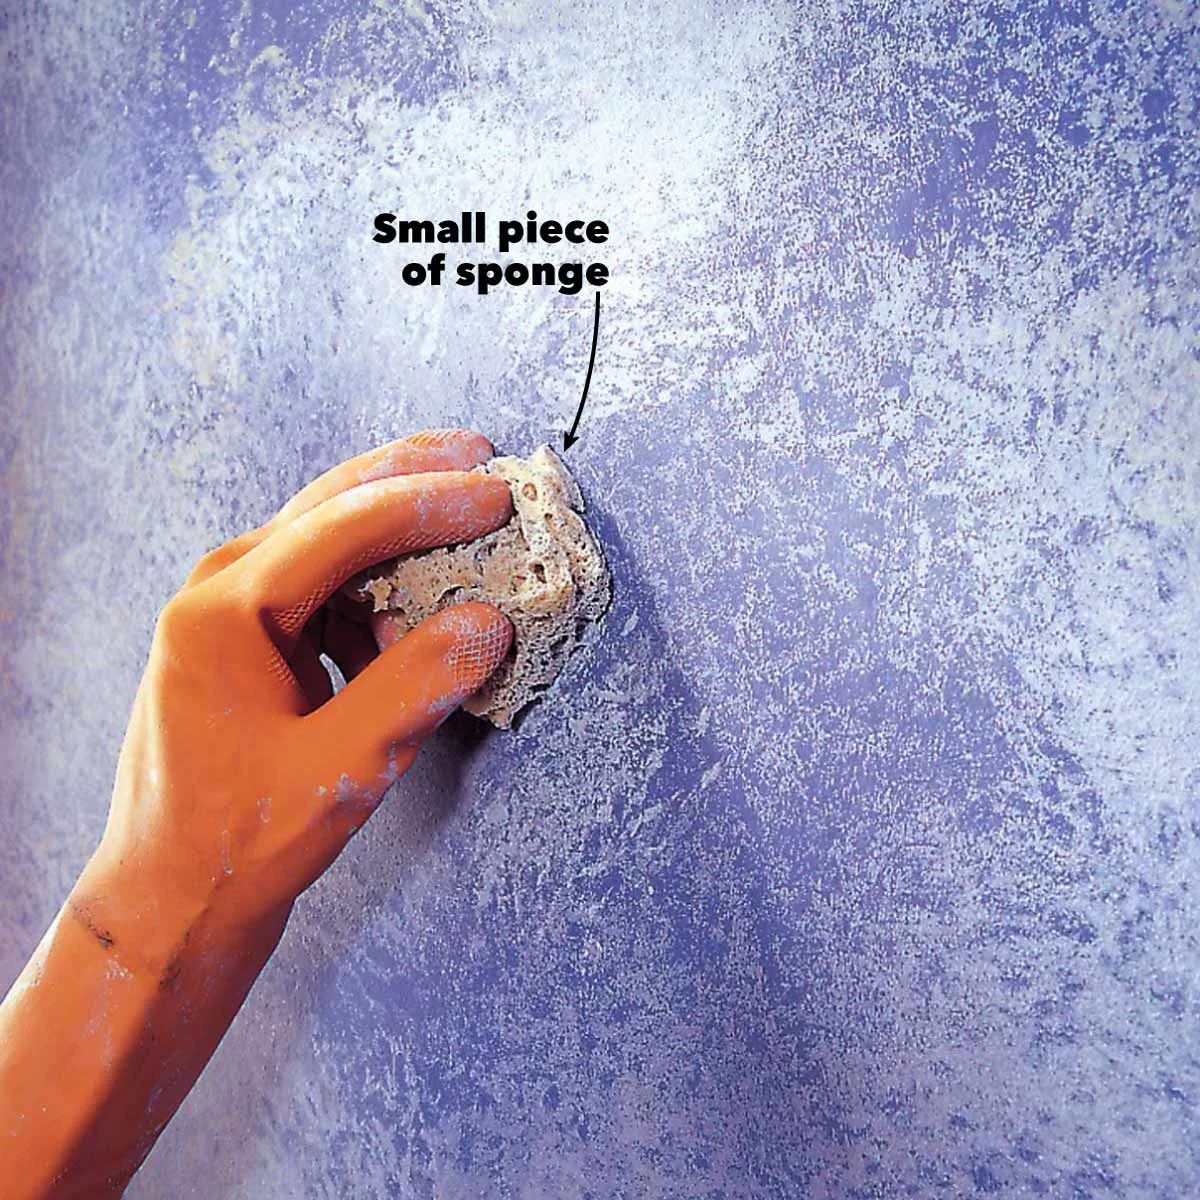
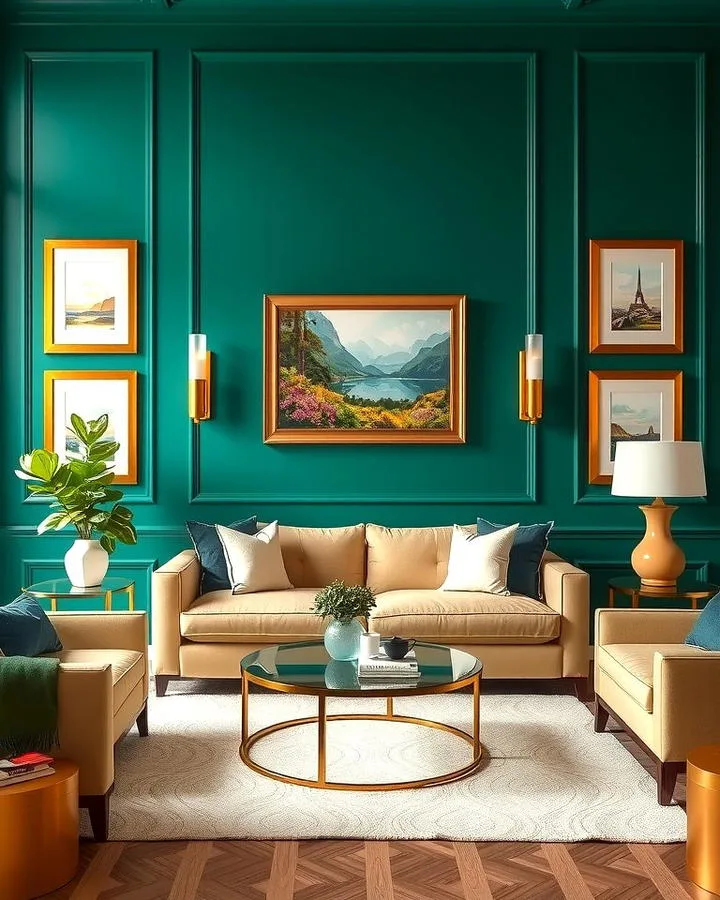
Image source: Bing (Web (fair-use with source credit))
A well-prepared workspace with all your materials at hand is what lets you stay in the creative flow instead of running to the store mid-project. This approach is just as important for a small bedroom wall as it is for larger projects like planning a barndominium exterior design.
The Step-by-Step Process: From Blank Wall to Boho Masterpiece
This is where your plan meets the wall. Following a logical sequence prevents mistakes and ensures your design has the solid foundation it needs.
Step 1: Prep is Everything
Clean the wall thoroughly with a TSP substitute to remove any grease or dust. Fill all holes and dings with spackle, let it dry, and sand it smooth. Lightly sand the entire wall with 120-grit sandpaper to help the new paint grip.
Wipe away all dust with a damp cloth and let the wall dry completely.
Step 2: Apply Your Foundation Base Coat
Tape off all trim, ceilings, and adjacent walls with painter’s tape. Press the edges down firmly to prevent bleed. Using your roller, apply your chosen neutral base color.
Most quality paints require two coats for full, even coverage. Let the second coat dry for at least four hours, or as directed on the can.
Step 3: Sketch Your Design
Once the base is completely dry, use a pencil to lightly sketch your shapes onto the wall. Don’t press hard. This is just a guide.
Use a level for any straight lines you want truly straight. For arches or circles, you can trace around a plate or use a string tied to a pencil as a compass. Remember, perfection isn’t the goal.
Step 4: Paint Your Main Shapes
Start with the largest shapes in your earth tone colors. Use your angled brush to carefully paint the edges (cutting in) around your pencil lines, then fill in the center with a small roller or brush. Work methodically, completing one color at a time and allowing for proper drying in between.
This prevents you from accidentally smudging wet paint.
Step 5: Add Texture and Details
After your main shapes are dry, add your textured effects. For a sponged look, dip a damp sea sponge lightly into paint, dab off the excess on a paper plate, then gently pounce it onto the wall within a shape. For color washing, thin your paint slightly with water, brush it on, and immediately blot with a crumpled rag.
Finally, use your small artist brushes to add fine lines, dots, or outlines in your accent colors.
Step 6: The Final Touch
Carefully remove all painter’s tape while the last details are still slightly tacky. Pull it back on itself at a 45-degree angle. This gives you the cleanest line.
Do any necessary touch-ups with a tiny brush. Then, step back and let your wall cure fully, which can take up to two weeks for the paint to reach full hardness.
A Visual Guide to Key Modern Boho Patterns & How to Paint Them
Let’s translate some of the most common patterns from idea to execution. Having a visual reference for the technique is crucial.
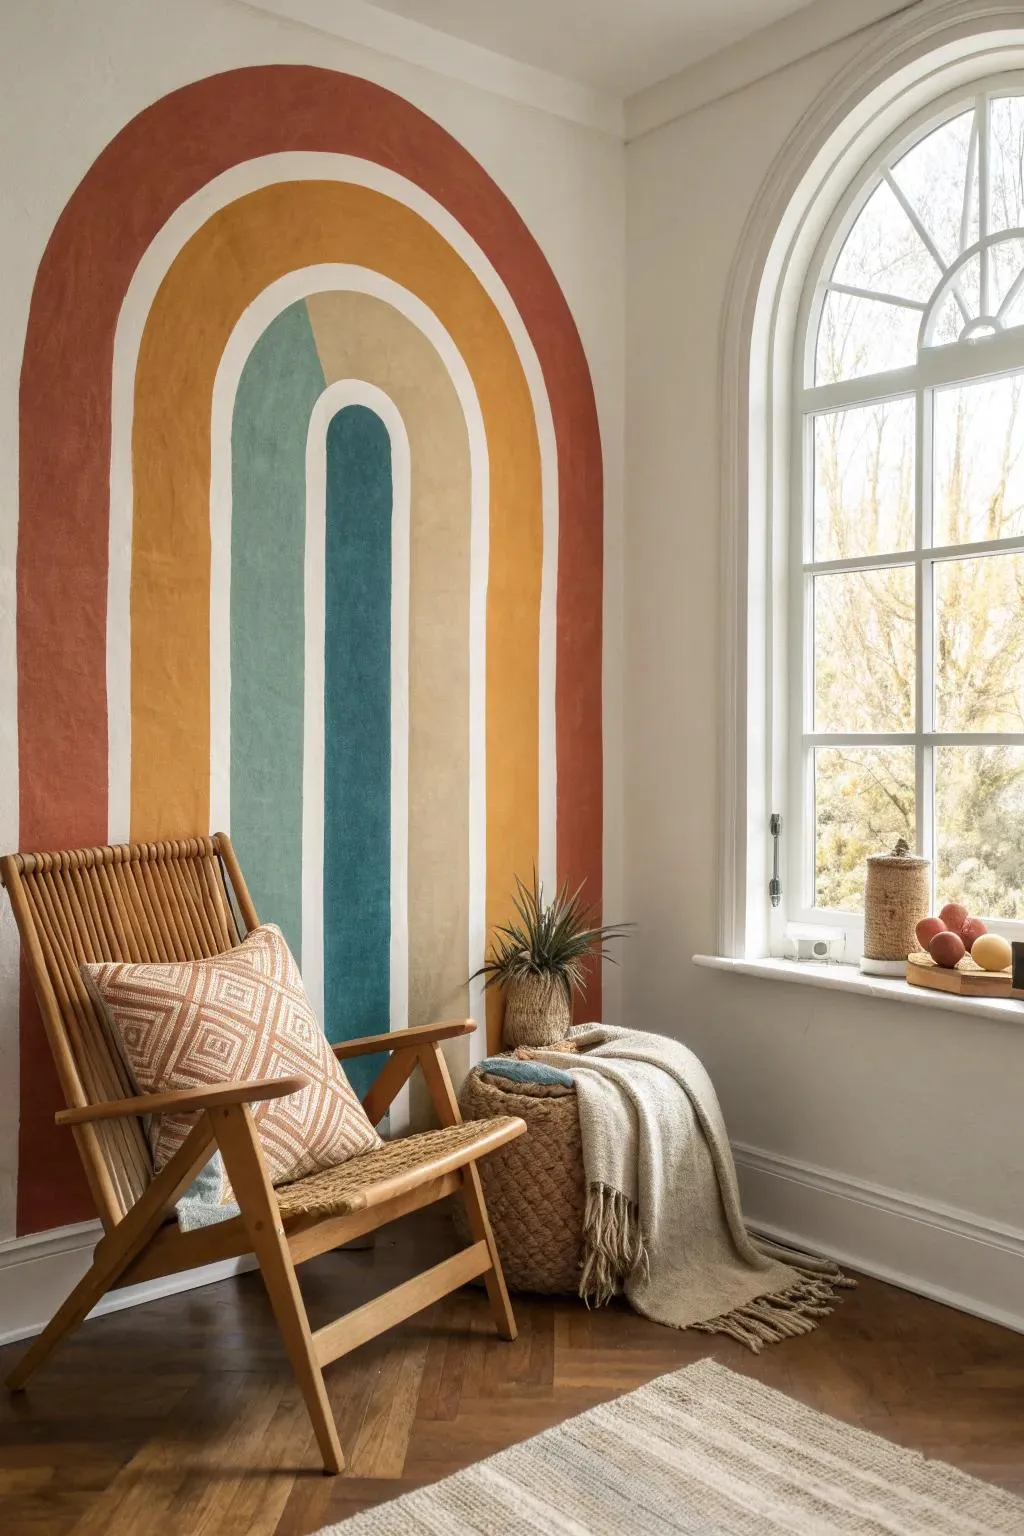
Image source: Bing (Web (fair-use with source credit))
The Organic Arch Line
This is a signature look. It involves painting a row of arches along the middle or bottom third of a wall.
- How to paint it: Mark a level horizontal line as your baseline. Decide on your arch width and height (keep them consistent for rhythm). Use a pencil and a flexible curve, like a bent piece of cardboard, to draw each arch. Paint inside the lines with your chosen color. The key is to keep the hand-drawn feel, so slight variations in the arches are good.
The Asymmetrical Color Block
Think of it as a giant, irregular shape floating on your wall. It’s not a rectangle. It has soft, rounded corners and an uneven silhouette.
- How to paint it: This is best done freehand. Lightly sketch the blob’s outline directly on the wall. It should feel balanced but not symmetrical. Paint the entire interior of the shape. For added depth, use a color wash or sponge texture over the base color once it’s dry, concentrating the texture around the edges.
The Freeform Line Drawing
This involves painting a single, continuous line that meanders across the wall, perhaps ending in a loop or a dot. It feels like a doodle.
- How to paint it: Use a small round brush and thinned paint or artist’s acrylic for better control. Start your line, and don’t lift the brush. Let your hand wobble naturally. If you make a “mistake,” lean into it. Add a few branching lines or cross-hatching for complexity. This pattern works wonderfully in a moody boho bedroom design, adding a personal, artistic touch.
The Dot Grid or Scattered Circles
A field of painted circles in varying sizes adds rhythm and playfulness without being too structured.
- How to paint it: You can use the end of a paintbrush, a pencil eraser, or even a cork dipped in paint. Vary the pressure to create different dot sizes. Apply them in a loose, scattered formation, not a perfect grid. Overlap a few dots or let some run into each other for an organic feel.
Design in Action: Real-World Use Cases for Every Room
Modern boho isn’t a one-size-fits-all formula. The application changes based on the room’s function and existing vibe.
The Living Room Accent Wall
This is the classic application. Choose the wall behind your sofa or your fireplace. Go bold here.
This is a public, social space that can handle a stronger statement. A large asymmetrical color block in terracotta or a line of arches in deep teal can define the entire room’s aesthetic. It pairs perfectly with natural textures like a jute rug and a macramé wall hanging.
The Bedroom Headboard Wall
The goal here is to create a serene, cocooning focal point. Opt for softer contrasts. Paint a gentle, oversized arch behind your bed in a dusty pink or sage green.
Use a lot of your neutral foundation color to keep it calming. This approach creates a built-in headboard effect that feels incredibly cohesive. It’s a natural extension of creating a peaceful, earthy moody bedroom decor atmosphere.
The Home Office Backdrop
For video calls and daily inspiration, a modern boho wall can be your best branding. Choose a design that isn’t too busy behind you. A simple freeform line drawing or a subtle textured wash in a single color adds personality without distracting.
It makes your workspace feel creative and intentional, boosting the mood without cluttering your field of view.
The Nursery or Playroom Feature Wall
This is where you can embrace playfulness. Use bright, clean versions of jewel tones like magenta or peacock blue. Paint whimsical, oversized shapes like clouds, mountains, or abstract blobs.
The texture and handmade quality feel nurturing and stimulating for a child. Ensure all paints used are certified zero-VOC for health and safety.
The Most Common Visual Mistakes (And How to Avoid Them)
Seeing where others go wrong is the fastest way to get your project right. These are the pitfalls that can make your wall look amateurish instead of artistic.
Mistake 1: Too Many Colors, No Hierarchy
Using every color you love on one wall creates visual noise. The eye doesn’t know where to look.
- The Fix: Stick to your three-tier palette system. Let one color dominate (the foundation), one support (the earth tone), and one accent. If you’re drawn to more colors, use different shades of the same hue instead of entirely new ones.
Mistake 2: Perfect Symmetry and Precision
Modern boho rejects machined perfection. Using stencils for every shape or measuring every element to the millimeter can make the wall feel stiff and lifeless.
- The Fix: Embrace the wobble. Draw your guiding lines by hand. When painting, use a brush, not a sprayer. Let the texture be uneven. The human touch is the soul of the style.
Mistake 3: Ignoring the Room’s Existing Decor
A stunning boho wall that clashes with your furniture or rug will feel disjointed. It becomes an island, not part of the room.
- The Fix: Pull one or two colors directly from your largest existing piece, like your sofa or area rug. Use those colors in your wall palette. This creates an instant, cohesive dialogue between the wall and the room. This principle of color coordination is key in any integrated space, from a bedroom to a modern barndominium design.
Mistake 4: Forgetting the Finish
Using a high-gloss or satin paint for your main shapes works against the boho aesthetic. It reflects too much light and looks slick, not organic.
- The Fix: Always choose matte or flat finishes. They absorb light, enhance texture, and give that sophisticated, velvety look that is central to the style.
Mistake 5: Poor Preparation Leading to Bleed and Flaws
Rushing the prep work leads to paint bleeding under tape (fuzzy lines) and poor adhesion (chipping later).
- The Fix: Don’t skip the cleaning and sanding step. Use high-quality painter’s tape designed for delicate surfaces. Seal the edge of the tape by running a putty knife over it or by painting a thin coat of your base color along the tape line first. This seals any tiny gaps.
Renters, Rejoice: How to Create a Boho Wall That’s Temporary
One of the biggest appeals of this style is its reversibility. With the right approach, you can enjoy a full boho wall without losing your security deposit.
First, communication is key. Review your lease agreement. Some landlords are open to painting if you agree to return the walls to a neutral color upon moving out.
Get any permission in writing. If painting is a firm “no,” your options shift to non-paint solutions that mimic the look.
For a truly temporary texture, consider fabric. You can starch lightweight, textured fabric like muslim or cheesecloth directly to the wall. It creates a beautiful, tactile background and peels off cleanly when you’re ready to move.
This technique is a fantastic way to add a boho layer without any permanent marks.
Your other main alternative is high-quality, removable wallpaper. As of 2026, many brands offer peel-and-stick papers in boho-inspired patterns, textures, and even murals that look hand-painted. The application is a commitment, but the removal is designed to be clean.
Always test a small patch first to ensure it doesn’t damage your specific wall surface.
If you can paint but need to cover it later, your strategy changes. Use a high-quality primer as your first step. When it’s time to move out, you’ll likely need two coats of a premium, stain-blocking primer to cover your boho colors before applying the landlord’s specified neutral.
Factor this extra time and material cost into your original plan. It’s often still worth it for a year or more of daily enjoyment in your personalized space.
Modern Boho vs. Other Styles: When to Choose Paint Over Wallpaper or Art
Choosing the right medium matters. Paint, removable wallpaper, and framed art all create a boho vibe, but they serve different needs.
Paint is your best choice for a truly custom, integrated look. You control every color, shape, and texture. It’s permanent and requires more effort, but it becomes part of the architecture of the room.
This makes it ideal for homeowners or renters with permission who want a one-of-a-kind statement.
Removable wallpaper is the champion of convenience and precision. It offers intricate, professional-looking patterns you might not be able to paint by hand. The installation is cleaner than painting, but you’re locked into the design on the roll.
It’s perfect for renters who need a flawless, non-permanent solution or anyone who wants a complex pattern without the artistic stress.
Framed art or tapestries are the most flexible. You can move them, change them, and take them with you. They add texture and color but don’t create the same immersive, wall-defining effect.
Use them to complement a painted wall or to add boho touches in a room where you can’t paint at all.
Pro Tips for a Cohesive Look: Tying Your Wall to Your Existing Decor
Your wall shouldn’t float alone. A few strategic connections weave it into the room’s story.
Repeat your wall colors in small decor items. Pull that terracotta from your arch onto a throw pillow or a vase. Let the sage green appear in a book spine or a plant pot.
These echoes create a unified color loop that feels intentional.
Balance the wall’s texture with other materials. A wall with a rough, sponged finish feels grounded next to a smooth leather chair or a sleek metal lamp. The contrast highlights the texture.
Pair it with natural fibers like rattan, wool, or linen for a layered, tactile experience that’s pure boho.
Consider the scale of your furniture. A large, bold asymmetrical color block needs a substantial sofa beneath it to feel anchored. A delicate line drawing might get lost behind a massive, oversized bed.
Scale creates visual harmony and prevents the wall from feeling either overwhelming or insignificant.
Cost Breakdown & Budget Planning: How Much You’ll Really Spend
Budgeting accurately prevents project stall. Costs break down into prep materials, paint, and tools.
- Prep & Protection: $30-$60. This includes spackle, sandpaper, drop cloths, and painter’s tape.
- Paint: $50-$150. A gallon of quality paint covers about 400 sq ft. Sample pots cost $5-$8 each. For an accent wall, a quart is often enough. Factor in primer if needed.
- Brushes & Tools: $40-$80. Investing in a good angled brush and roller saves time and gives a better finish. Add a sea sponge and small artist brushes.
The total for a DIY accent wall typically ranges from $120 to $290. This assumes you own basic tools like a putty knife and ladder. Hiring a professional mural artist starts around $500 and climbs quickly based on design complexity.
Weigh the cost against your skill level and the value of your time.
Safety & Practical Tips: Ventilation, Paint Choice, and Protecting Your Space
Your health and home are priority one. Follow these guidelines for a safe, smooth project.
Always ventilate the room well. Open windows and use fans to circulate air, even with low-VOC paints. Wear a mask when sanding to avoid inhaling dust.
Protect your floors thoroughly with canvas drop cloths, as plastic can be slippery.
Choose your paint wisely. For bedrooms, nurseries, or any room with low airflow, insist on zero-VOC paints. Check the manufacturer’s technical data sheet for certifications.
Keep pets and children out of the room until the paint is fully dry and odors have dissipated.
Be mindful of your body. Use a stable ladder, never a chair. Take breaks to avoid fatigue, which leads to sloppy work.
Keep a damp rag handy for quick clean-up of drips before they dry. Proper care extends to your tools. Clean brushes and rollers immediately after use with soap and water for water-based paints.
Your Next Steps: A Simple Decision Guide to Get Started
Feeling inspired but unsure where to begin? Follow this quick flow.
If you’re nervous about commitment, start with a small test. Buy one sample pot and practice on poster board. See if you enjoy the process.
If you love it but can’t paint your wall, explore temporary options like removable wallpaper or a large, textured tapestry.
If you’re ready to paint, revisit your mood board. Finalize your three-color palette. Write down your needed supplies from the tools list.
Schedule a weekend for the project, allowing extra time for drying between coats. Then, begin with the prep work. Clean your wall, and you’re officially on your way to a personalized modern boho space.
Frequently Asked Questions
Can I create a modern boho wall if I’m not artistic?
Yes, absolutely. The style embraces imperfection. Use painter’s tape to create simple geometric shapes like arches or blocks.
Techniques like sponging are very forgiving. Start with a simple design and a limited palette. You’ll build confidence as you go.
What type of paint finish is best?
Always use a matte or flat finish. These sheens absorb light, hide wall imperfections, and enhance textured techniques. They give the velvety, organic look that is essential to the modern boho aesthetic.
Avoid satin, semi-gloss, or gloss.
How long does the entire project take?
Budget two to three days for a typical accent wall. Day one is prep and base coats. Day two is painting shapes and adding texture.
Day three is for final details and touch-ups. This schedule includes essential drying time between steps. Rushing leads to smudges and poor results.
How do I clean a textured boho wall?
Dust it regularly with a soft brush attachment on your vacuum. For marks, use a barely damp microfiber cloth and gently blot. Avoid scrubbing, as it can damage the textured paint.
Test any cleaning method in an inconspicuous spot first.
Can I use this style in a small, dark room?
You can, with strategy. Use a light, reflective color as your dominant foundation. Choose just one or two accent colors to avoid closing the space in.
Incorporate the boho feel through texture and a single, well-placed shape rather than a busy, full-wall pattern. It can make the room feel cozy, not cramped.